In the ever-evolving world of interior design, walls serve as the canvas for expressing personality, creating atmosphere, and defining the character of a space. While furniture and decor certainly play crucial roles, the way we treat our walls can fundamentally transform a room from ordinary to extraordinary. Cool wall painting ideas offer an accessible and cost-effective means of reimagining your living spaces, allowing you to experiment with color, texture, and pattern in ways that reflect your unique style. Whether you’re drawn to bold geometric patterns, soothing ombre effects, or sophisticated color-blocking techniques, the right wall painting approach can elevate your home’s aesthetic while creating environments that truly resonate with your lifestyle.
The beauty of creative wall painting lies in its versatility and accessibility. Unlike major renovations or expensive furnishings, paint offers a low-commitment, high-impact solution for refreshing your interiors. From dramatic accent walls that command attention to subtle textured finishes that add depth and sophistication, the possibilities are limited only by imagination. Modern painting techniques have evolved far beyond simple solid colors, embracing artistic expression through gradients, murals, metallic finishes, and dimensional textures that bring walls to life. These approaches cater to diverse design preferences—whether you favor minimalist Scandinavian aesthetics, bohemian eclecticism, coastal serenity, or contemporary boldness.
This comprehensive guide explores twenty-three innovative wall painting ideas that span various rooms, styles, and techniques. Each concept has been carefully curated to provide both inspiration and practical application, ensuring that readers can translate these ideas into their own homes. From bedrooms and living rooms to kitchens, bathrooms, and specialized spaces, we’ll journey through distinctive painting approaches that demonstrate how strategic color application, thoughtful technique selection, and attention to detail can completely redefine your interiors. Prepare to discover how cool wall painting ideas can breathe new life into every corner of your home.
1. Abstract Brushstroke Drama in Navy and Gold
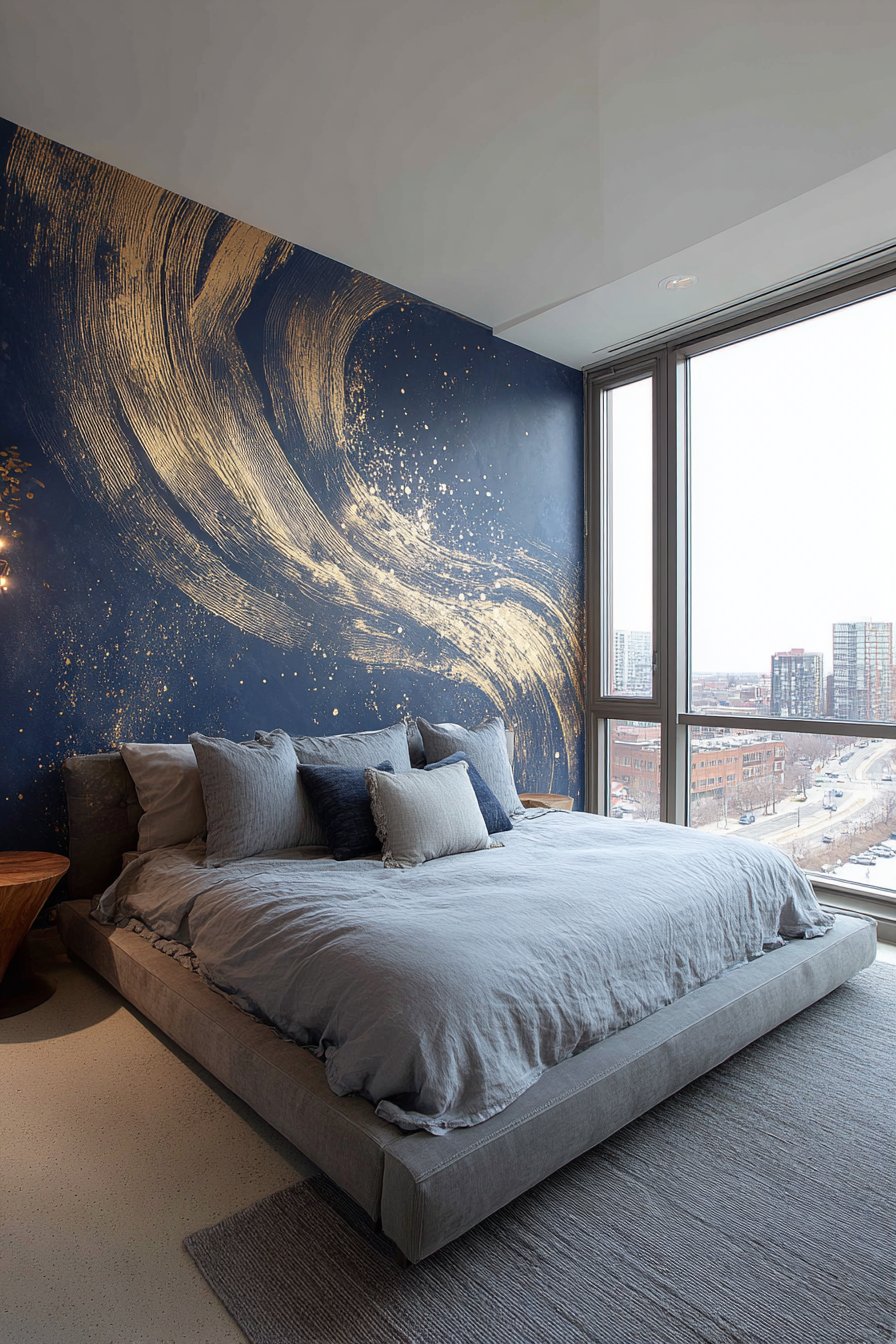
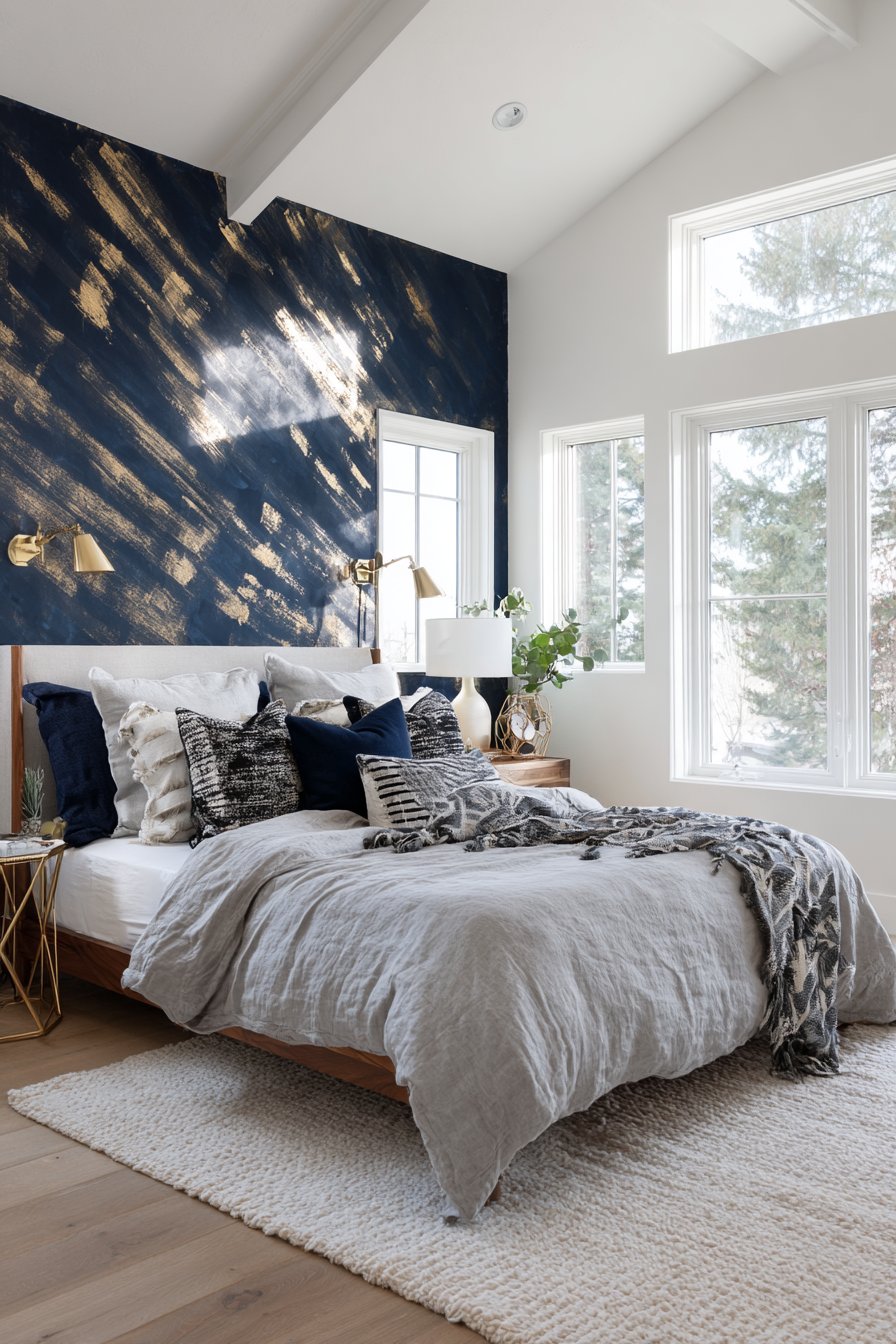
The marriage of deep navy blue with metallic gold creates an instant focal point that commands attention while exuding sophistication. This wall painting idea transforms a bedroom’s accent wall into a piece of living art, where hand-painted abstract brushstrokes in shimmering gold metallic paint dance across a rich navy background. The technique captures the spontaneity of abstract expressionism while maintaining enough restraint to function beautifully in a residential setting. The remaining walls maintain crisp white paint, creating a striking contrast that allows the artistic wall to truly shine without overwhelming the space.
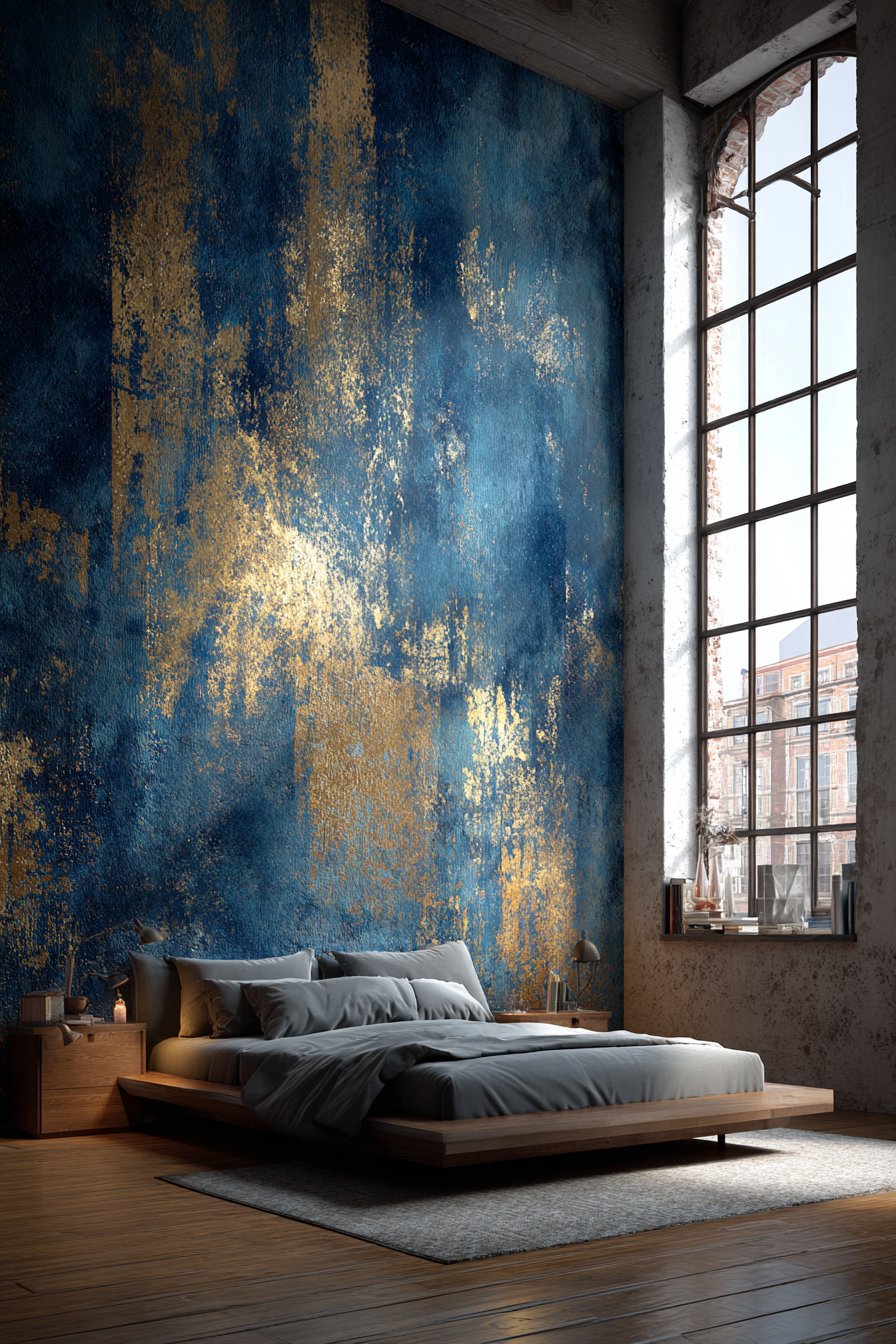
What makes this approach particularly effective is how the metallic gold interacts with natural and artificial lighting throughout the day. Morning sunlight catches the gold shimmer, creating a warm, energizing atmosphere perfect for starting the day, while evening lamplight produces a more intimate, luxurious ambiance. The textured paint surface adds dimensional interest that flat colors simply cannot achieve, with each brushstroke creating subtle shadows and highlights that shift with changing light conditions.
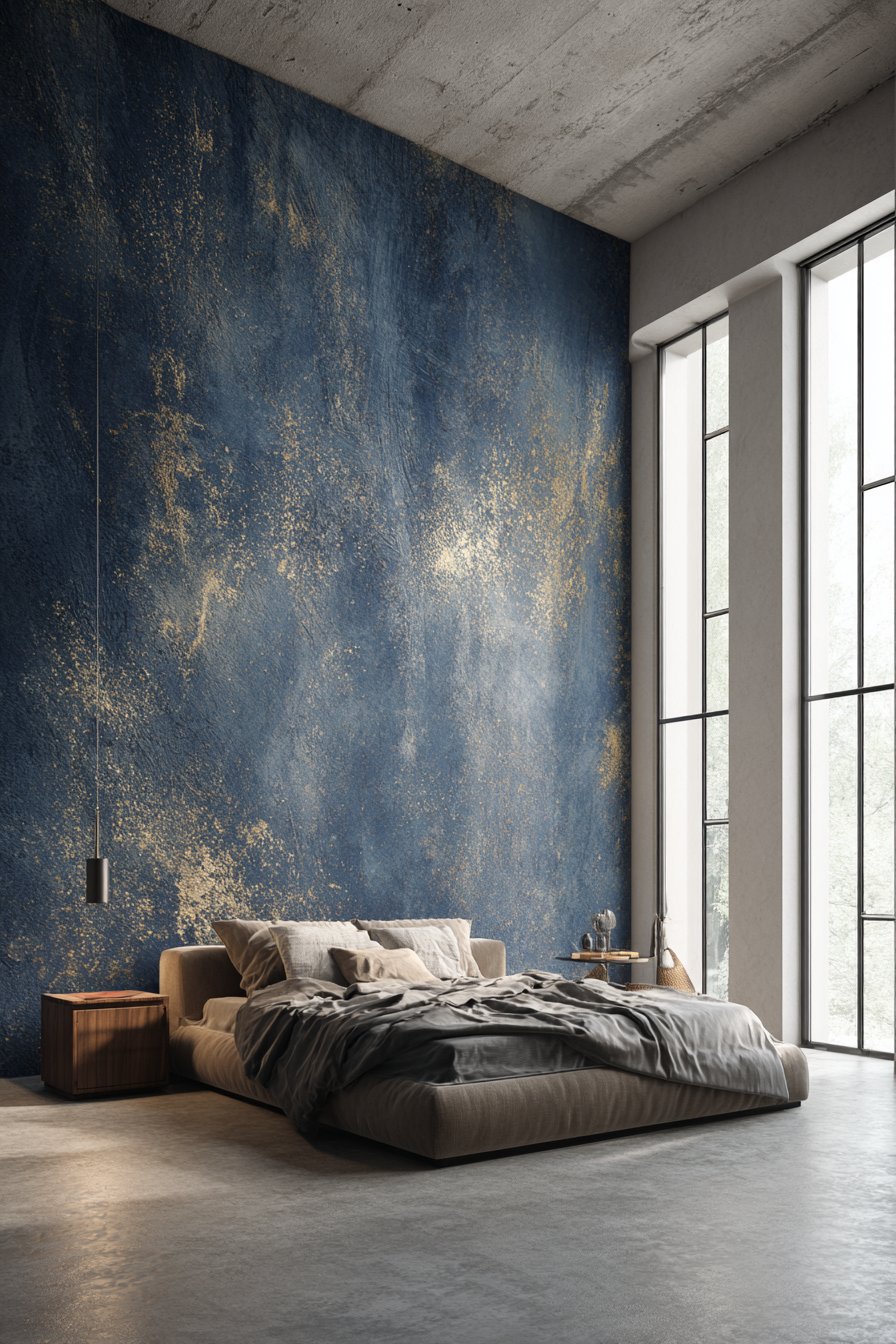
The practical execution of this design requires careful planning and quality materials. Using a high-quality navy blue base coat provides the depth necessary for the gold to truly pop, while metallic paints with genuine metallic particles rather than simply metallic-colored pigments deliver the authentic shimmer that makes this technique special. The abstract brushstrokes should feel intentional yet organic, avoiding rigid patterns while maintaining visual balance across the wall surface.
Key Design Tips:
- Apply two coats of navy base paint for rich, even color saturation
- Use artist-quality metallic gold paint for authentic shimmer and durability
- Practice brushstroke techniques on sample boards before tackling the wall
- Vary brushstroke sizes and directions to create dynamic visual movement
- Allow adequate drying time between base coat and metallic application
- Consider the room’s lighting when determining brushstroke placement for maximum impact
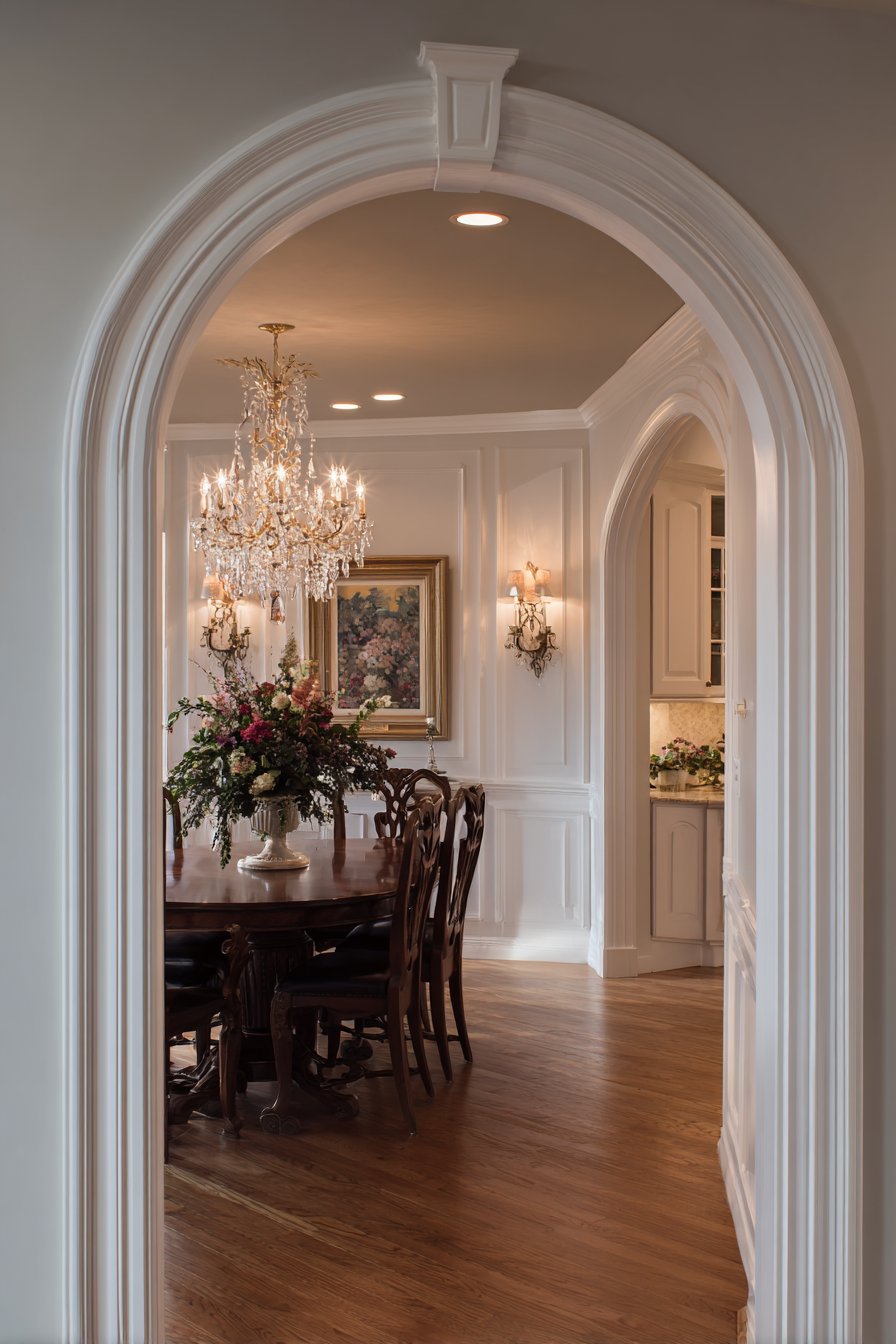
2. Sophisticated Two-Tone Elegance with Picture Rail Division
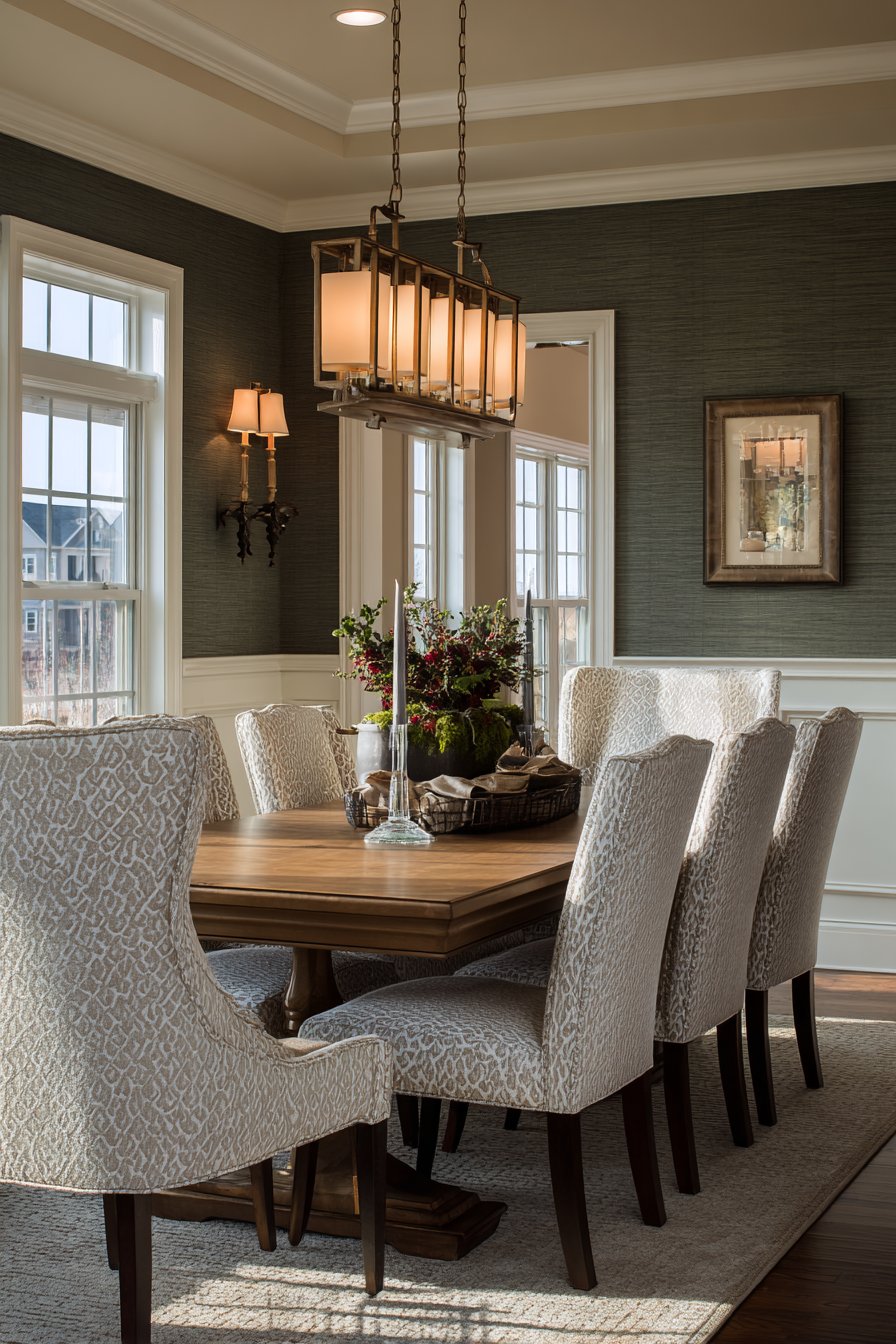
The two-tone wall treatment represents a timeless approach to adding architectural interest and visual sophistication to dining spaces. This particular execution features deep forest green on the lower portion of walls, paired with warm cream above, with the transition marked by classic white picture rail molding. The forest green receives a subtle color-washing technique that introduces depth and texture, preventing the darker color from appearing flat or oppressive. This layered approach to paint application creates visual complexity that rewards closer inspection while maintaining elegance from a distance.
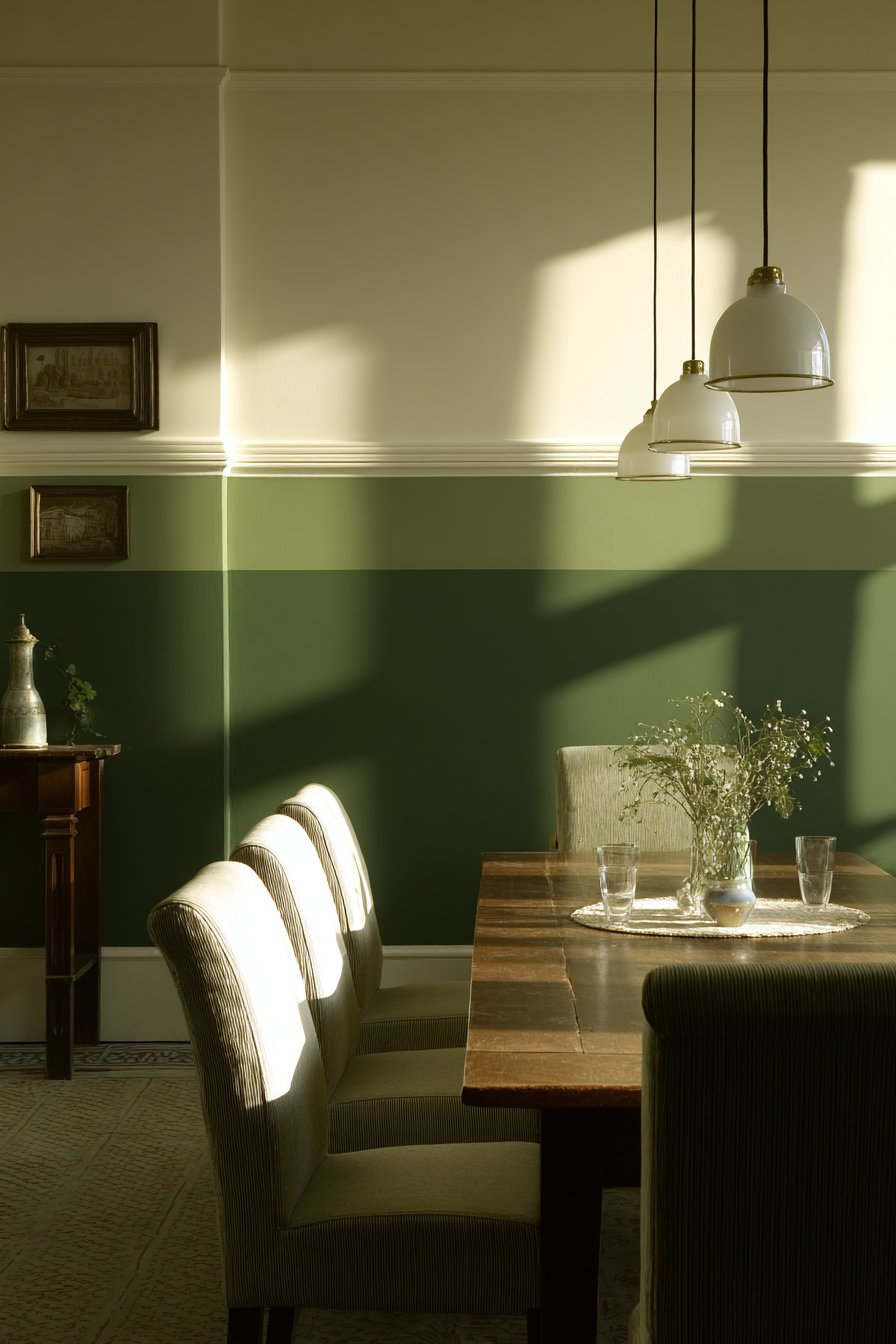
The strategic division of wall space creates several design advantages. The darker lower portion grounds the room and provides a rich backdrop for furniture, while the lighter upper section maintains an open, airy feeling that prevents the space from feeling cave-like. The picture rail molding serves both aesthetic and practical purposes, offering a clean transition line that eliminates the need for perfect freehand painting while adding traditional architectural detail. This classic technique has endured for generations precisely because it successfully balances visual interest with livable sophistication.
Color-washing the green section requires a specific technique that involves applying translucent glaze over a base coat, then manipulating it with rags, sponges, or specialized brushes to create irregular patterns that mimic natural variations in stone or aged plaster. This process adds warmth and character to what might otherwise be a stark, modern color division. The technique’s forgiving nature makes it accessible to DIY enthusiasts while still delivering professional-looking results.
Key Design Tips:
- Install picture rail molding at approximately 30-36 inches from the floor for traditional proportions
- Use satin or eggshell finish on walls to allow for gentle sheen without high gloss
- Practice color-washing technique on poster board to master the glazing process
- Select green and cream tones that share warm or cool undertones for harmonious pairing
- Consider the room’s natural light exposure when choosing darker lower colors
- Protect the molding with semi-gloss white paint for durability and easy cleaning
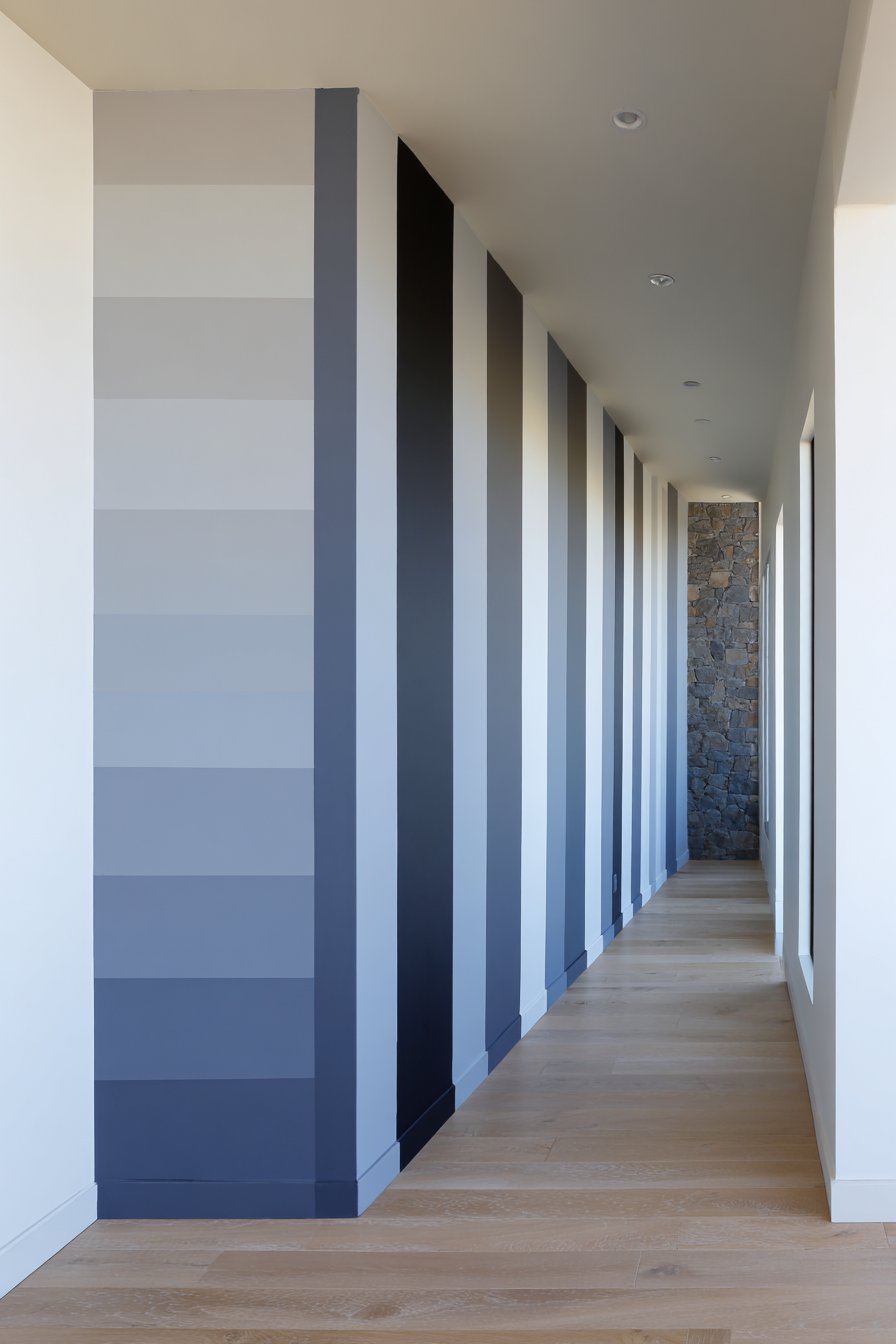
3. Modern Ombre Gradient from Charcoal to Silver
Ombre effects have transcended their origins in fashion and hair styling to become a compelling wall painting technique that creates dramatic visual interest through seamless color transitions. This home office application demonstrates the technique’s versatility, progressing from deep charcoal gray at the floor to luminous light silver at the ceiling. The gradual transition creates an illusion of height, making the room feel more spacious while establishing a contemporary aesthetic that complements modern work environments. Unlike abrupt color changes, the smooth gradient requires careful blending and patience, resulting in a custom artistic effect impossible to achieve with standard paint applications.
The psychology of this color progression supports productivity and focus in a workspace. Darker tones at eye level and below create a grounding effect that promotes concentration, while the lighter ceiling area prevents the space from feeling oppressive during long work sessions. The monochromatic gray palette maintains professional sophistication while offering enough visual interest to prevent monotony. When executed properly, the transition points become nearly imperceptible, creating the impression of naturally shifting light rather than deliberate paint application.
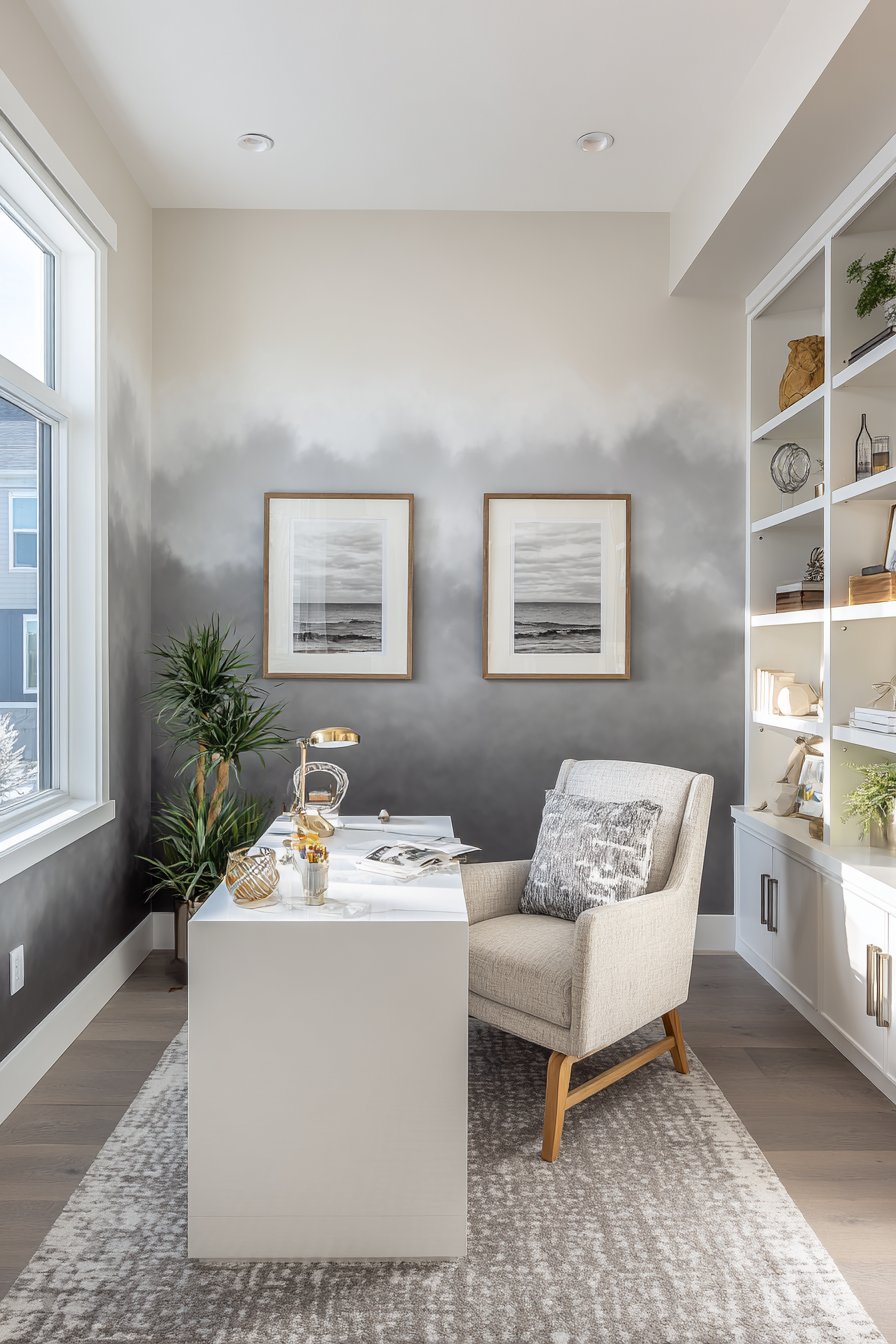
Technical execution of ombre walls demands specific materials and methods. Working with multiple shades of the same color family—typically five to seven distinct tones—painters overlap and blend adjacent colors while the paint remains wet. This wet-blending technique requires working in manageable sections and maintaining consistent pressure and direction with blending tools. The process is time-intensive but delivers results that elevate the space beyond what standard painting can achieve.

Key Design Tips:
- Purchase or mix five to seven progressive shades between your darkest and lightest colors
- Work in horizontal bands approximately 12-18 inches tall for manageable blending
- Use a large, soft brush or sponge to blend transition zones while paint remains wet
- Begin with the darkest color at the bottom and progressively move upward
- Maintain even moisture levels across the wall for consistent blending
- Consider practicing on a large piece of drywall or plywood before tackling the actual wall
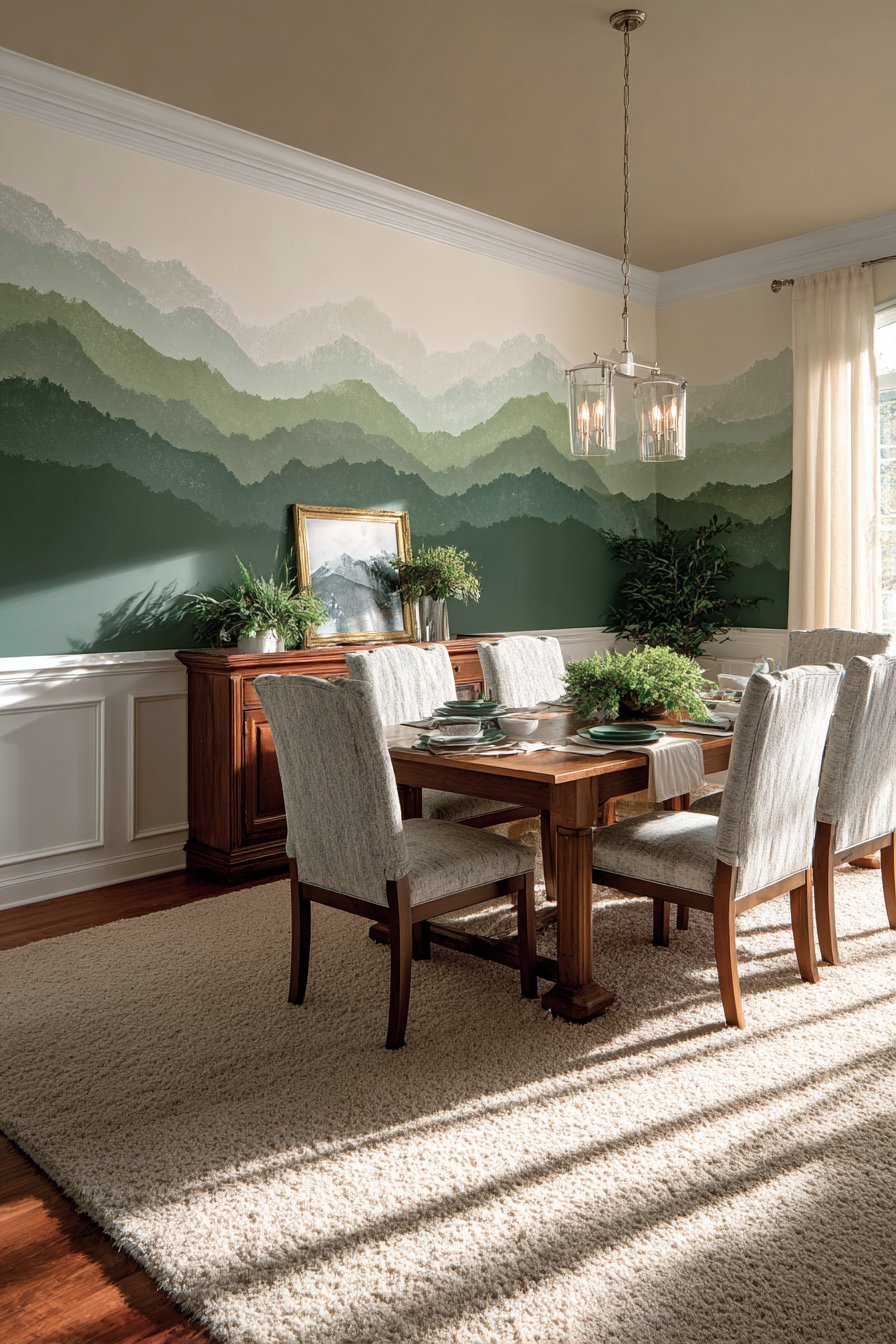
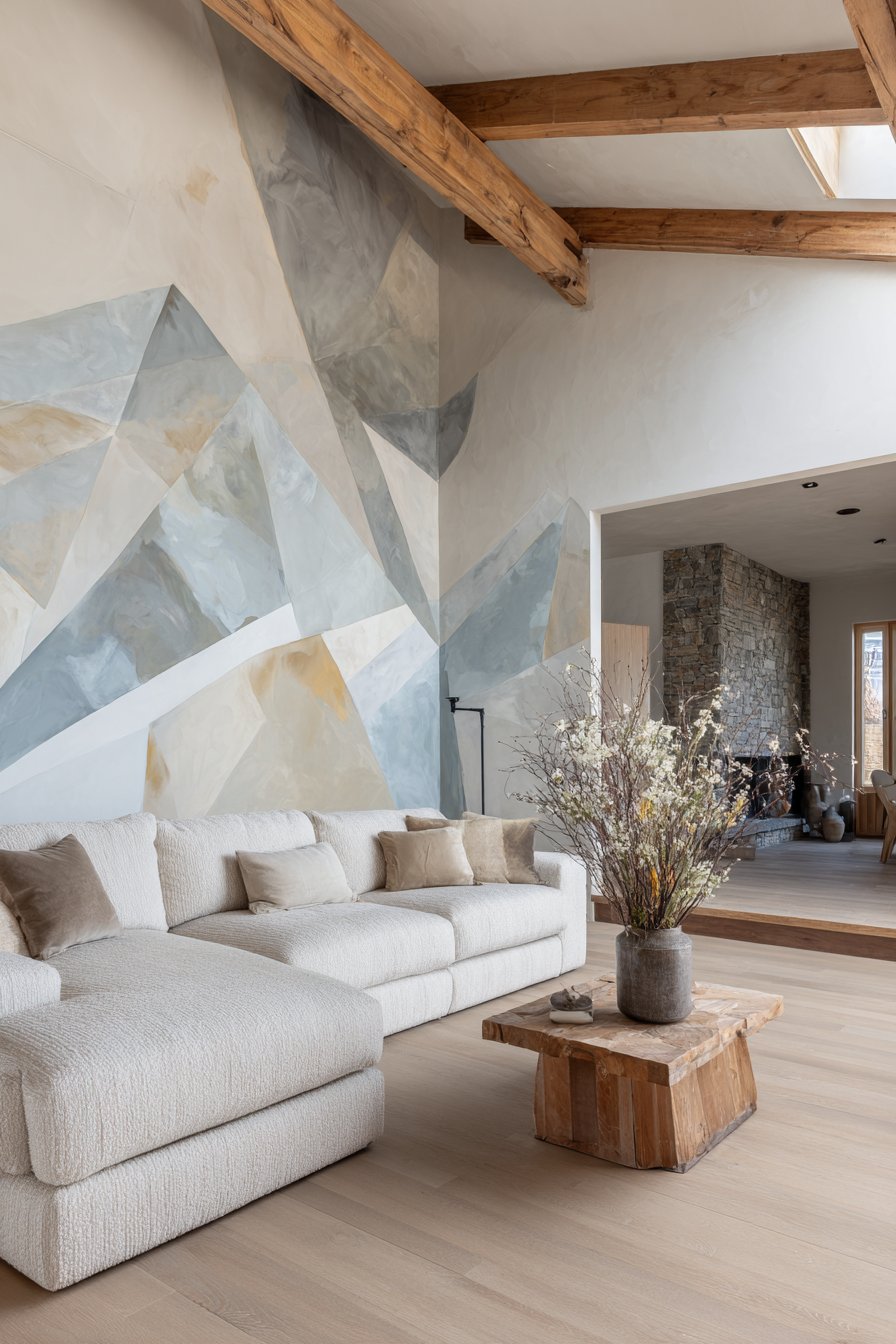
4. Geometric Mountain Range Mural in Muted Tones
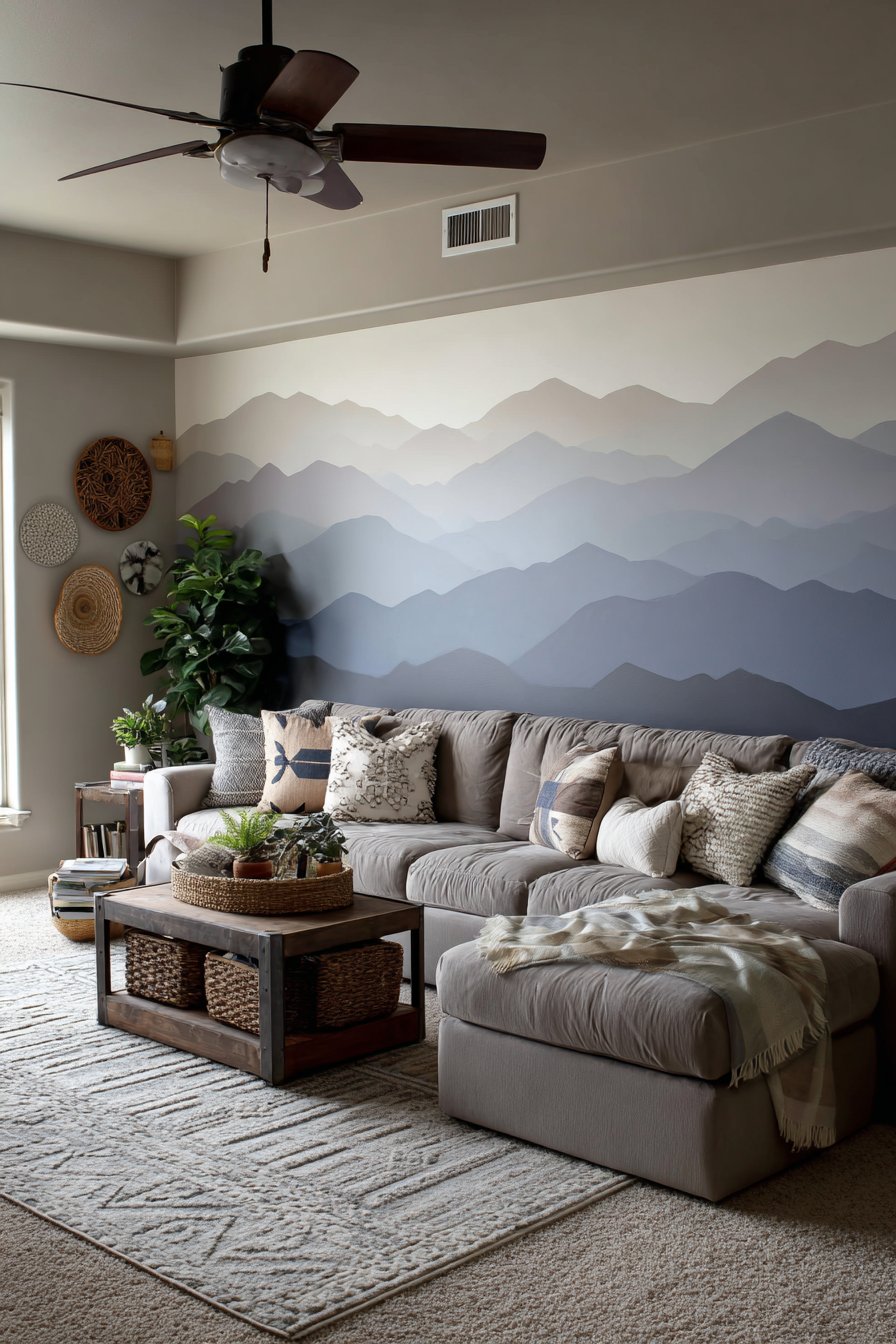
Murals have evolved from purely decorative elements to sophisticated design features that anchor spaces with artistic intention. This geometric mountain range approach offers a contemporary take on landscape art, translating natural forms into angular, stylized peaks rendered in a harmonious palette of gray, taupe, and soft blue. The muted color scheme ensures the mural enhances rather than dominates the living room, creating a calming focal point that serves as both art and backdrop. The geometric interpretation of mountains strikes an ideal balance between recognizable imagery and abstract design, making it sophisticated enough for mature spaces while remaining accessible and universally appealing.
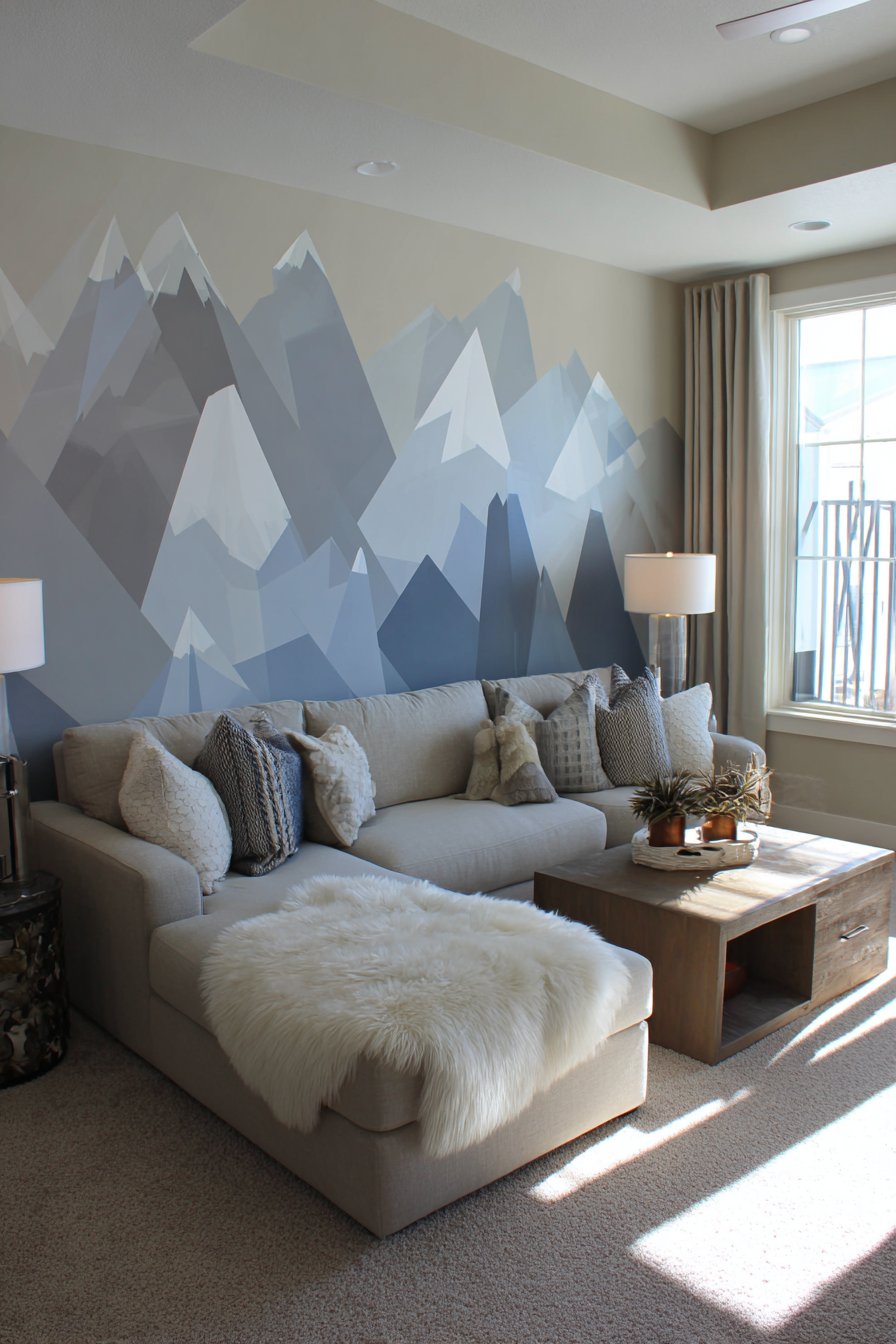
The dimensional quality of this mural comes from thoughtful color layering and strategic shading. Different mountain peaks rendered in varying tones create a sense of depth and distance, mimicking atmospheric perspective where distant mountains appear lighter and bluer than foreground elements. This technique requires understanding basic landscape composition principles, even when working in a stylized, geometric manner. The angular nature of the design actually simplifies execution compared to realistic landscape murals, as clean edges and defined shapes prove more forgiving than organic, flowing forms.
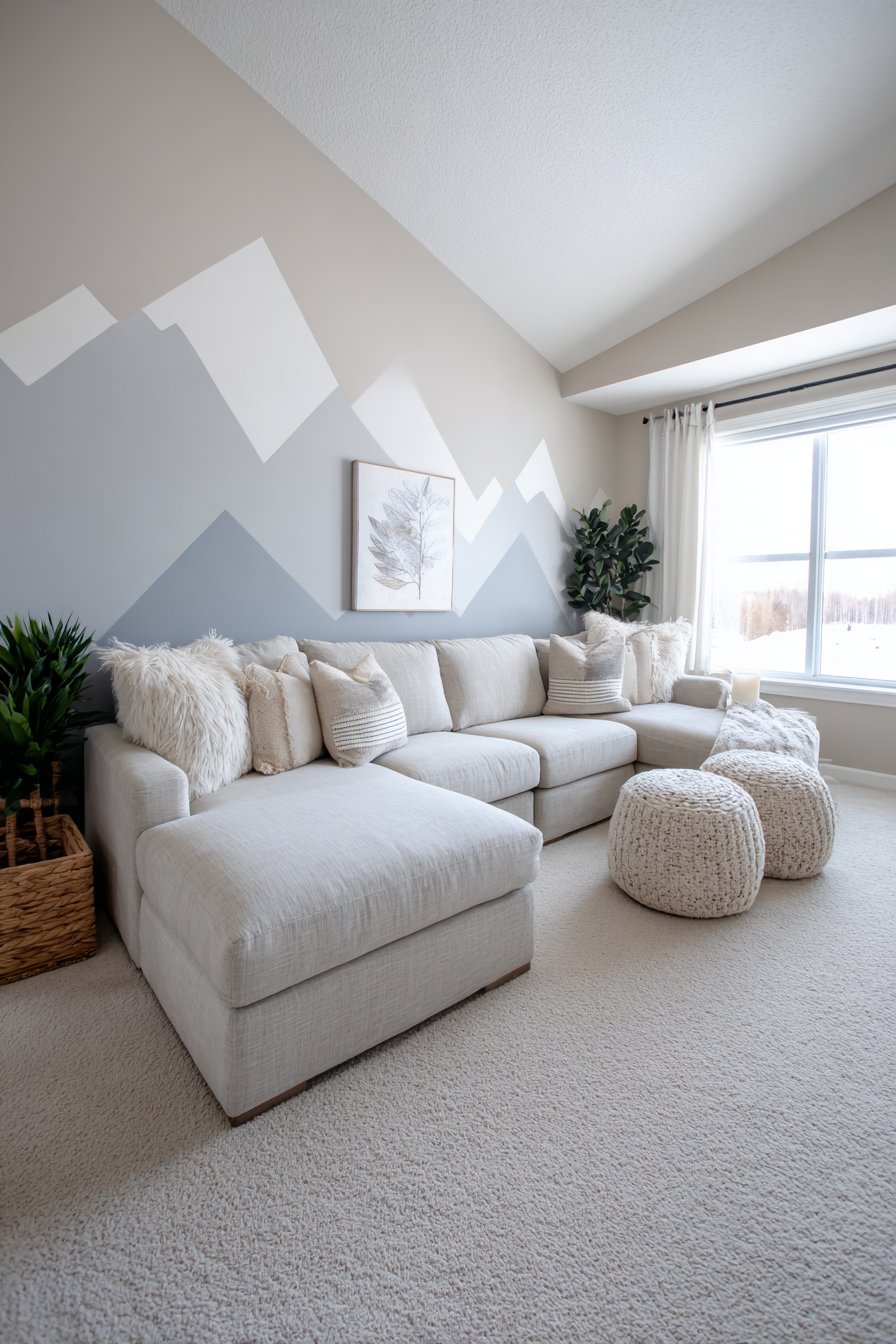
Placement and scale considerations significantly impact this mural’s effectiveness. Positioning it on the wall behind a seating area creates a natural focal point that guests’ eyes gravitate toward, while keeping the mural at a scale proportionate to the room prevents it from overwhelming the space. The coordination between mural colors and existing furnishings ensures cohesion, with neutral seating allowing the wall art to shine without color competition.
Key Design Tips:
- Sketch the mountain range design at scale on paper before transferring to the wall
- Use painter’s tape to create clean, sharp edges between mountain peaks
- Layer colors from background to foreground, allowing each section to dry completely
- Incorporate three to five different tones to create adequate depth perception
- Position the mural behind key furniture pieces to anchor the room’s focal point
- Maintain at least 6-8 inches of negative space around the mural for visual breathing room
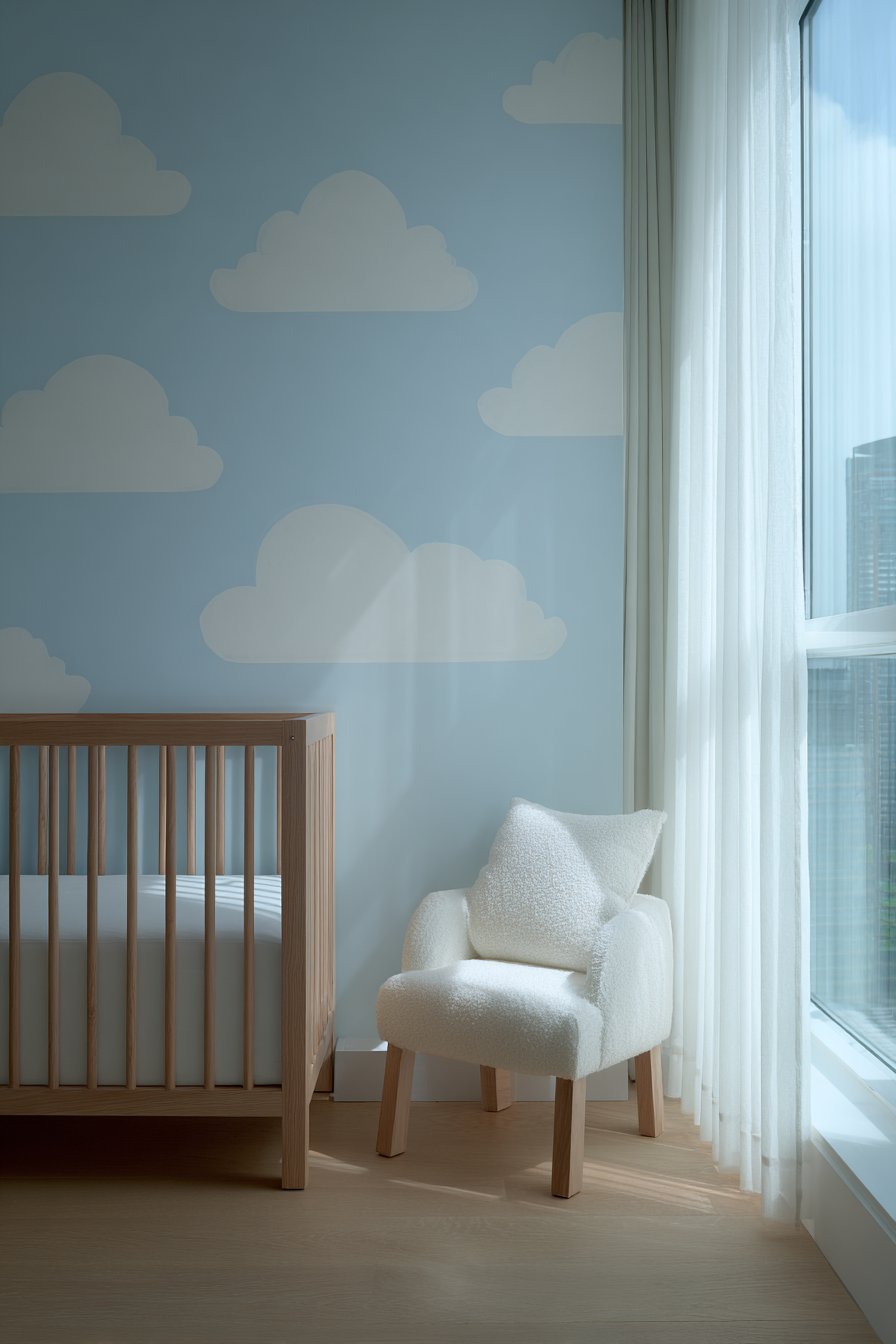
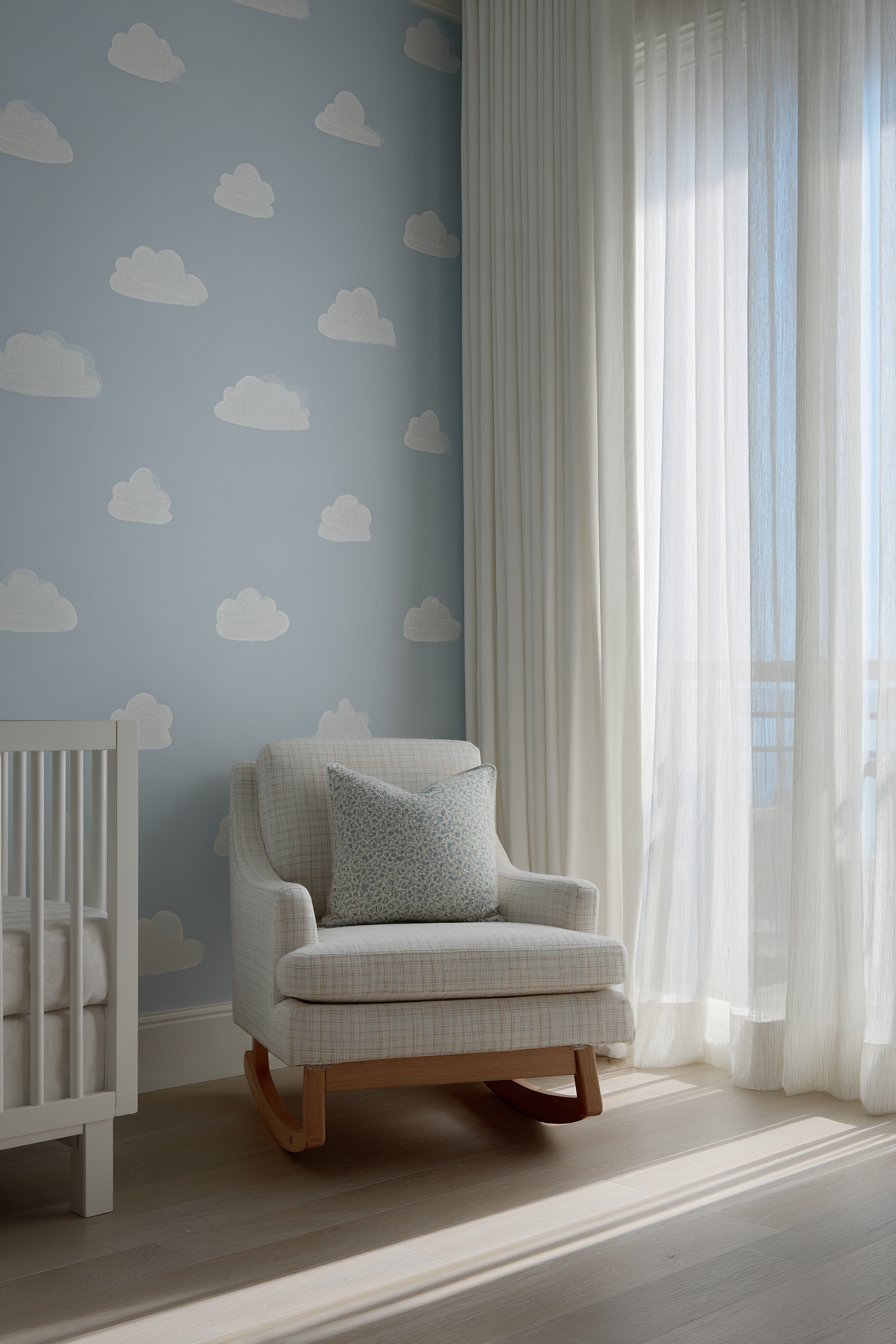
5. Whimsical Cloud Pattern for Nursery Serenity
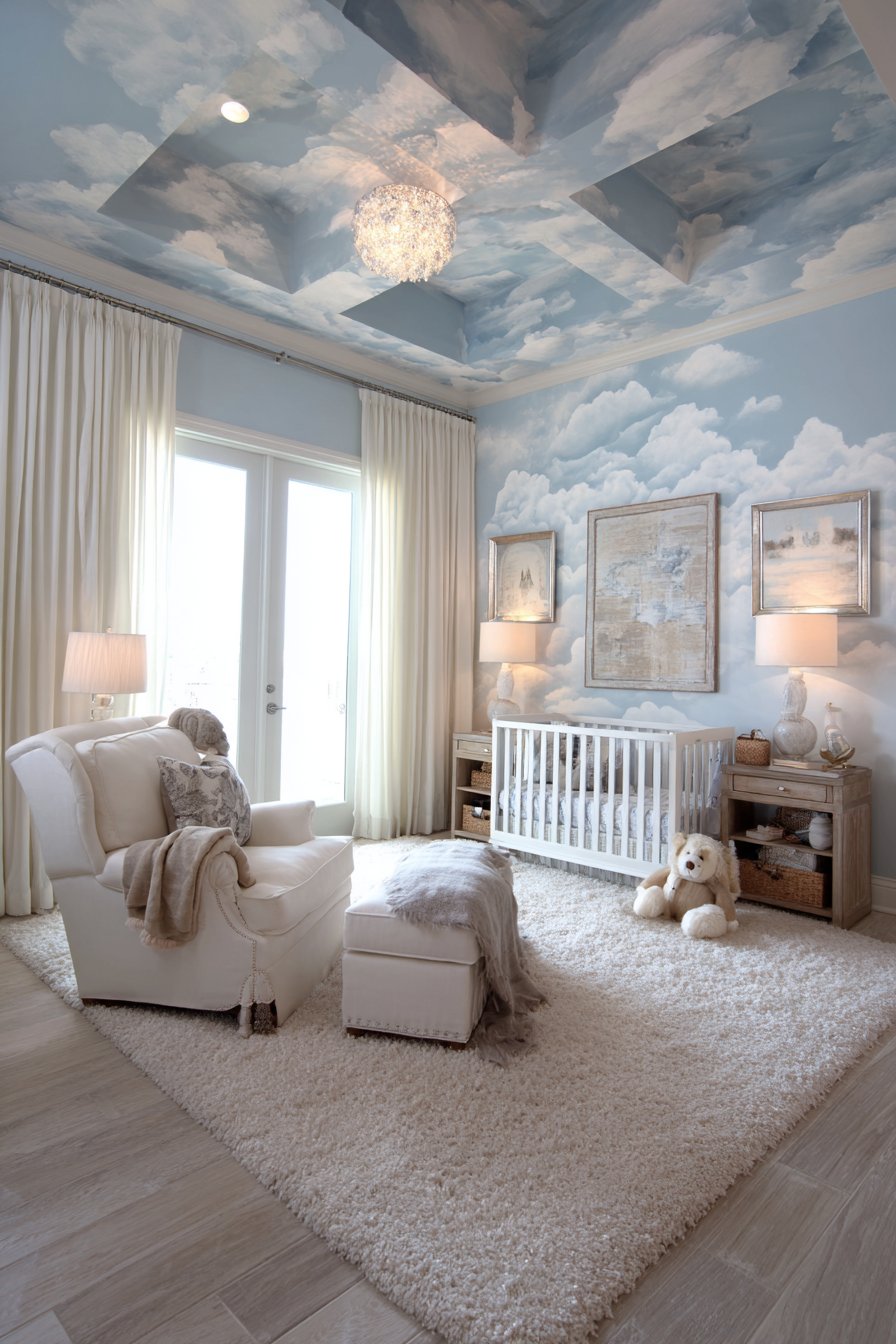
Nursery design requires special consideration, balancing visual stimulation with soothing ambiance to create environments conducive to rest and calm. This hand-painted cloud pattern exemplifies thoughtful nursery wall treatment, featuring soft gray and white clouds floating across pale blue walls. Each cloud receives subtle shading that creates a gentle three-dimensional effect, transforming simple shapes into believable, pillowy forms that capture childhood wonder. The restrained color palette avoids overstimulation while providing enough visual interest to engage developing minds during wakeful periods.
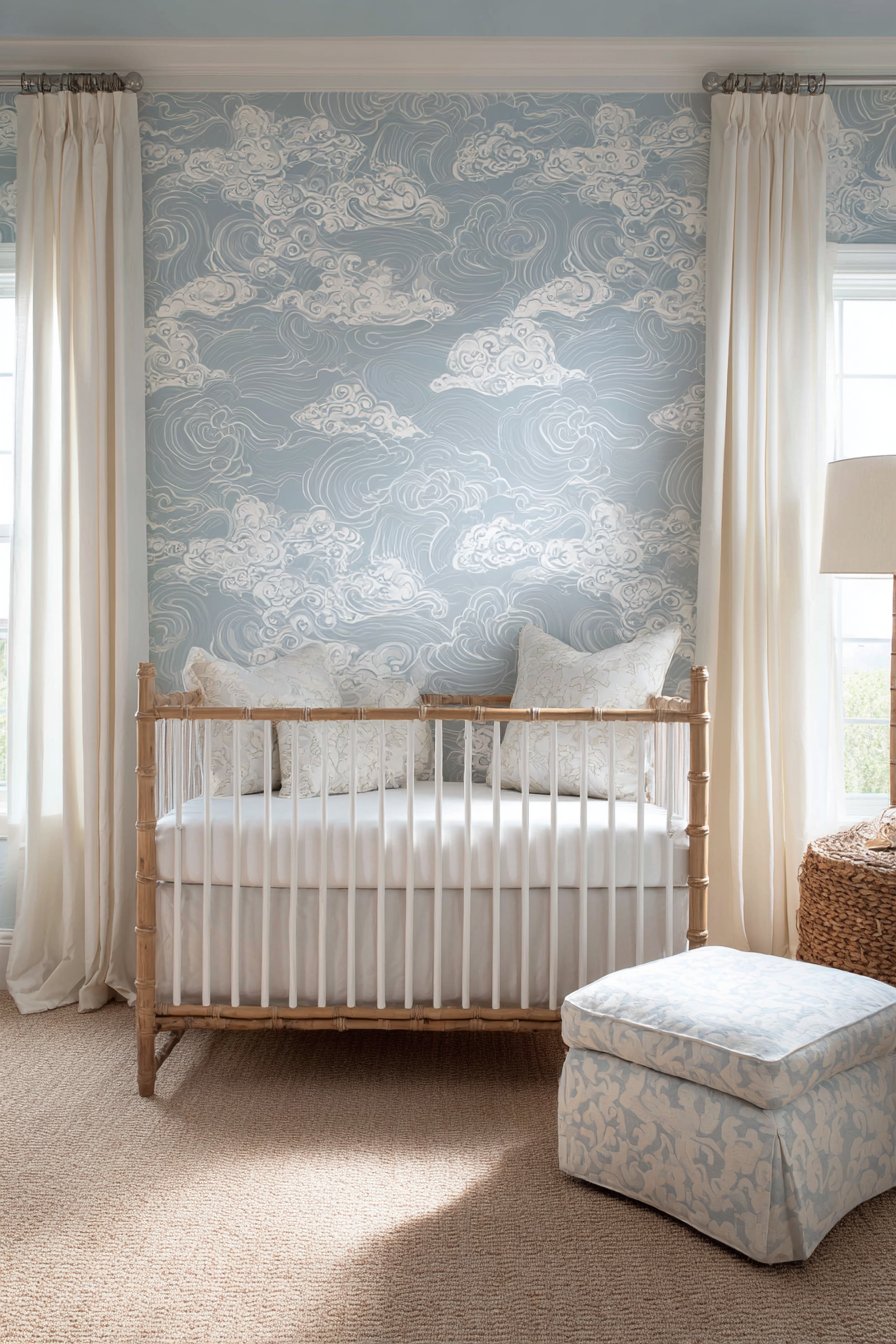
The technique of creating dimensional clouds involves understanding basic light and shadow principles. Darker gray concentrated on the undersides and edges of clouds, gradually transitioning to pure white at the tops and centers, mimics natural light falling from above. This subtle shading elevates the design from flat cartoon clouds to softly modeled forms with genuine depth. The irregular spacing and varying cloud sizes create organic, natural-looking patterns that avoid the rigidity of perfectly spaced, identically sized elements.
Beyond aesthetics, this painting approach offers practical advantages for nurseries. The soft, nature-inspired imagery creates a calming environment that supports better sleep, while the hand-painted quality adds personal touches that make the space feel specially created for the child. As children grow, cloud patterns remain age-appropriate much longer than character-themed walls, potentially extending the room’s design relevance for several years.
Key Design Tips:
- Use low-VOC or zero-VOC paints specifically rated for nurseries and children’s spaces
- Create cloud templates from cardboard for consistent shapes while allowing size variation
- Apply base blue color first, allowing complete drying before adding clouds
- Build clouds from light to dark, starting with white base then adding gray shading
- Space clouds irregularly to mimic natural sky patterns rather than uniform grids
- Consider cloud density—fewer, larger clouds feel calmer than many small ones
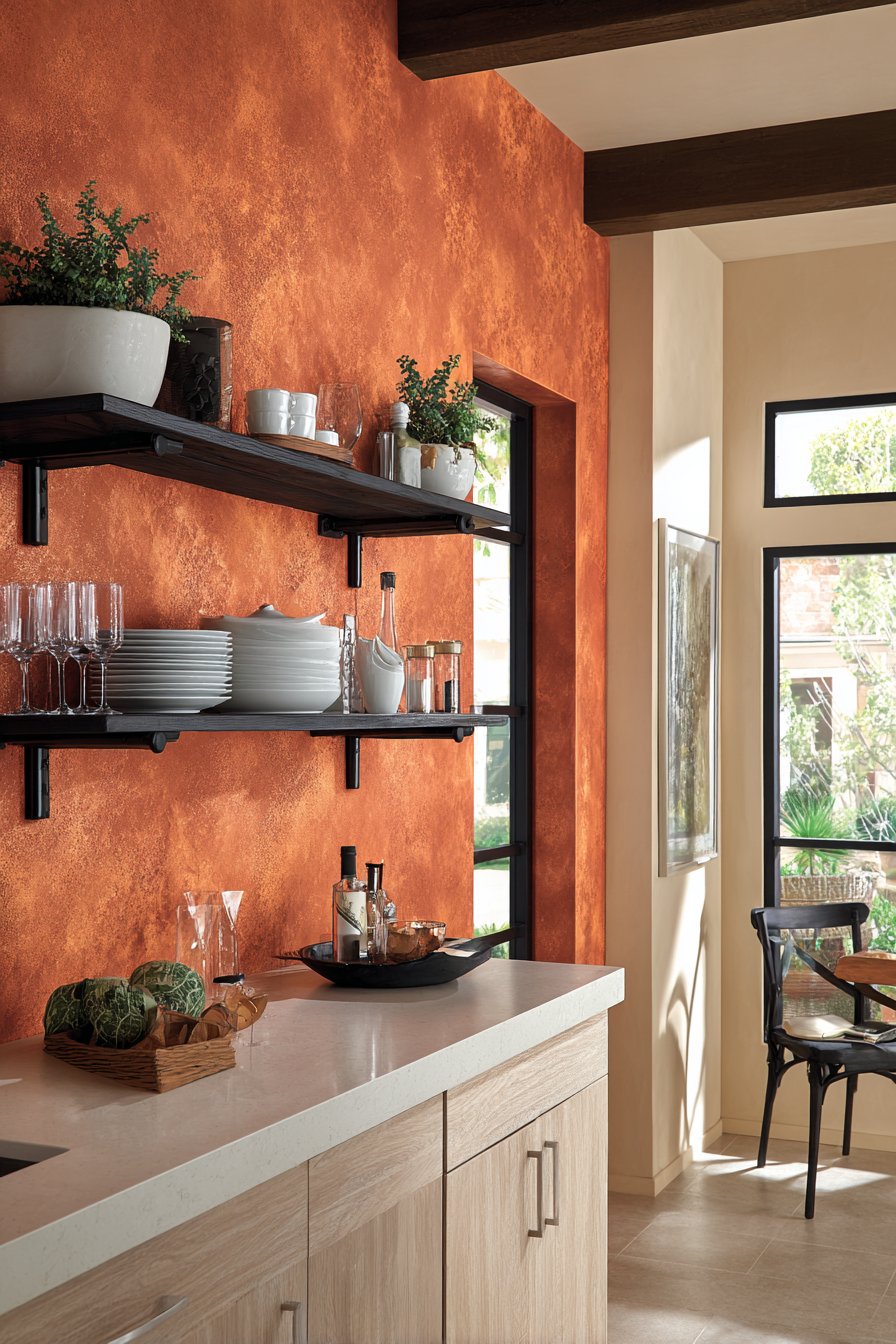
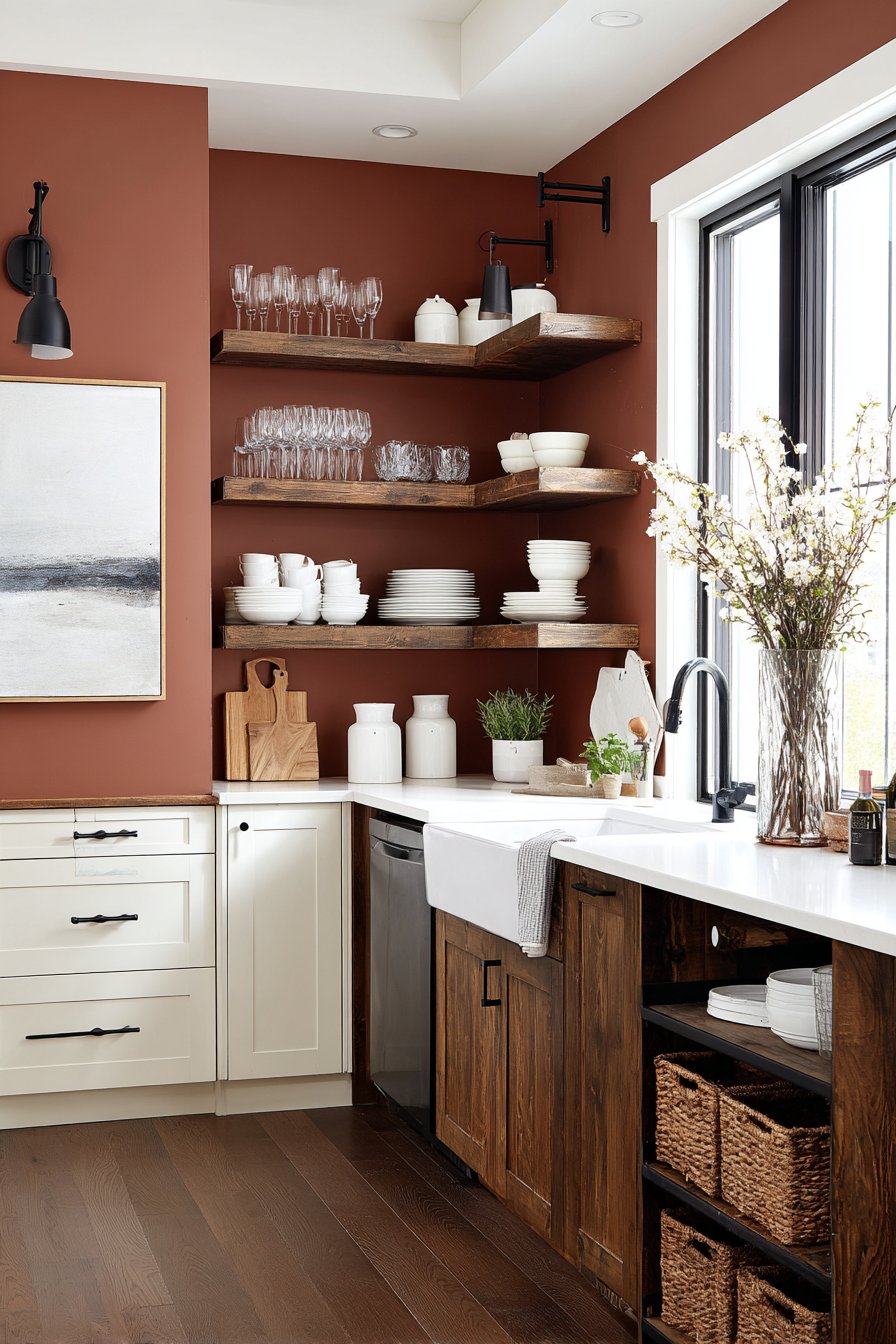
6. Bold Terracotta Accent Wall in Modern Kitchen
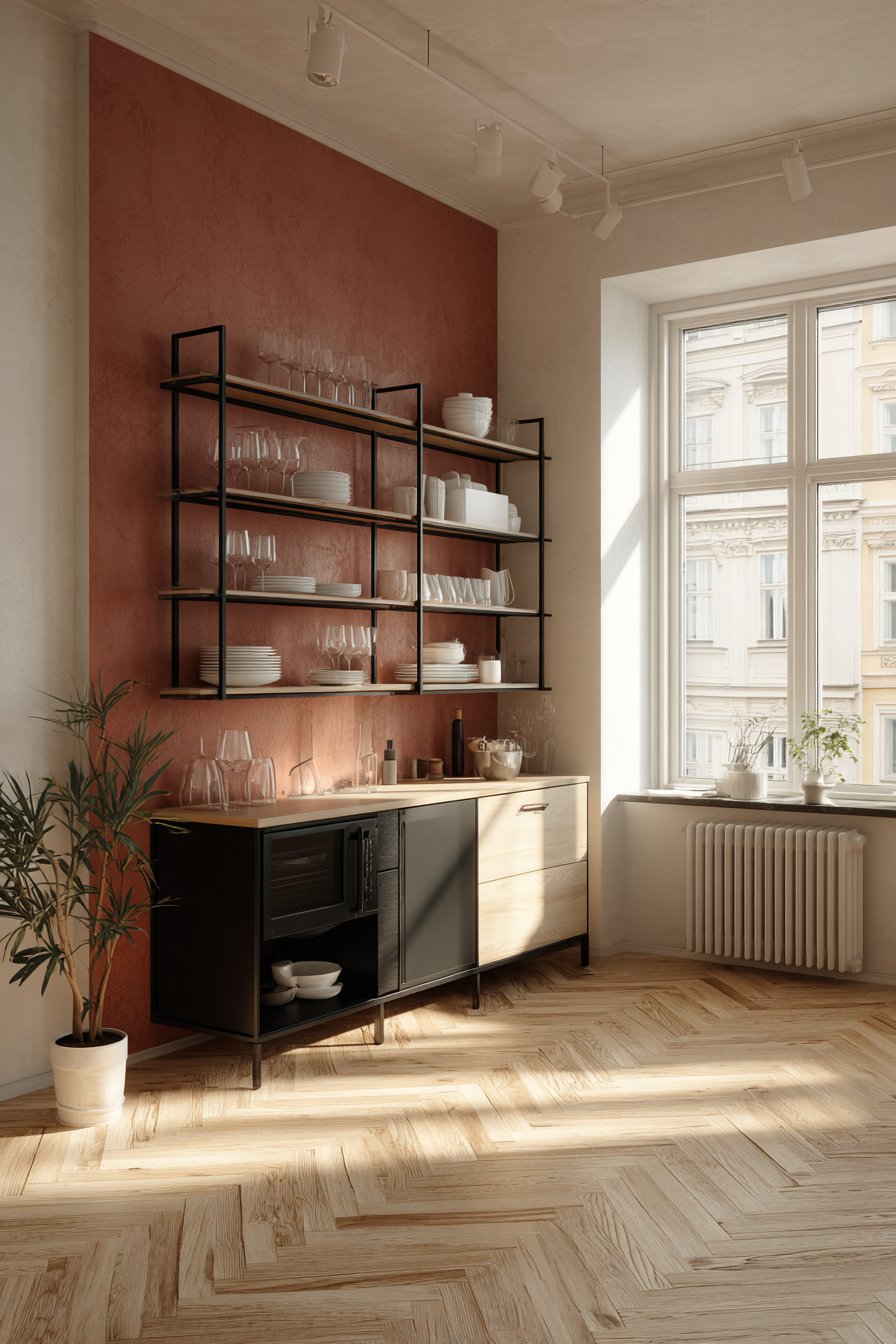
Kitchens increasingly serve as design showcases rather than purely functional spaces, with homeowners recognizing opportunities to inject personality into these hardworking rooms. A bold terracotta accent wall behind open shelving creates an immediate warmth and earthiness that contrasts beautifully with modern kitchen elements. The rich, sunset-inspired hue brings energy and appetite appeal—appropriate for spaces centered around food and gathering—while remaining sophisticated enough for contemporary design sensibilities. Against this warm backdrop, white dishes and glassware on open shelves pop dramatically, creating a curated display that functions as both storage and visual interest.
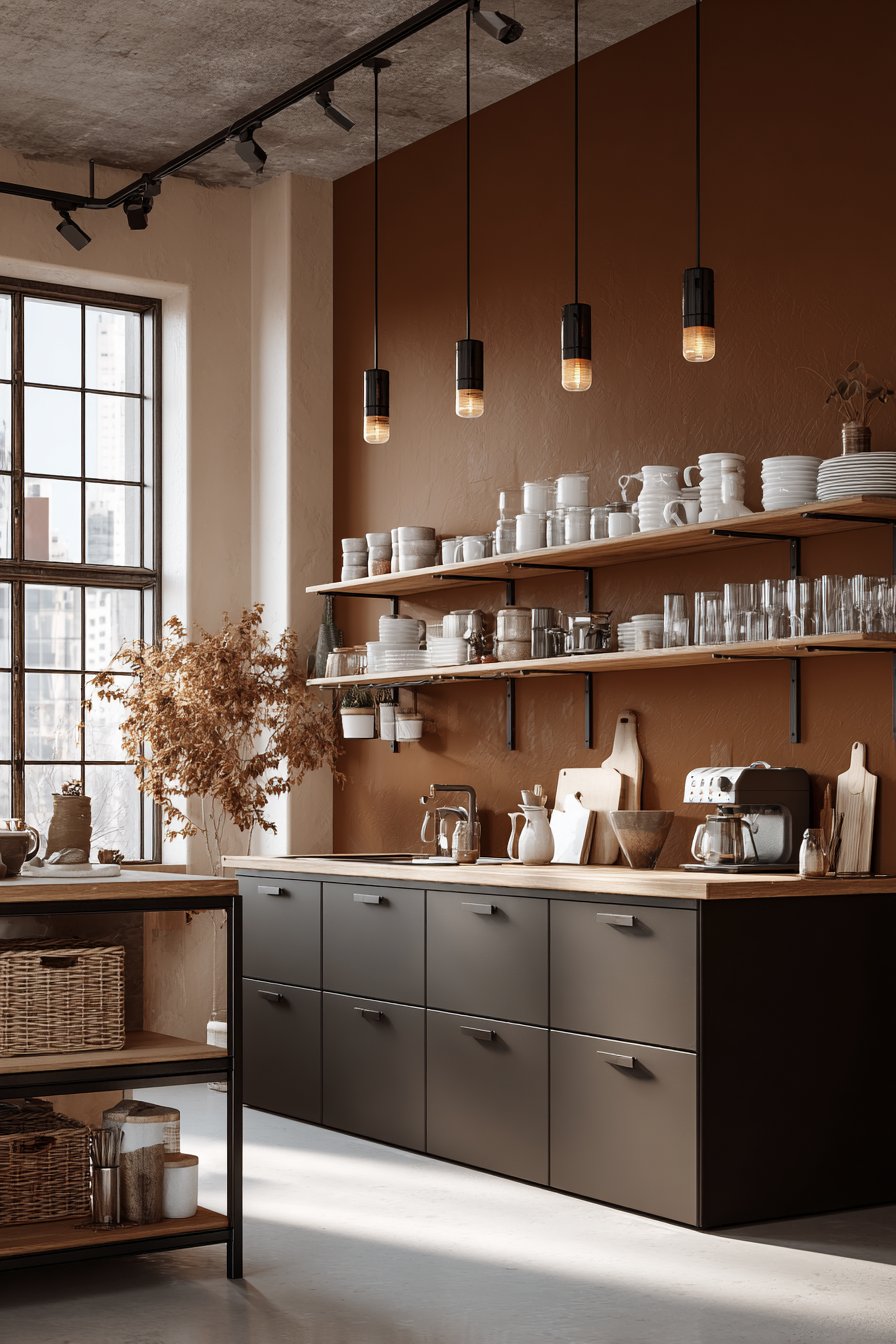
The psychology of terracotta in kitchen spaces deserves attention. This earthy orange-red tone stimulates appetite and conversation while evoking Mediterranean warmth and hospitality. Unlike cooler colors that can feel clinical in food preparation areas, terracotta creates an inviting atmosphere that encourages gathering and lingering. The color’s natural association with clay pottery and rustic cooking traditions adds subconscious connections to artisanal food preparation and authentic, from-scratch cooking.
Technical considerations for kitchen wall painting include selecting appropriate paint finishes that withstand moisture, grease, and frequent cleaning. Semi-gloss or satin finishes prove more practical than flat paint in kitchens, offering easier maintenance while providing slight sheen that enhances the terracotta’s richness. The smooth matte finish specified in this design suggests either exceptionally high-quality paint with advanced stain resistance or careful positioning away from the stove’s immediate splash zone.
Key Design Tips:
- Choose kitchen-specific paint formulations with enhanced resistance to moisture and grease
- Apply two coats for even, saturated color coverage with rich terracotta tones
- Consider the undertones—orange-based terracotta versus red-based—based on existing finishes
- Coordinate with other warm elements like wood countertops and brass or copper fixtures
- Use the accent wall to define a specific kitchen zone, such as the display or dining area
- Test terracotta samples in your kitchen’s specific lighting before committing to the full wall
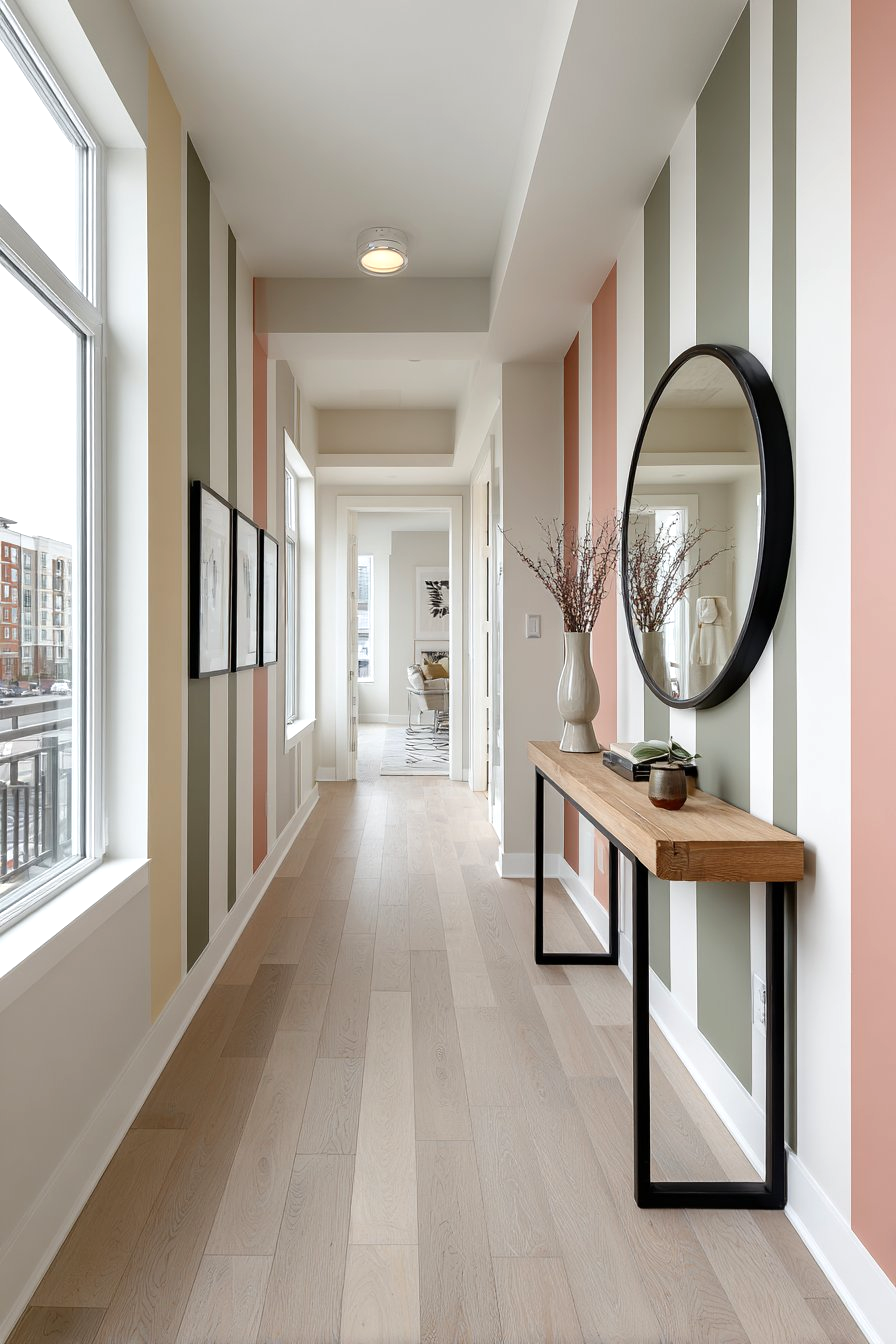
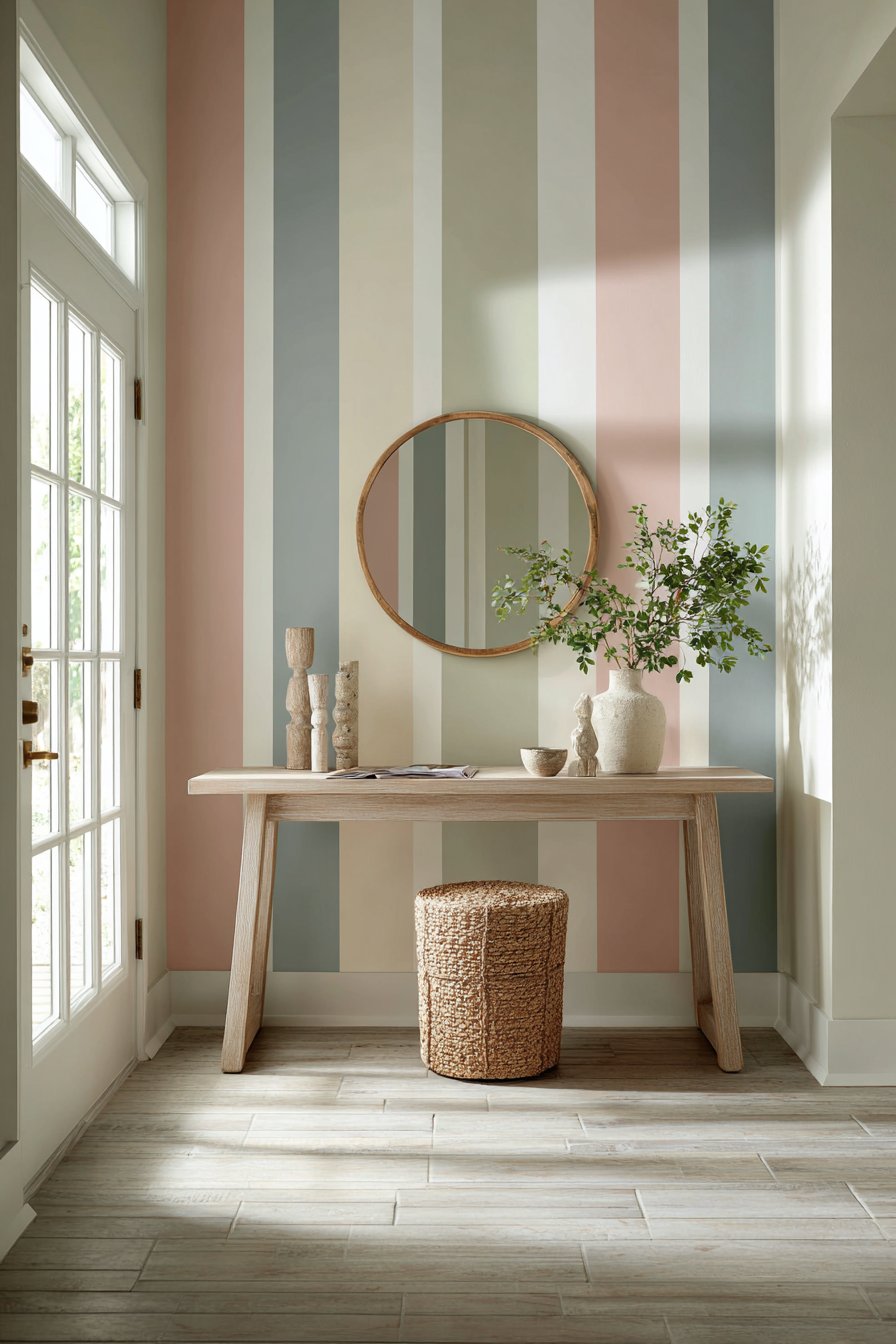
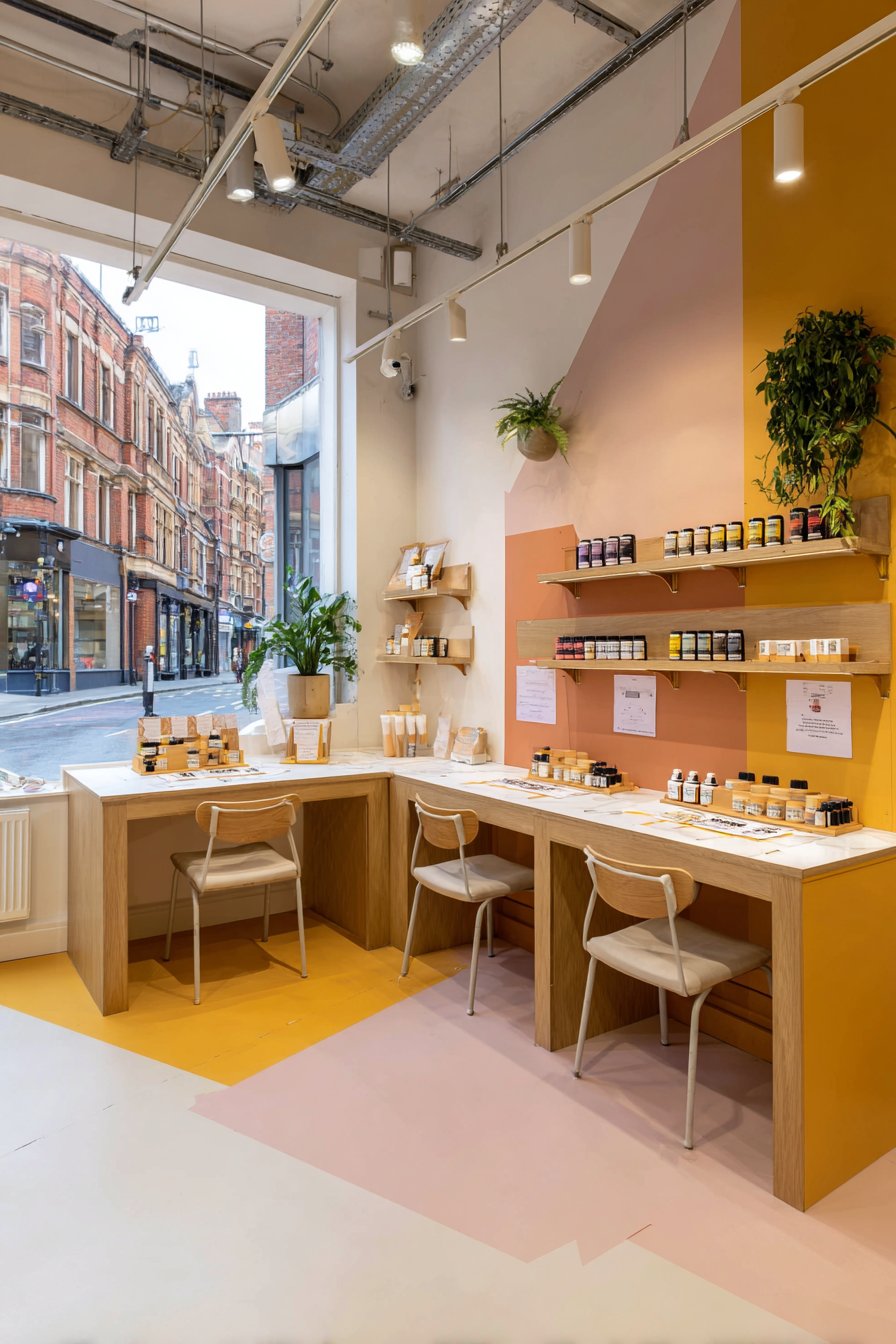
7. Vertical Color-Blocked Stripes in Sage, Rose, and Cream
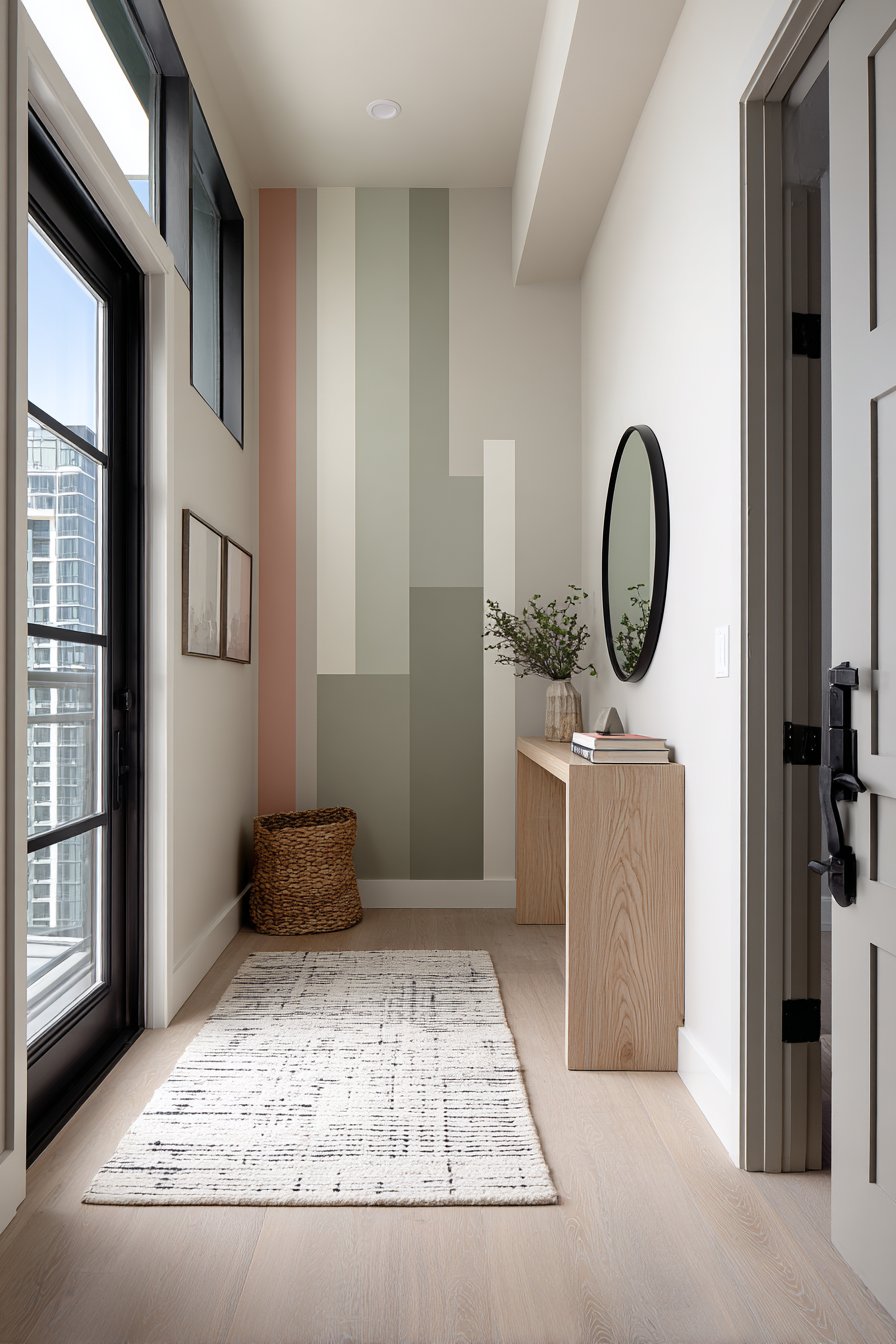
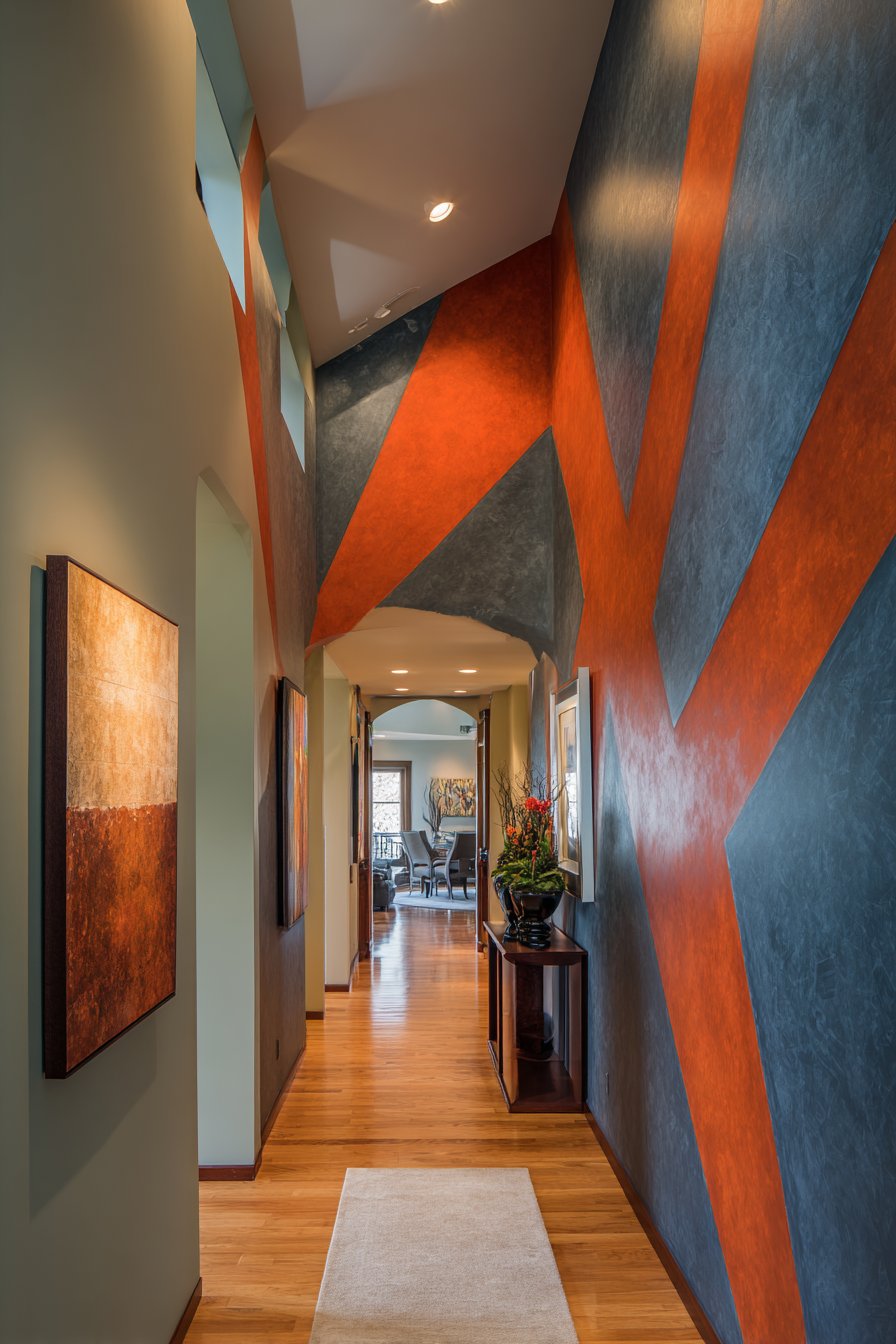
Color-blocking represents a contemporary approach to wall painting that creates striking visual impact through geometric color divisions. This entryway application utilizes vertical stripes in varying widths, featuring a sophisticated palette of sage green, dusty rose, and cream. The technique immediately distinguishes the entry as a designed space worthy of attention, establishing the home’s aesthetic from the moment guests arrive. Vertical orientation visually heightens the space, drawing eyes upward and making narrow entryways feel more generous and considered.
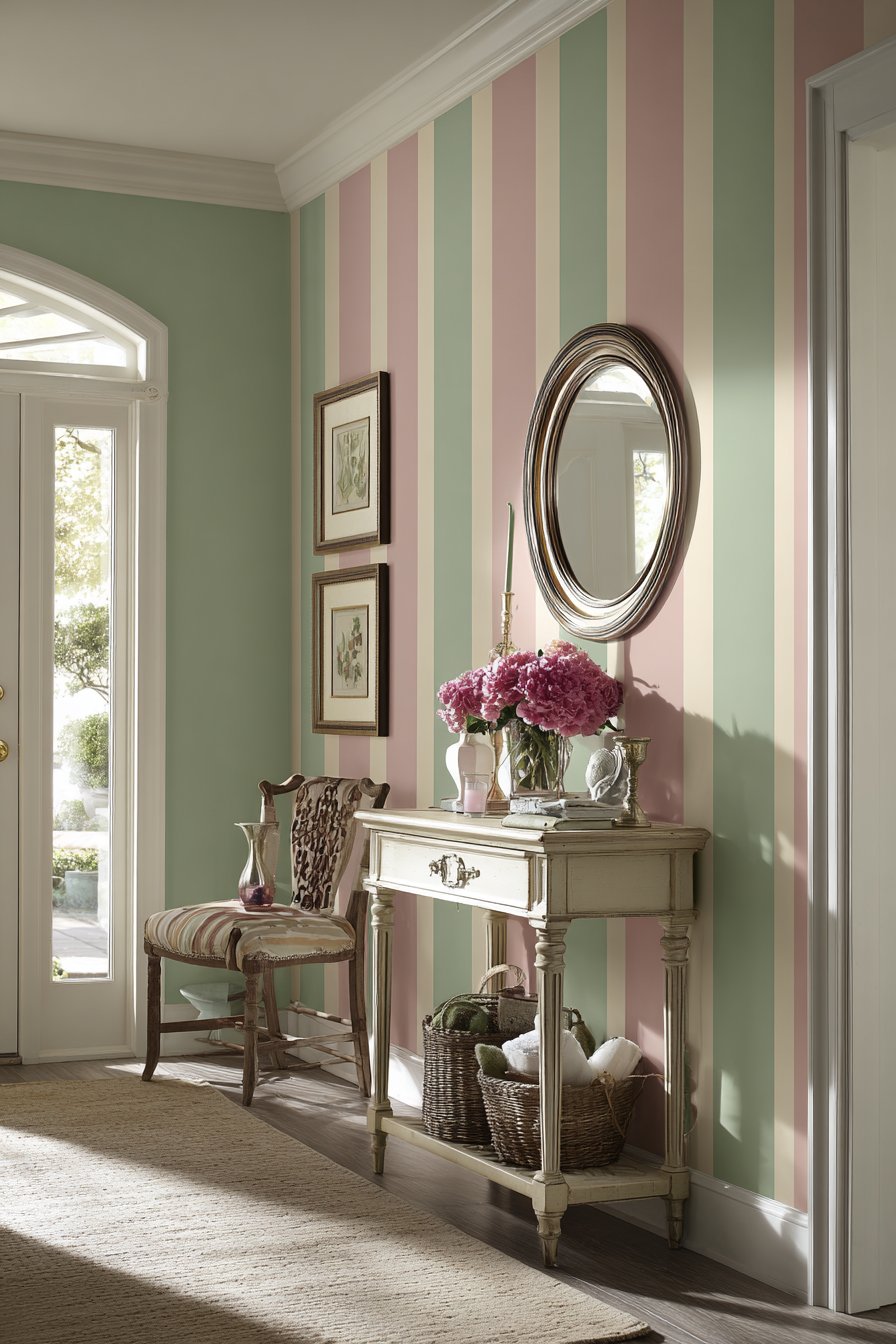
The success of color-blocked stripes depends heavily on color selection and proportional balance. The sage green, dusty rose, and cream combination exemplifies harmonious color relationships, sharing similar saturation levels and warm undertones despite representing different hue families. The varying stripe widths prevent monotony and rigidity, with some bands spanning 8-12 inches while others measure only 3-4 inches, creating rhythm and visual interest. This irregular pattern feels organic and intentional rather than accidentally uneven.
Execution requires precision tools and careful measuring. Painter’s tape becomes essential for achieving clean, sharp lines between colors, though even with tape, proper technique matters. Sealing tape edges with the base wall color before applying the stripe color prevents bleed-through, ensuring professional-looking results. For DIYers, patience and precision prove more important than artistic ability, as the geometric nature of the design demands accuracy rather than painterly skill.
Key Design Tips:
- Map out stripe widths and spacing on graph paper before measuring on walls
- Use a laser level or long straightedge to ensure vertical lines remain truly perpendicular
- Apply base coat of the lightest color (cream) first, then tape and add darker stripes
- Press painter’s tape edges firmly and remove while paint remains slightly tacky
- Maintain consistent paint thickness across all stripes for uniform appearance
- Consider terminating stripes at chair rail height in very narrow entries to prevent dizziness
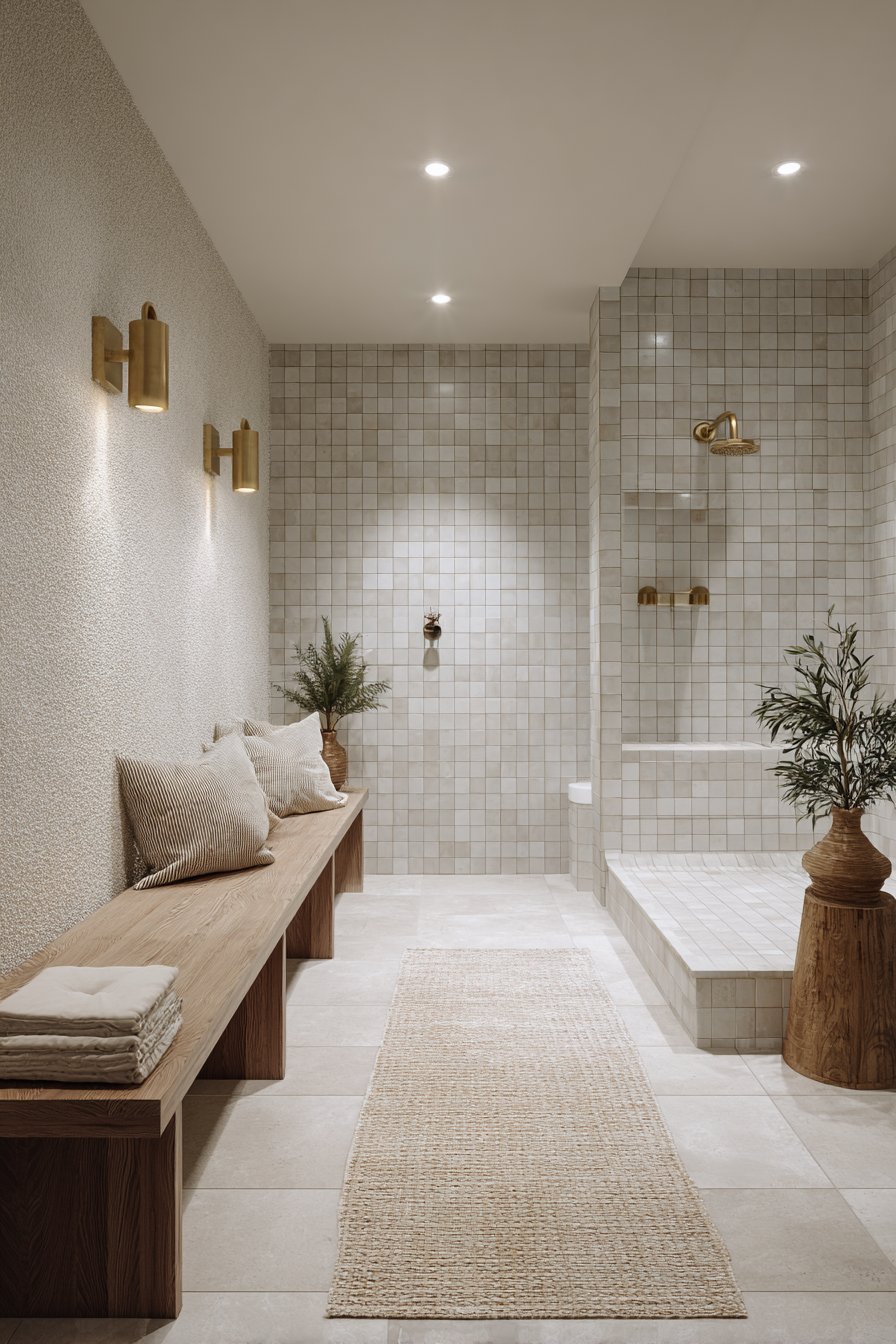
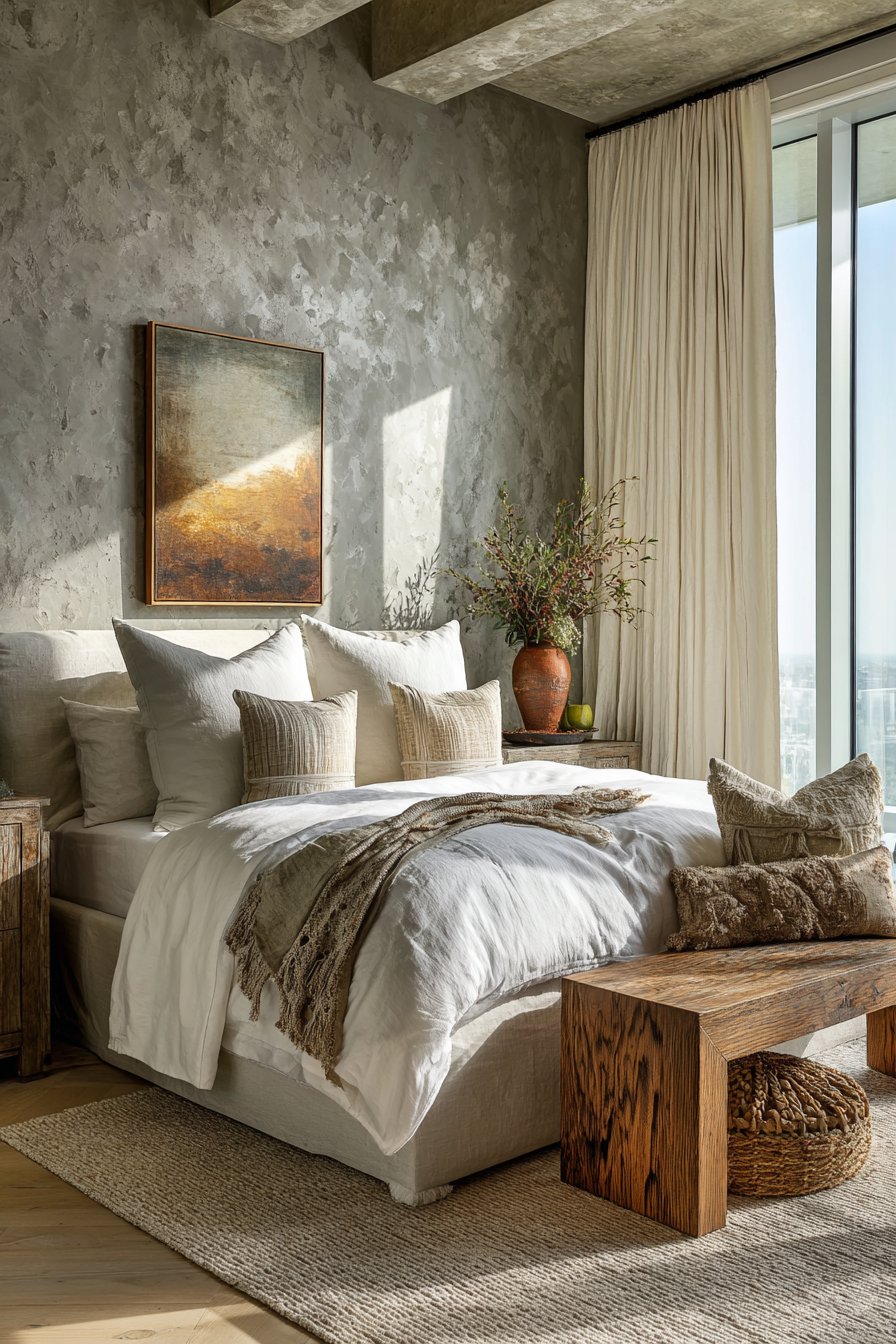
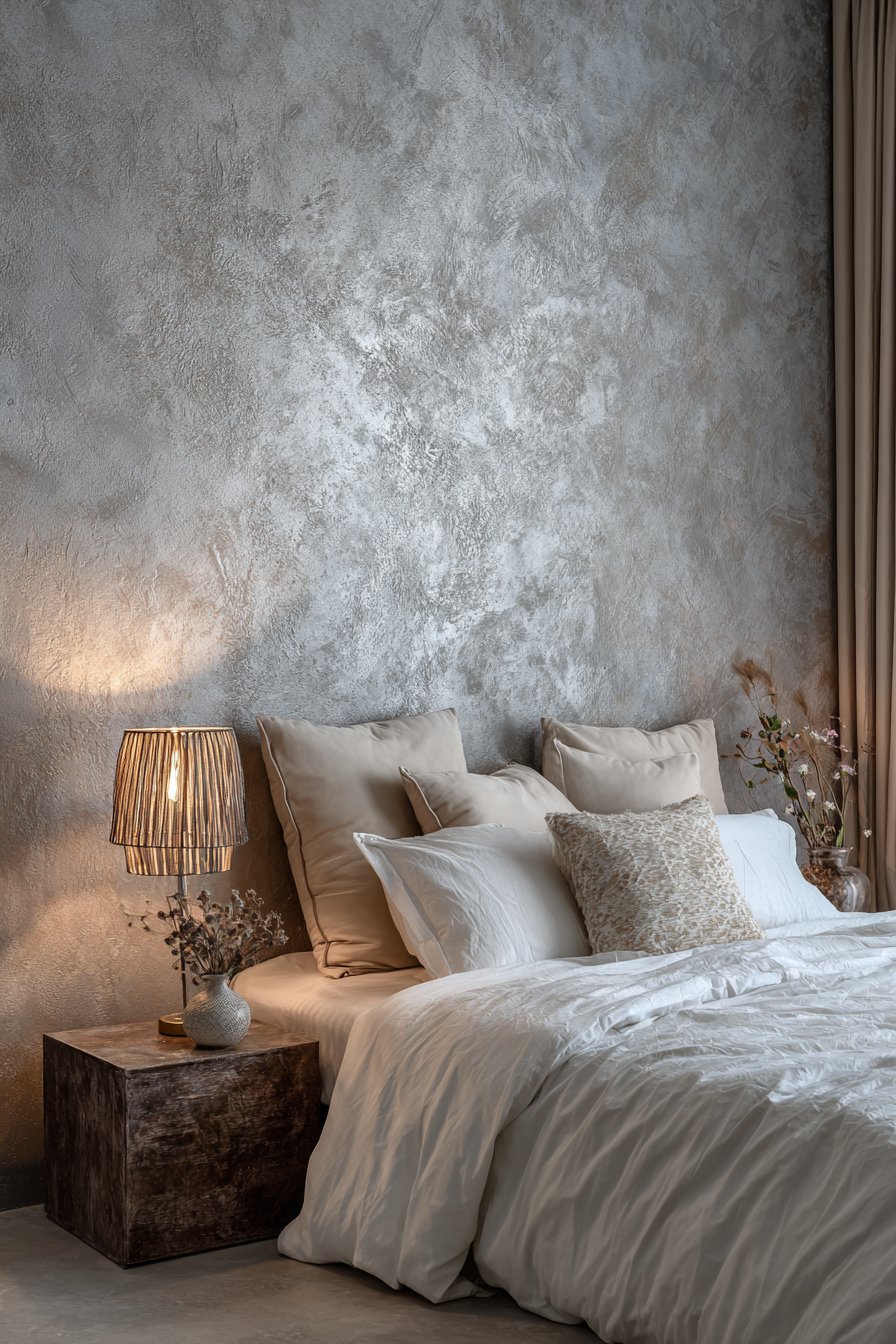
8. Mediterranean Textured Stucco Effect in Warm Sand
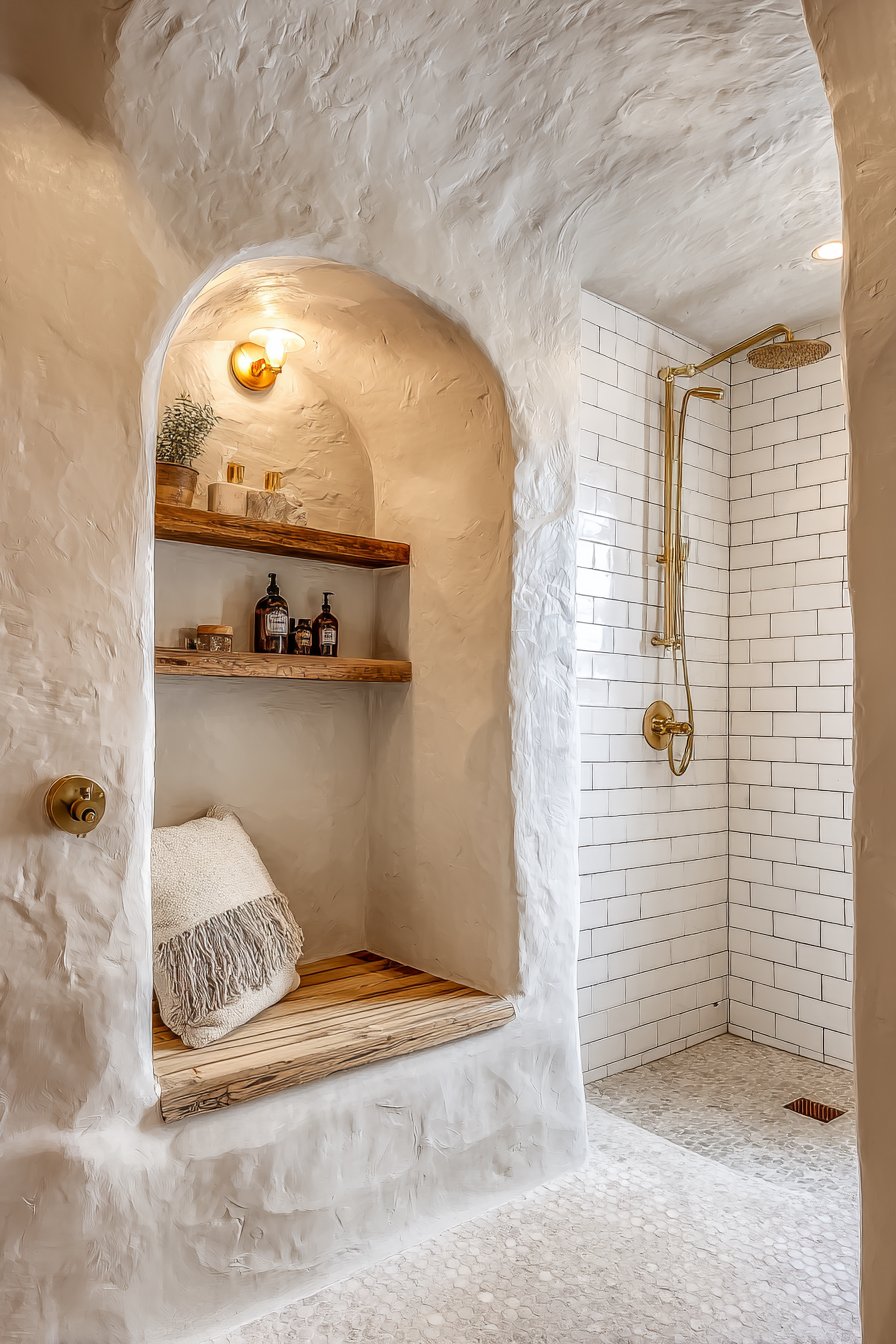
Texture in wall finishes adds a tactile dimension that elevates spaces beyond what smooth, flat paint can achieve. This bathroom treatment employs a textured stucco-effect paint technique in warm sand tones, evoking Mediterranean villas and European coastal retreats. The dimensional surface catches and reflects light irregularly, creating ever-changing shadow patterns throughout the day that add vitality and interest to what might otherwise be a static bathroom design. The organic, handcrafted quality of textured finishes introduces warmth and character that contrasts beautifully with the smooth, hard surfaces typical of bathrooms—tile, glass, porcelain, and metal.
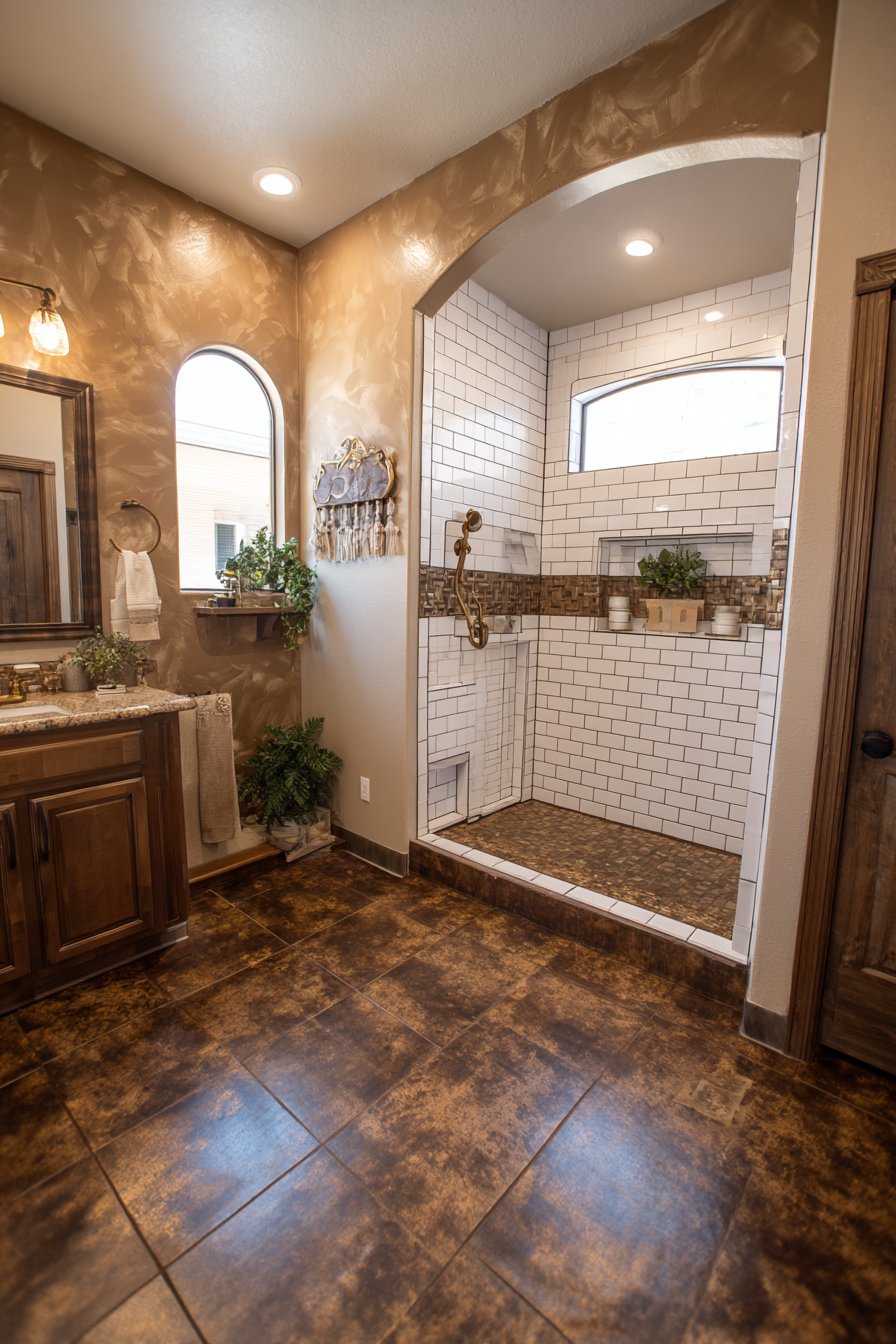
The textured stucco technique involves specialized materials and application methods. Venetian plaster, textured paint additives, or purpose-made stucco-effect products create the desired surface variation. Application typically involves troweling or using specialized brushes and tools to create irregular patterns that mimic hand-troweled plaster. The technique’s forgiving nature actually makes it excellent for DIY projects, as slight inconsistencies and variations enhance rather than detract from the authentic, artisanal appearance.
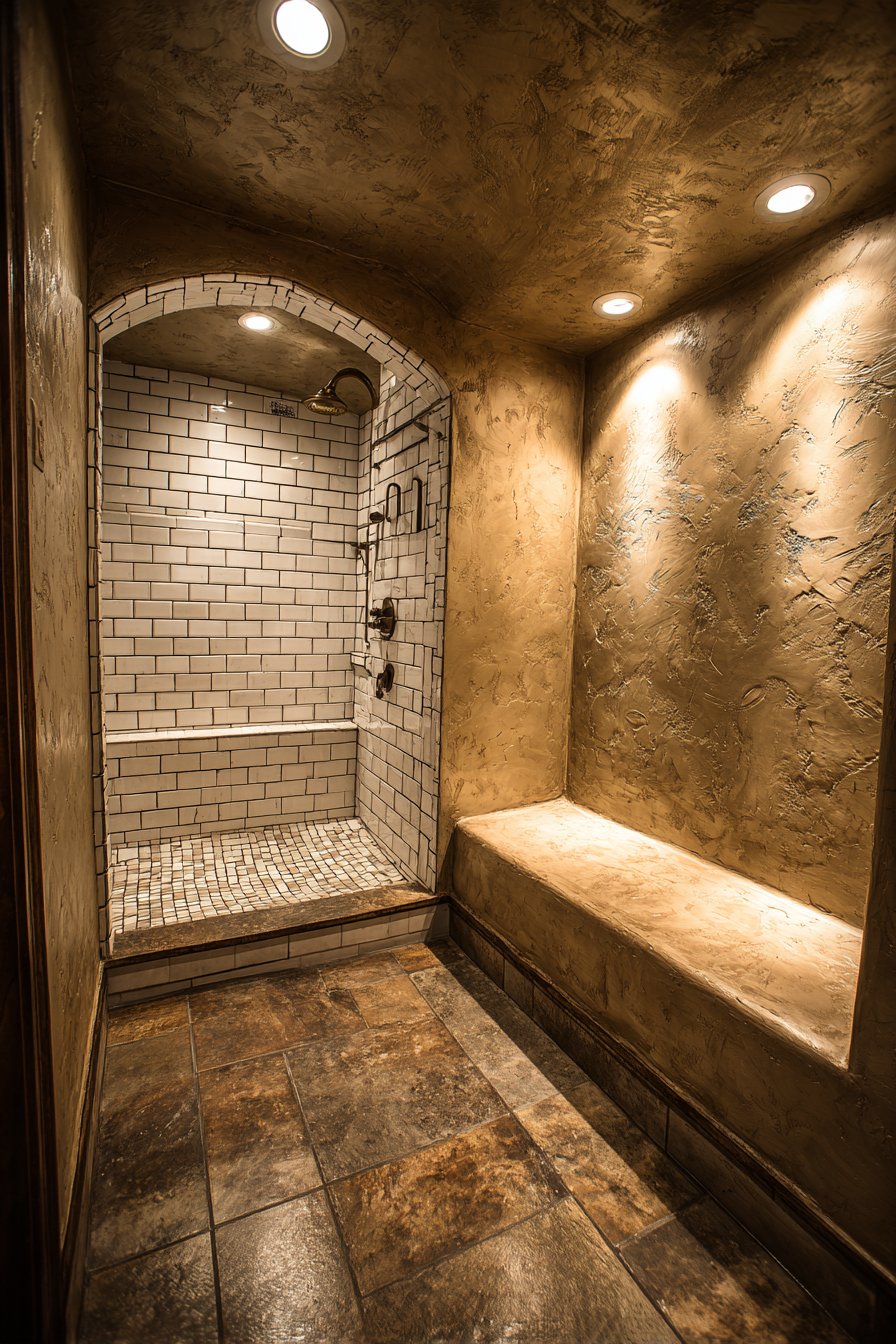
Practical considerations for textured bathroom walls include moisture resistance and cleanability. Properly sealed textured finishes can withstand bathroom humidity, though highly textured walls in shower enclosures themselves require careful product selection and application. The moderate texture described in this design provides visual interest without creating deep crevices that trap moisture or complicate cleaning—a crucial balance for bathroom applications.
Key Design Tips:
- Select bathroom-specific textured products with inherent moisture resistance
- Practice troweling technique on sample boards to develop consistent pressure and pattern
- Work in small sections to maintain wet edges for seamless transitions
- Consider applying texture in random, overlapping patterns rather than uniform strokes
- Seal textured surfaces with appropriate topcoats designed for high-humidity environments
- Pair textured warm walls with smooth cool elements for pleasing material contrast
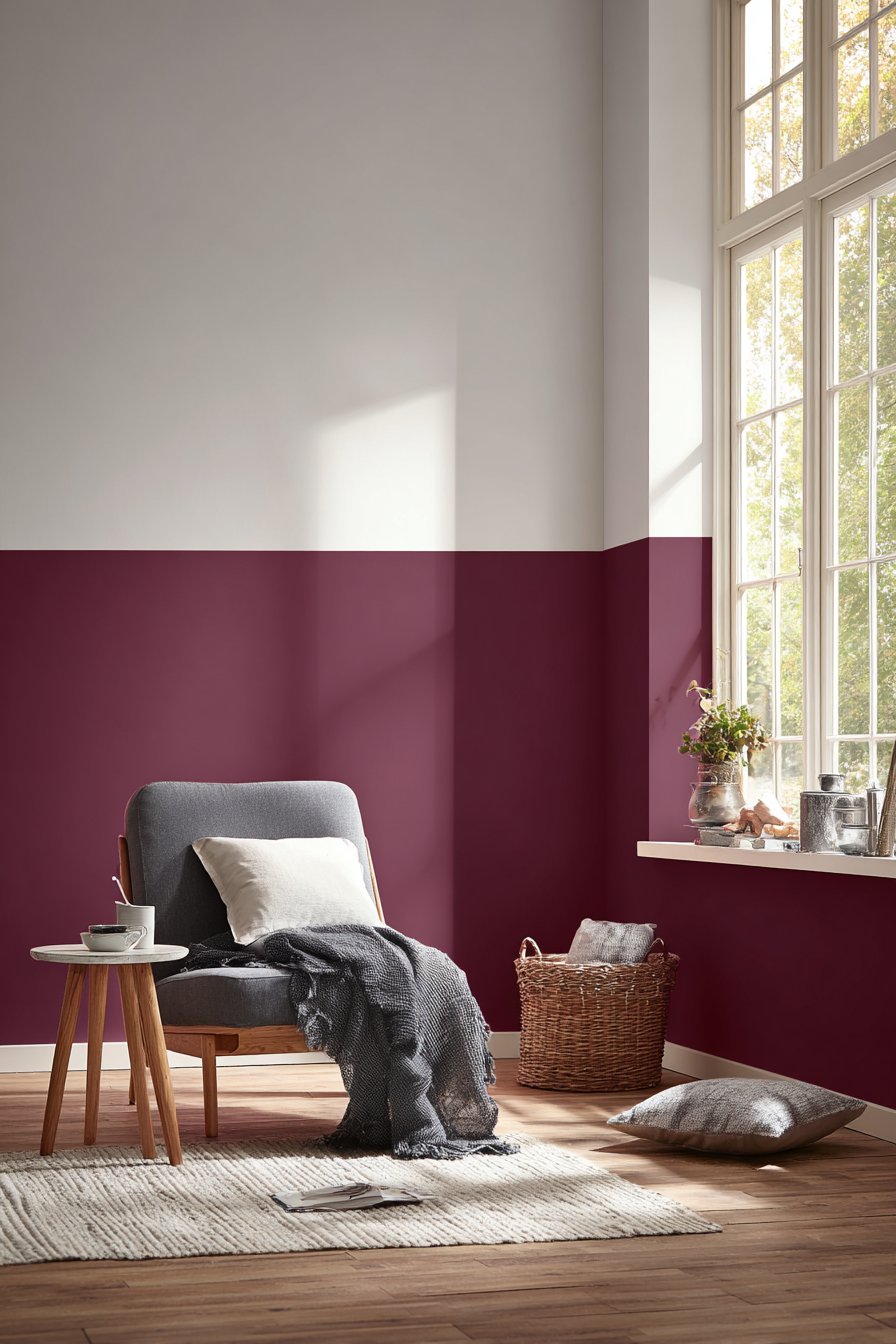
9. Color-Dipped Effect with Deep Plum Band
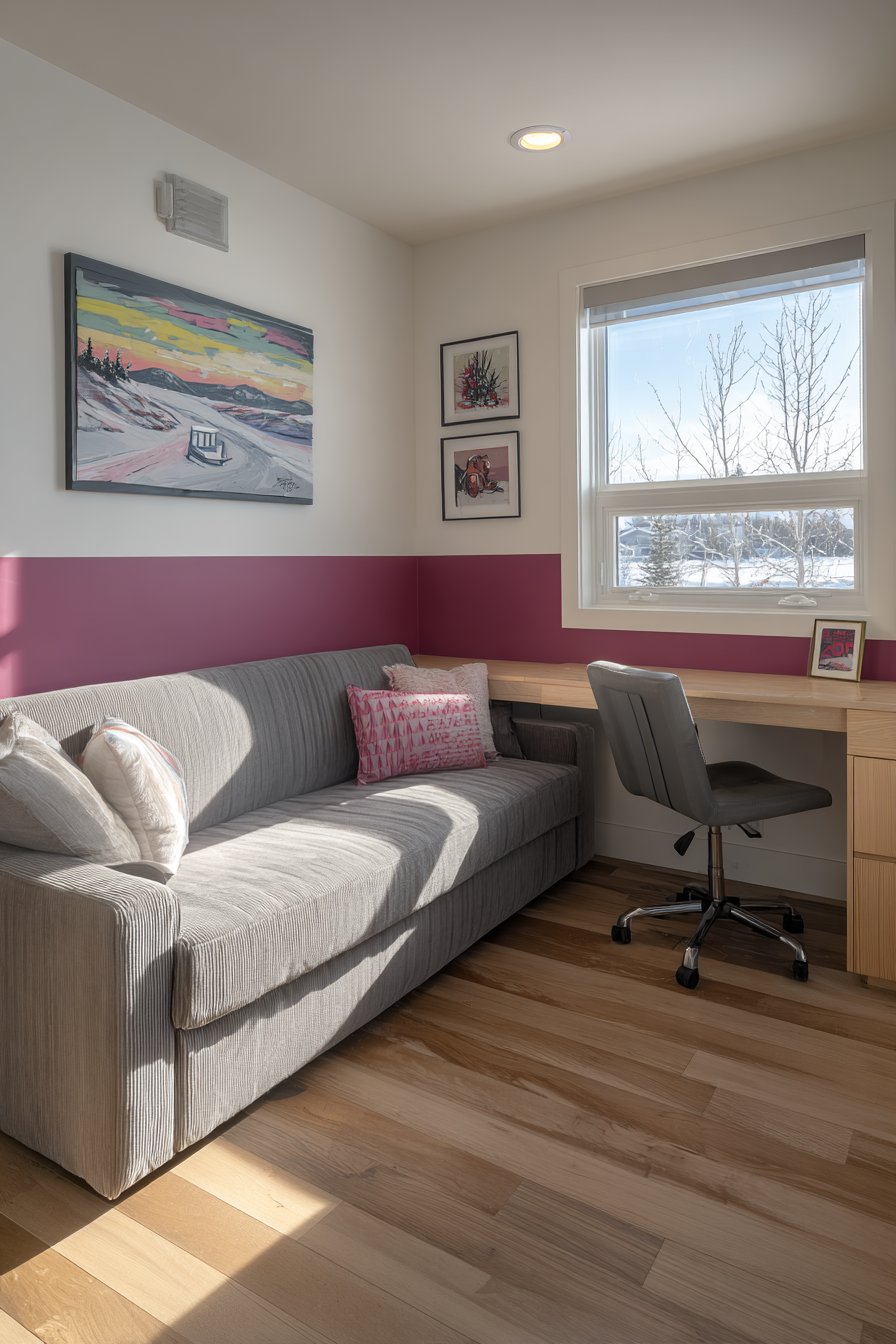
The color-dipped technique offers a fresh, contemporary approach to wall painting that creates bold statements without overwhelming spaces. This teen bedroom application features deep plum paint extending approximately three feet up from the floor, creating a striking horizontal band with crisp, clean edges against the white walls above. The effect resembles objects dipped in paint or dye—hence the name—producing a modern, graphic quality that appeals to younger sensibilities while remaining sophisticated enough to age gracefully as tastes mature.
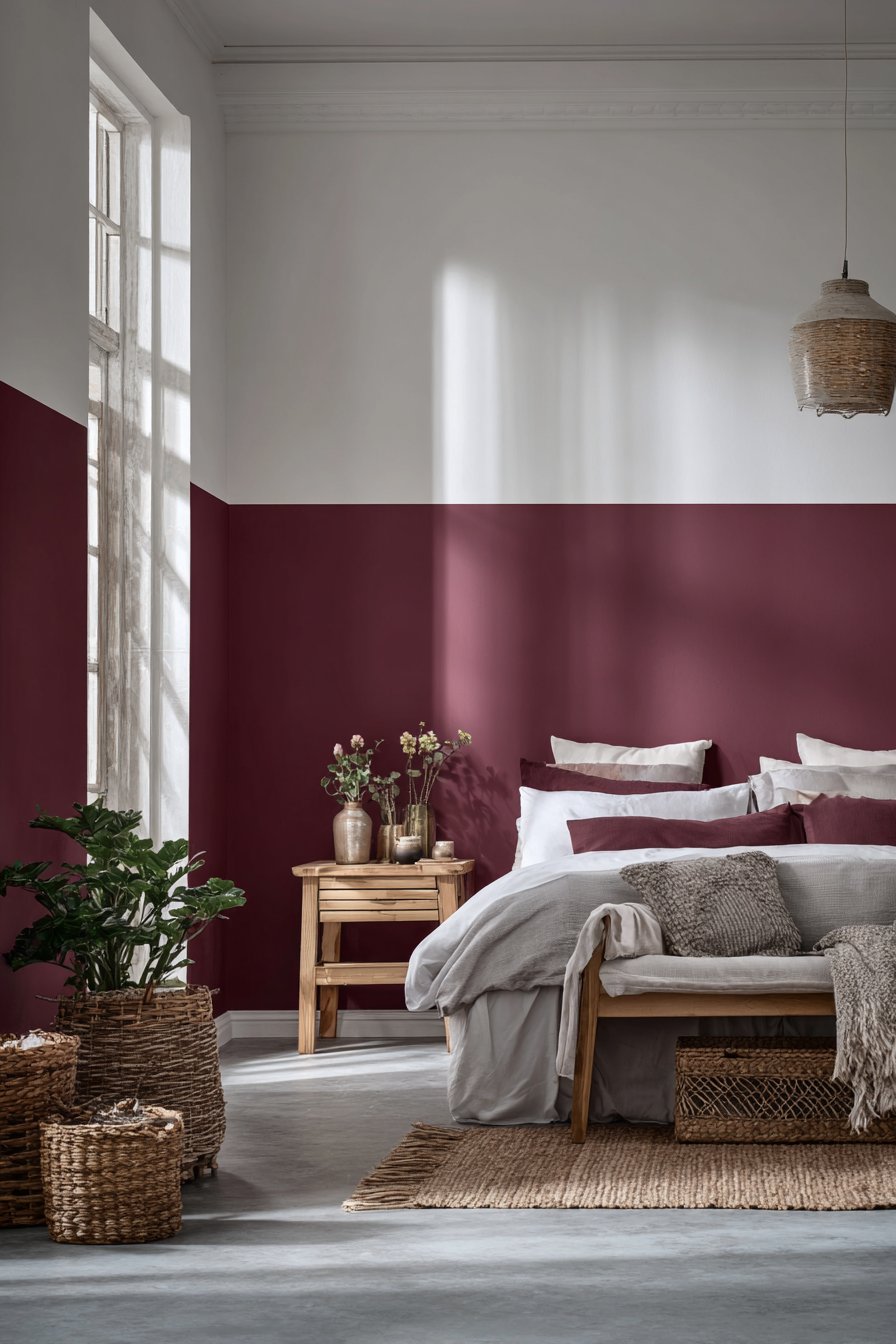
The horizontal division creates interesting spatial effects different from traditional wainscoting or chair rail divisions. The lower concentration of darker color grounds the room visually while maintaining an overall light, open feeling from the dominant white upper walls and ceiling. This approach proves particularly effective in rooms with lower furniture—beds, dressers, desks—as the dark band provides a backdrop for these pieces while white walls above keep the space feeling airy rather than enclosed.
Technical execution requires precise measuring and taping to achieve the characteristic crisp edge that defines the color-dipped look. Unlike soft, blended transitions, this technique demands ruler-straight lines and perfect paint edges. The payoff for this precision is a contemporary, almost architectural quality that reads as intentional design rather than DIY experimentation.
Key Design Tips:
- Measure and mark the desired height consistently around the entire room before taping
- Use premium painter’s tape and press edges firmly to prevent paint bleed
- Apply base white coat first, then tape above the desired plum line
- Paint the edge where tape meets white with white first to seal, preventing purple bleed-through
- Remove tape while plum paint remains slightly tacky for cleanest edges
- Consider metallic or glossy finish on the plum section for added visual interest
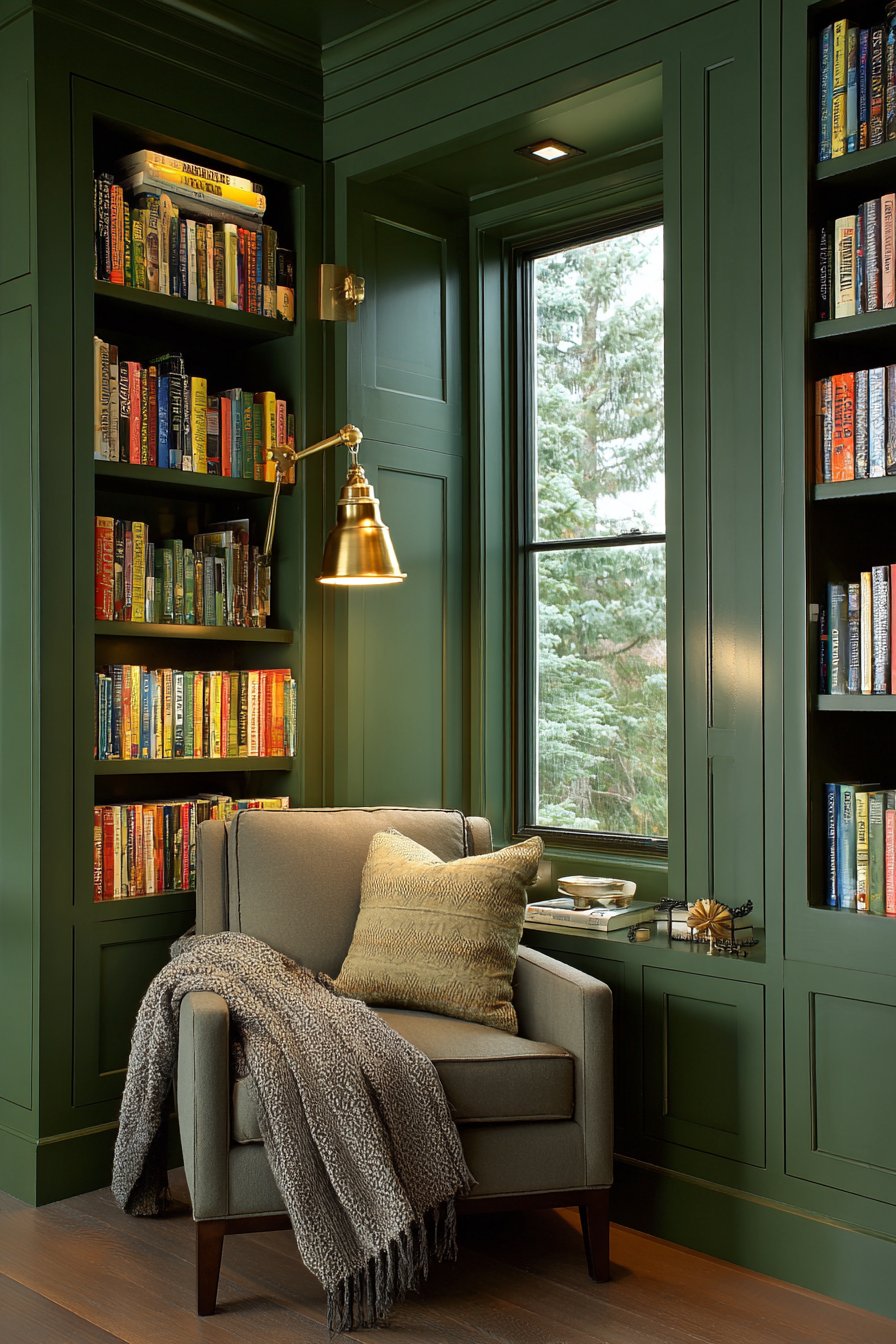
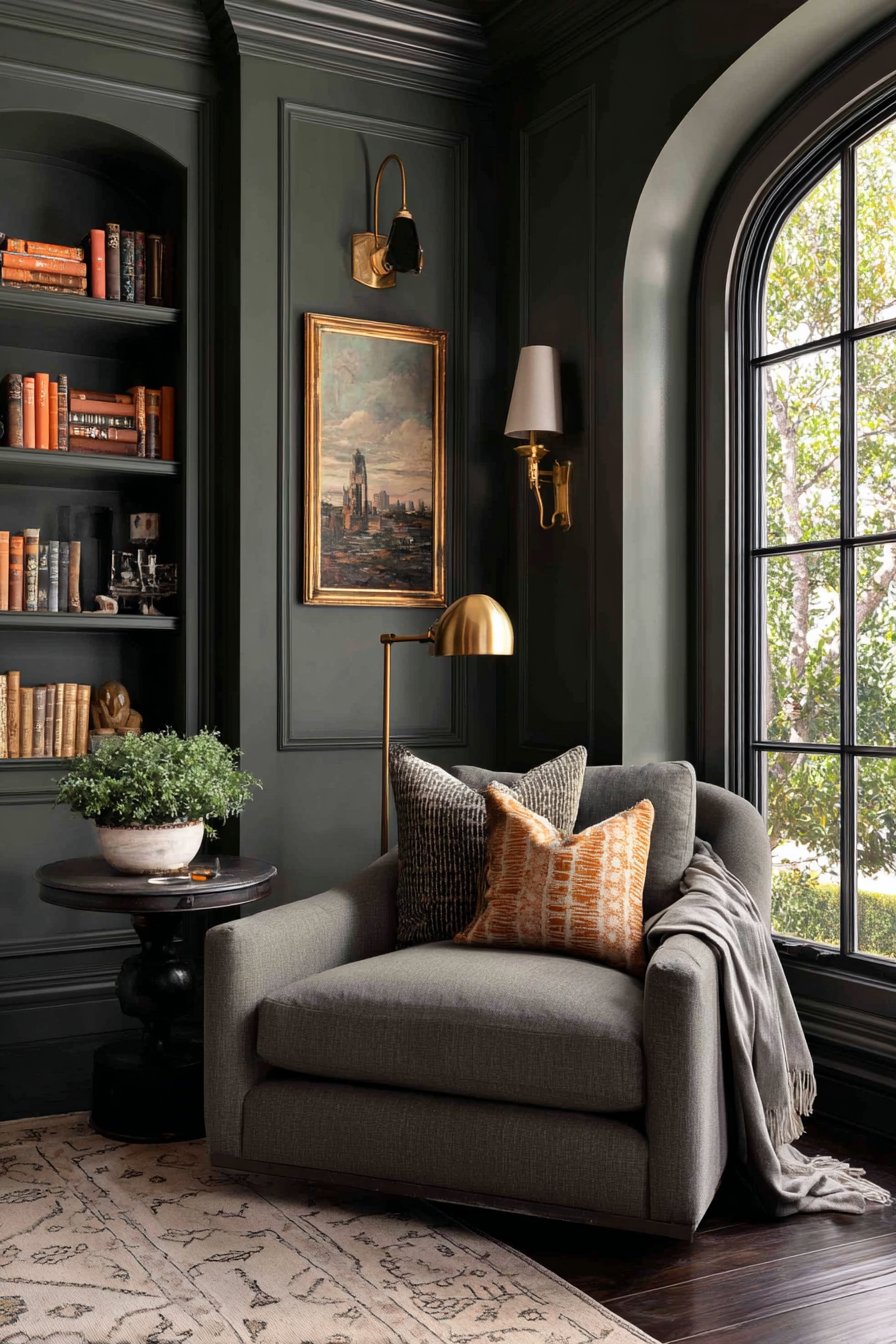
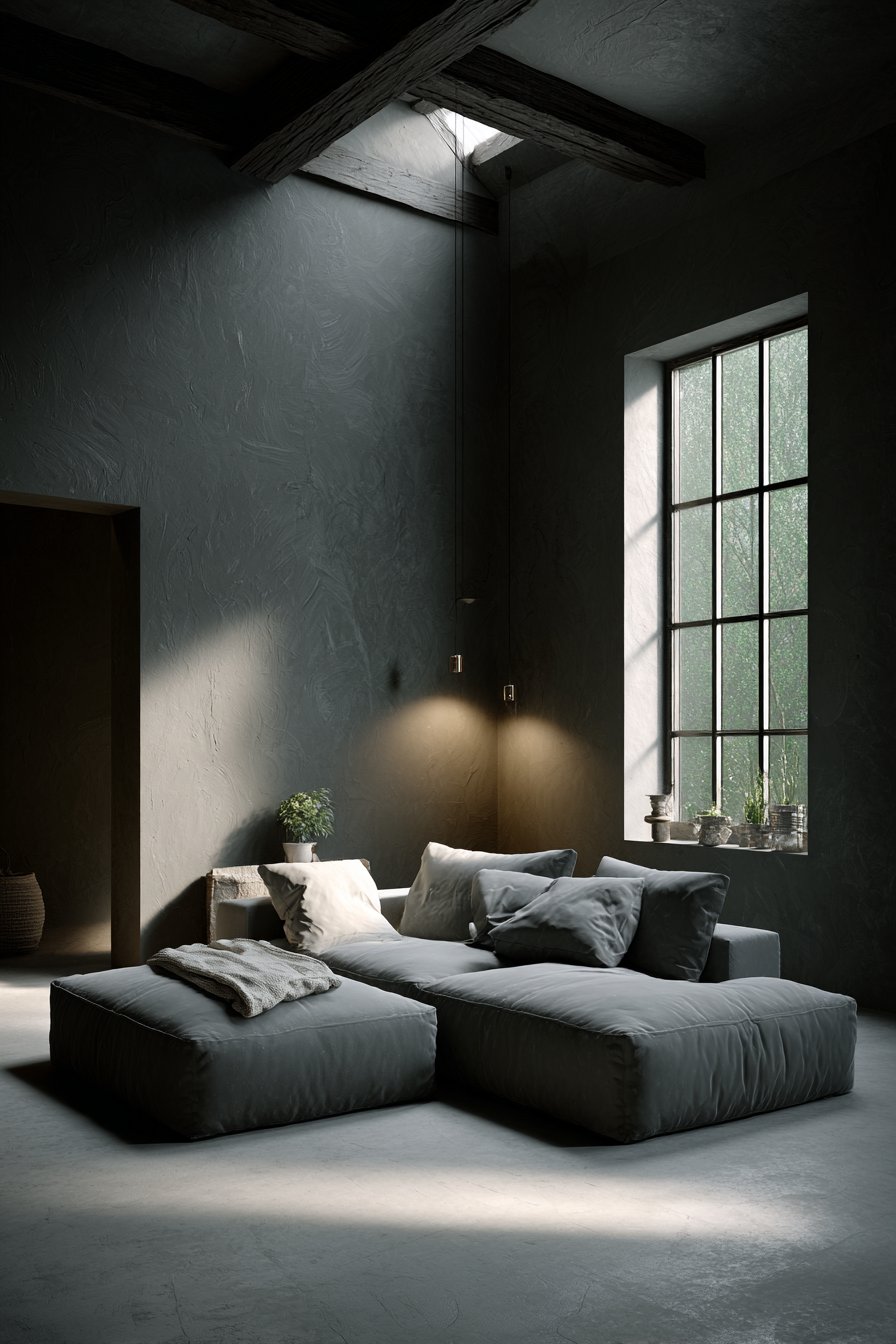
10. Library Green Cocoon Effect for Reading Nook
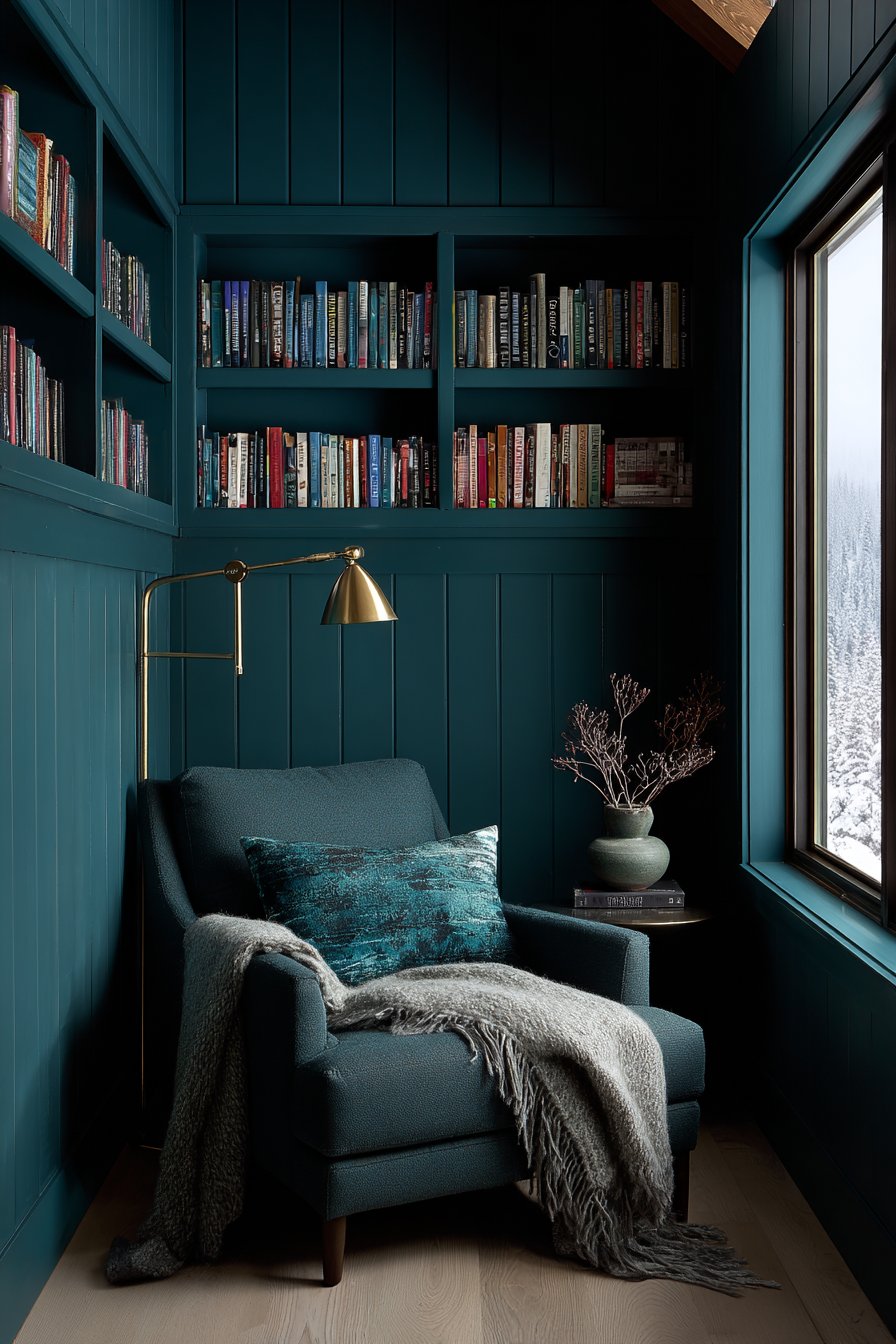
Deep, saturated wall colors create cocooning effects that transform spaces into intimate retreats—a design approach that works beautifully for dedicated reading nooks and small, specialized spaces. This concept embraces rich library green applied to all surrounding walls, creating an enveloping atmosphere that promotes focus and relaxation. Rather than feeling oppressive, the dark green produces a womb-like comfort that shuts out distractions and invites hours of peaceful reading. Built-in shelving painted in matching green creates seamless integration while allowing colorful book spines to provide the color accent points against the moody backdrop.
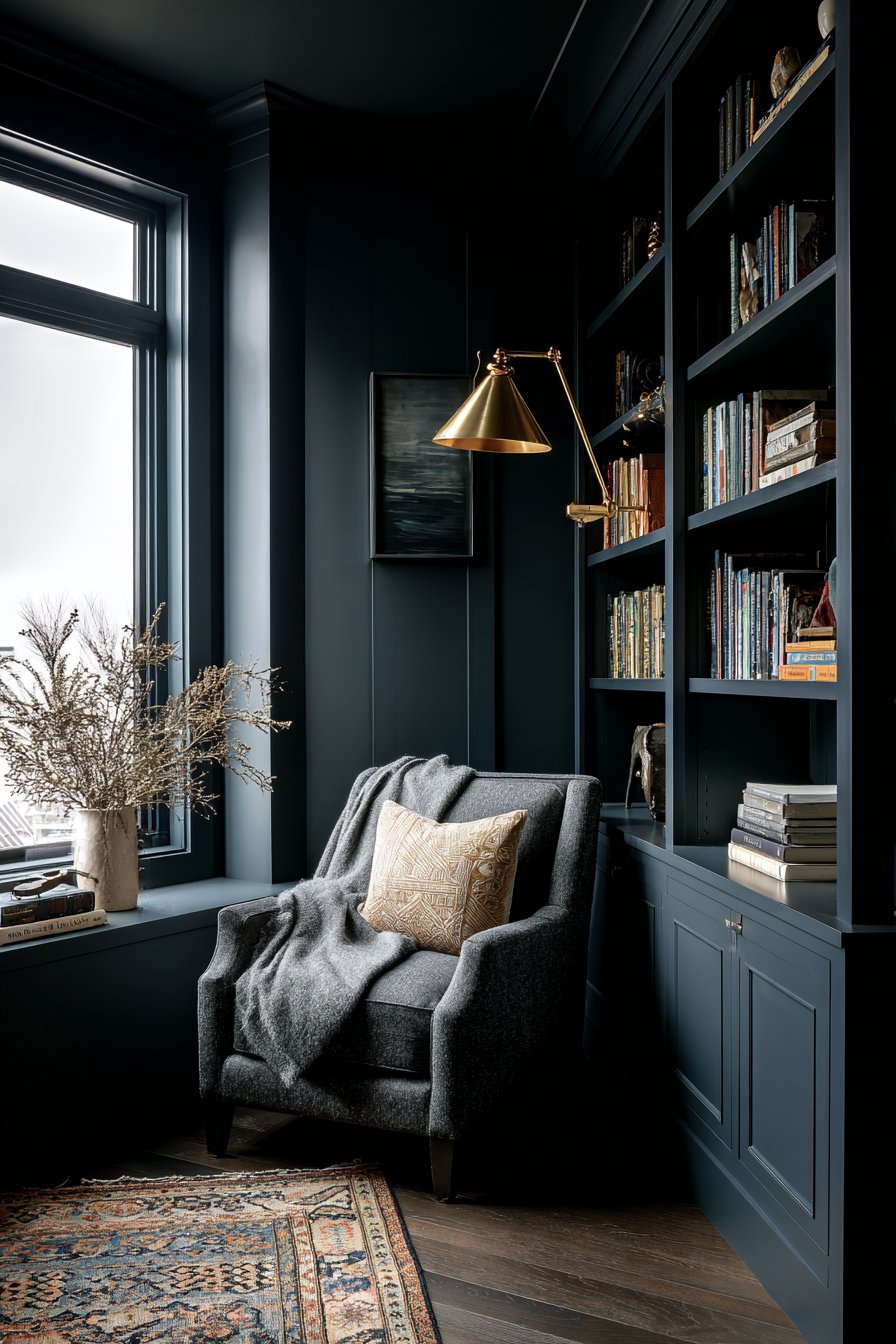
The success of very dark wall colors depends heavily on lighting strategy and complementary elements. Natural light from windows provides essential contrast, preventing the space from becoming uncomfortably cave-like, while brass or warm metal light fixtures add golden highlights that play beautifully against deep green. The green itself benefits from quality paint with excellent coverage and color depth—cheap paint may appear muddy or require excessive coats to achieve rich saturation.
This approach challenges the conventional wisdom that dark colors make spaces feel smaller. When thoughtfully executed with adequate lighting and strategic placement of lighter elements, dark walls actually create depth perception and architectural interest that can make spaces feel more intentional and designed rather than simply small.
Key Design Tips:
- Select green with balanced undertones—neither too blue nor too yellow—for versatility
- Plan lighting carefully with multiple sources at different heights for functionality
- Use high-quality paint rated for excellent hide and color saturation
- Apply at least two coats for even, rich color without thin spots
- Introduce warm metallics like brass or copper to complement the green’s richness
- Balance dark walls with lighter flooring and textiles to prevent the space from feeling too heavy
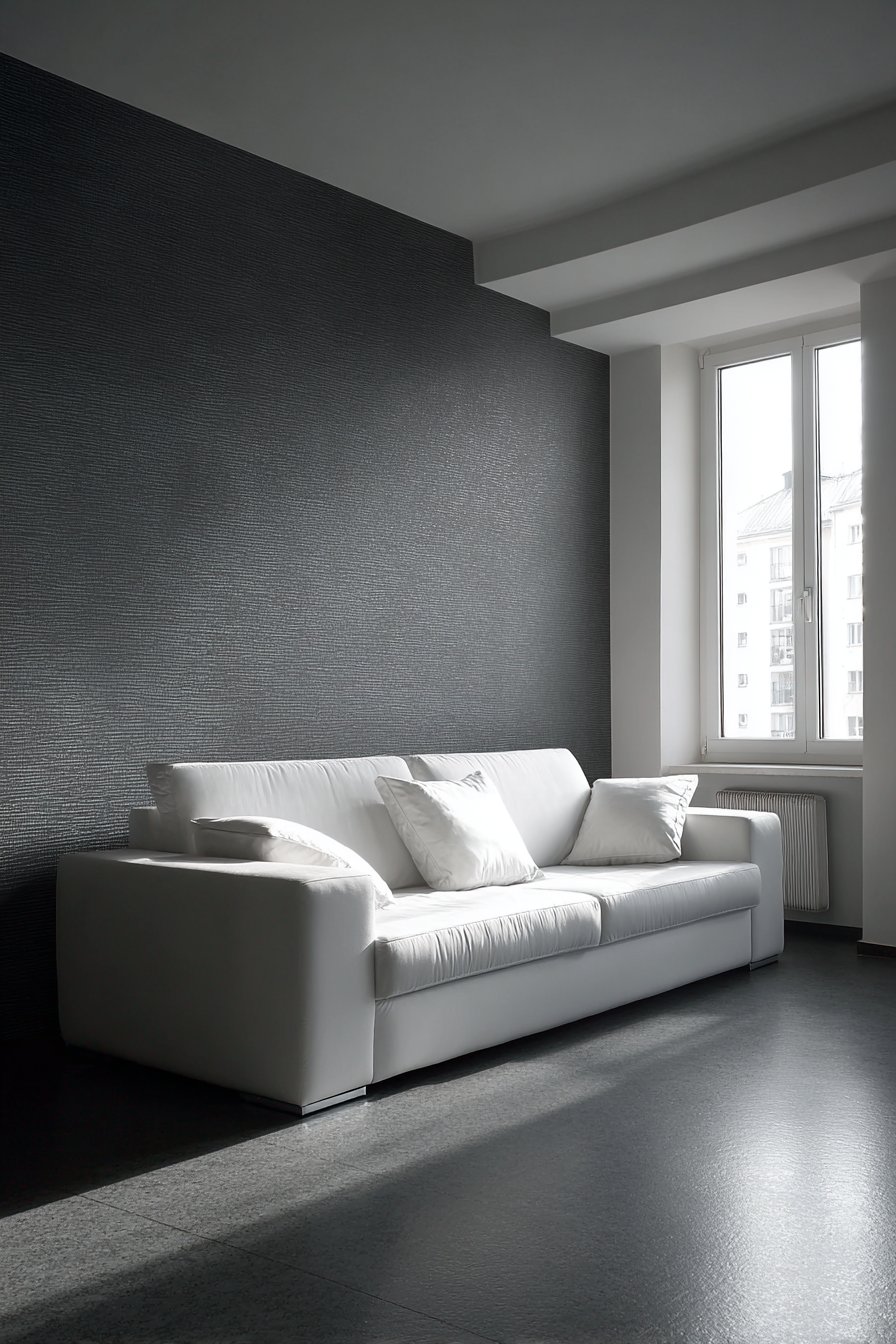
11. Metallic Glaze Over Soft Gray Base
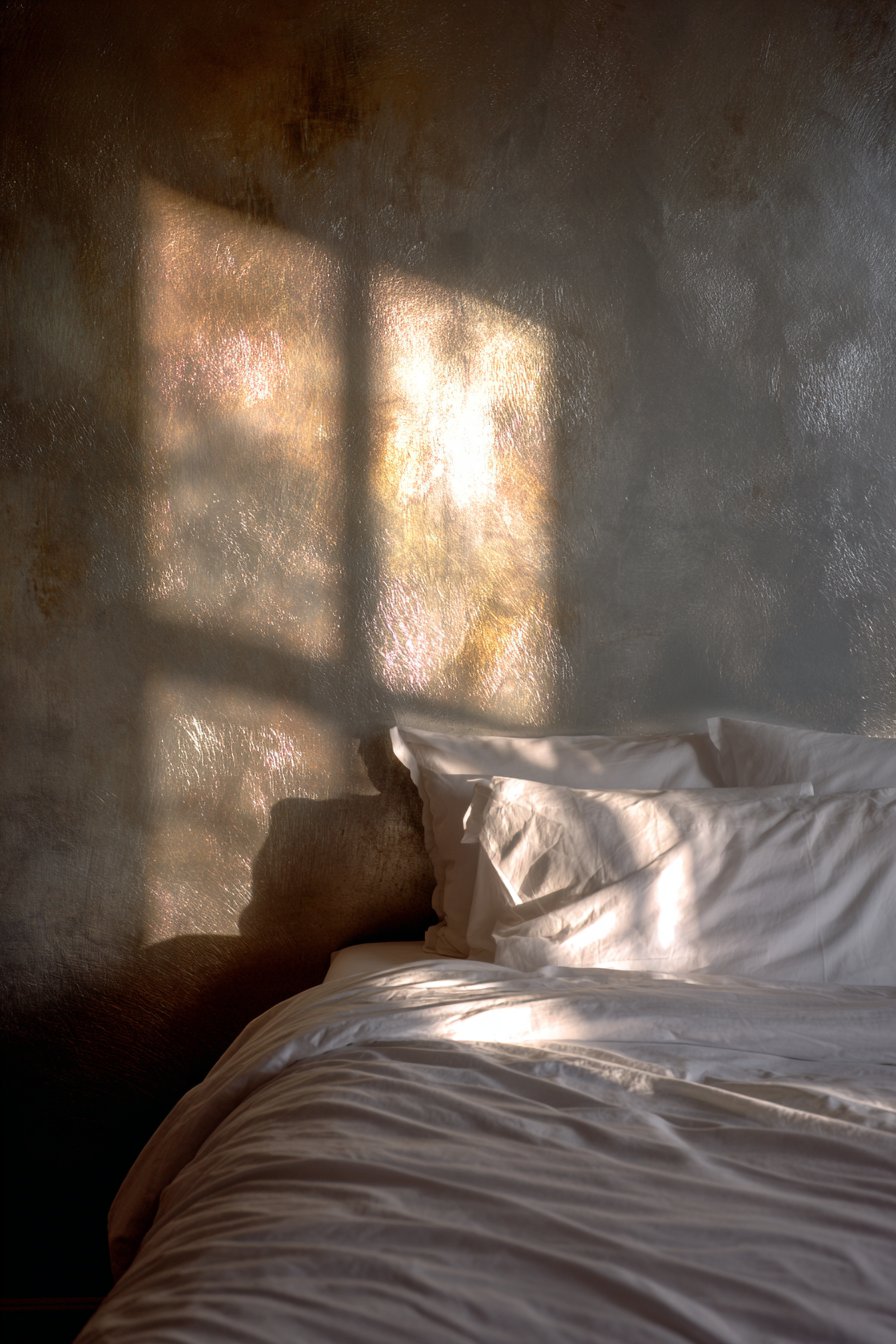
Metallic finishes bring glamour and sophistication to residential spaces, but heavy-handed application can veer into gaudy territory. This master bedroom approach demonstrates restraint and elegance, featuring a subtle metallic glaze applied over a soft gray base coat. The technique creates a shimmering effect that changes throughout the day, catching morning sunlight with warm highlights and producing soft luminosity under evening lamplight. Visible brushstroke texture adds another layer of interest, preventing the metallic finish from reading as flat or artificial.
The layering process begins with a properly prepared gray base coat—typically two coats of high-quality paint in a complementary undertone to the metallic glaze. The metallic glaze, thinned slightly for translucency, is then applied with deliberate brushwork that creates subtle texture rather than perfect smoothness. This intentional brushstroke visibility gives the finish a handcrafted, artisanal quality that distinguishes it from commercially metallic wallpapers or standard metallic paints.
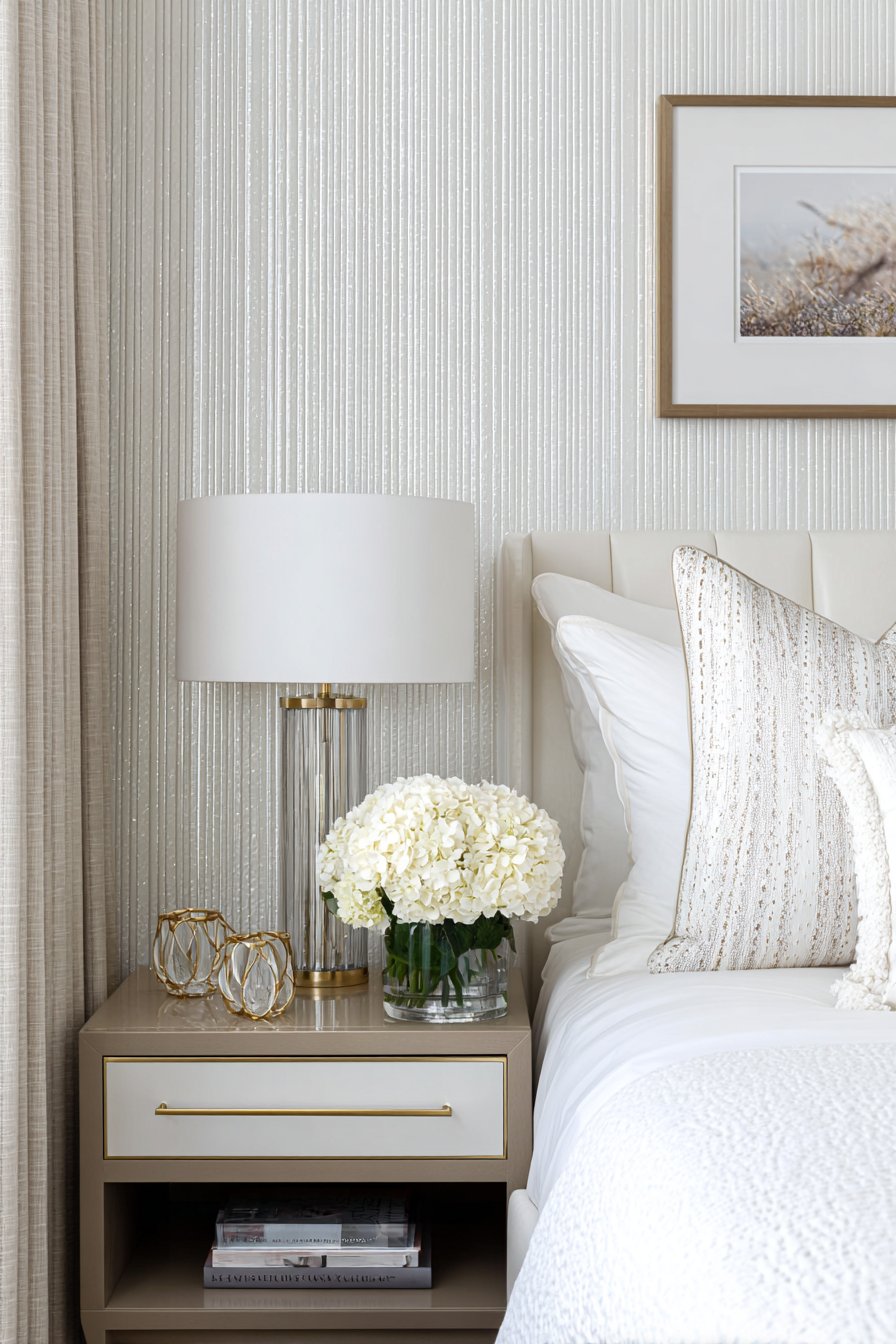
The interplay between matte gray and metallic shimmer creates sophisticated depth that solid colors cannot achieve. The gray provides a neutral, calming foundation appropriate for bedroom relaxation, while the metallic element adds just enough visual interest and luxury to elevate the space beyond basic neutral territory.
Key Design Tips:
- Choose metallic glazes with silver or pearl tones for cool gray bases, gold for warm grays
- Apply metallic glaze in random, overlapping brushstrokes for organic texture
- Work in good lighting to monitor shimmer distribution and avoid overly concentrated areas
- Consider applying glaze more heavily on accent walls and lightly on remaining walls
- Test the combination on large sample boards visible in the room’s actual lighting
- Pair metallic walls with matte textiles and finishes for pleasing contrast
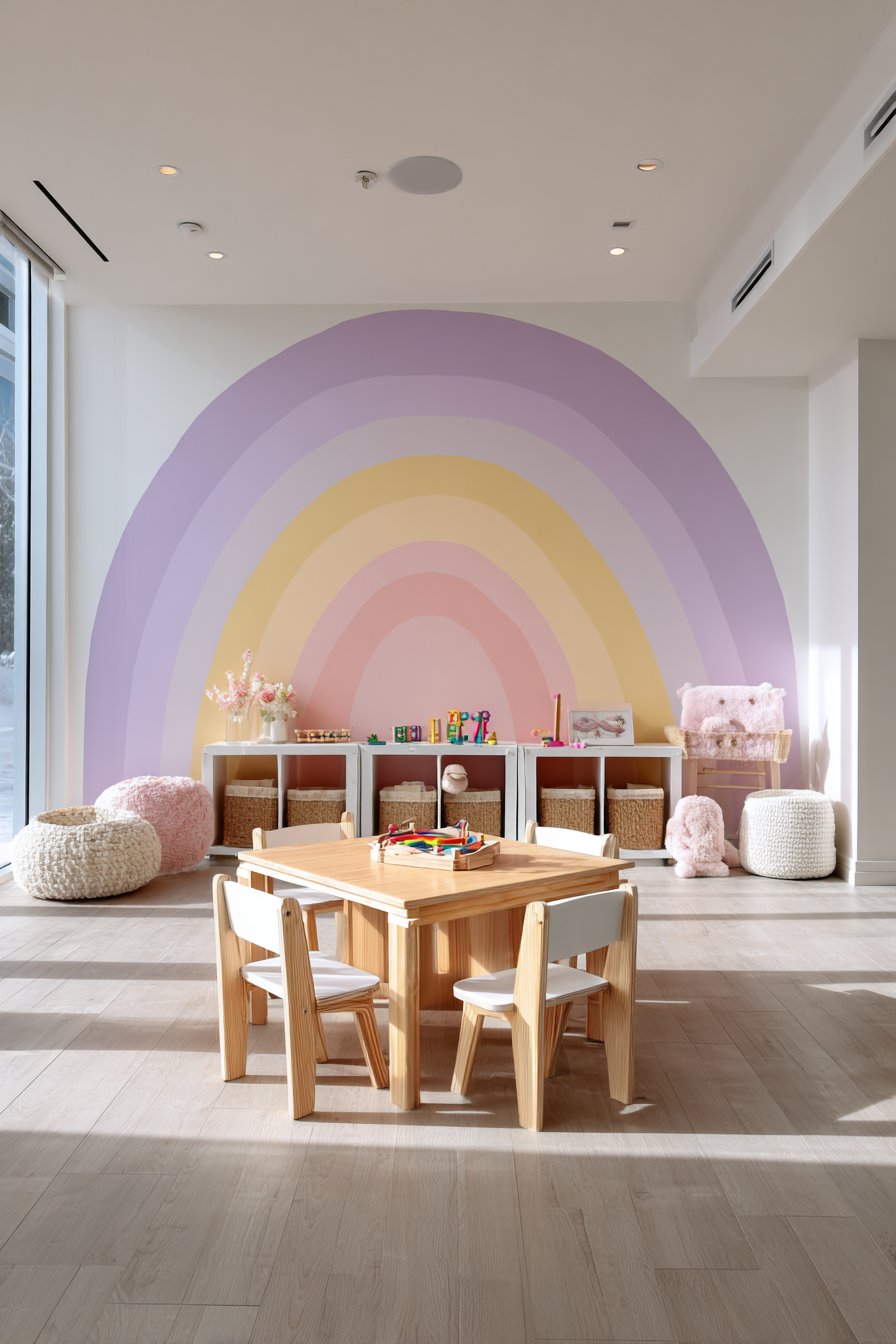
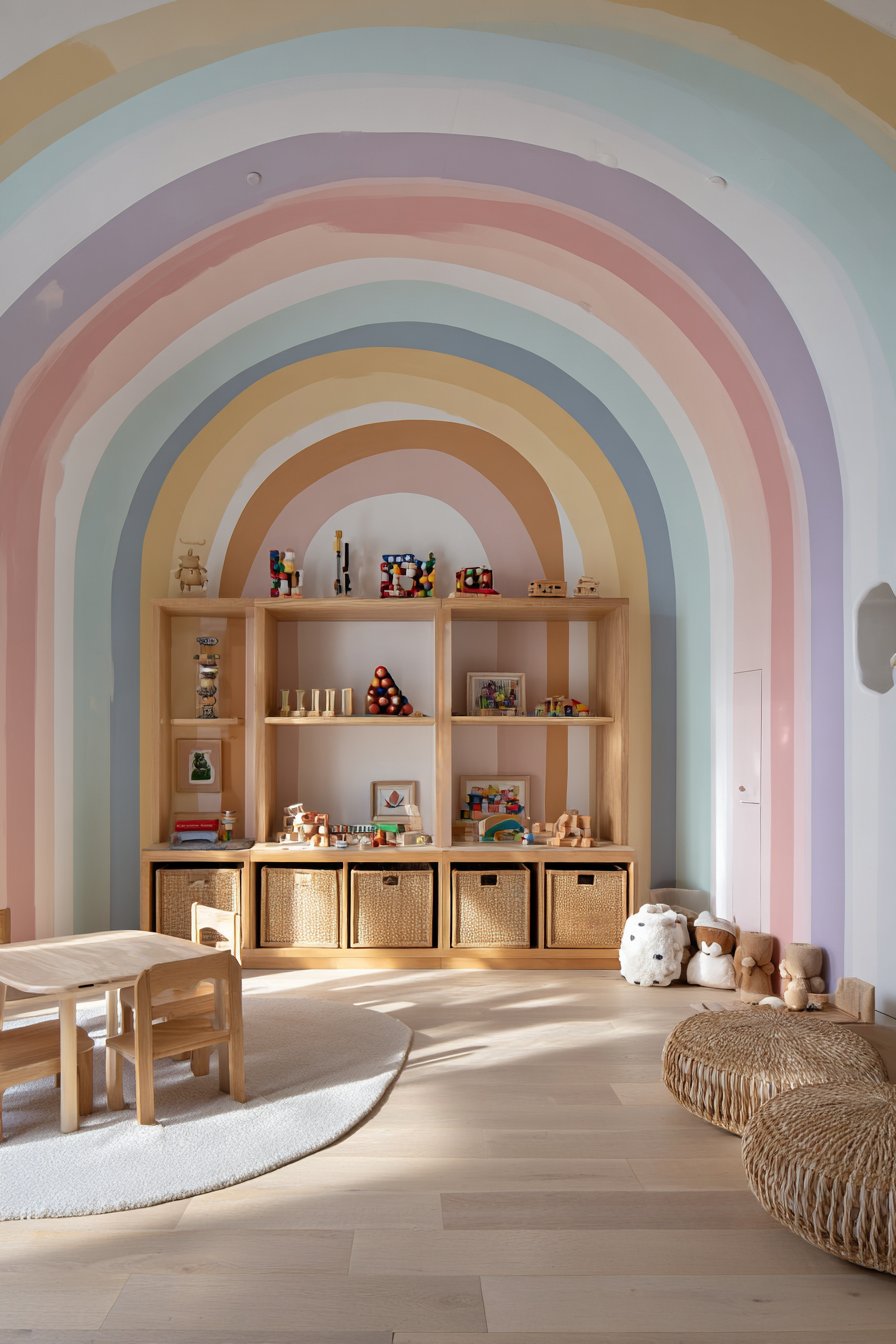
12. Soft Pastel Rainbow Arch for Playroom
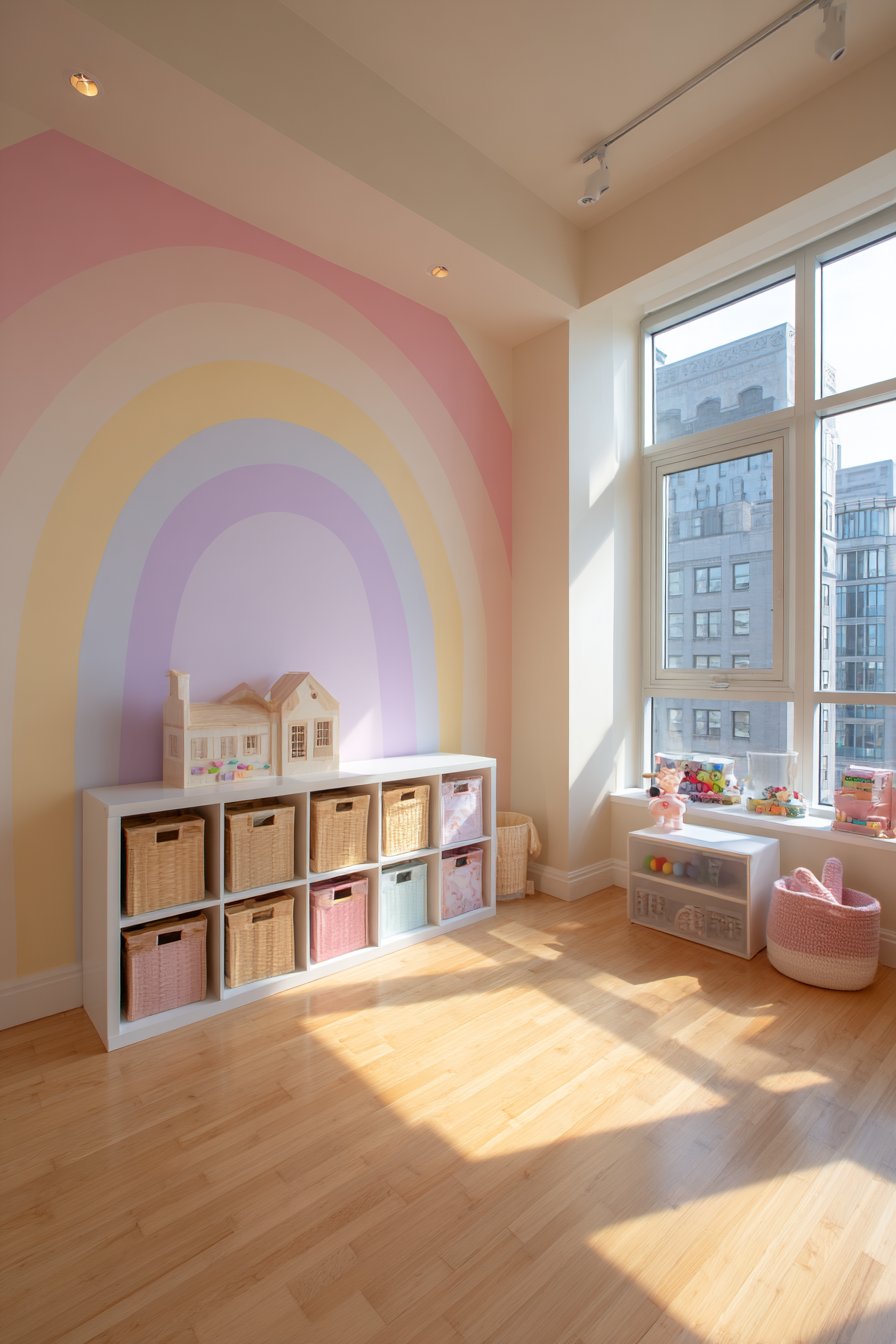
Children’s spaces benefit from playful elements that spark imagination while maintaining design sophistication that respects the home’s overall aesthetic. This playroom wall painting features a hand-painted rainbow arch spanning across white walls in soft pastel shades—pink, peach, yellow, mint, and lavender. Each color band measures approximately twelve inches wide with smooth, gradual transitions between hues. The gentle pastel palette provides color stimulation without the visual intensity of primary-colored rainbows, creating an environment that energizes without overstimulating.
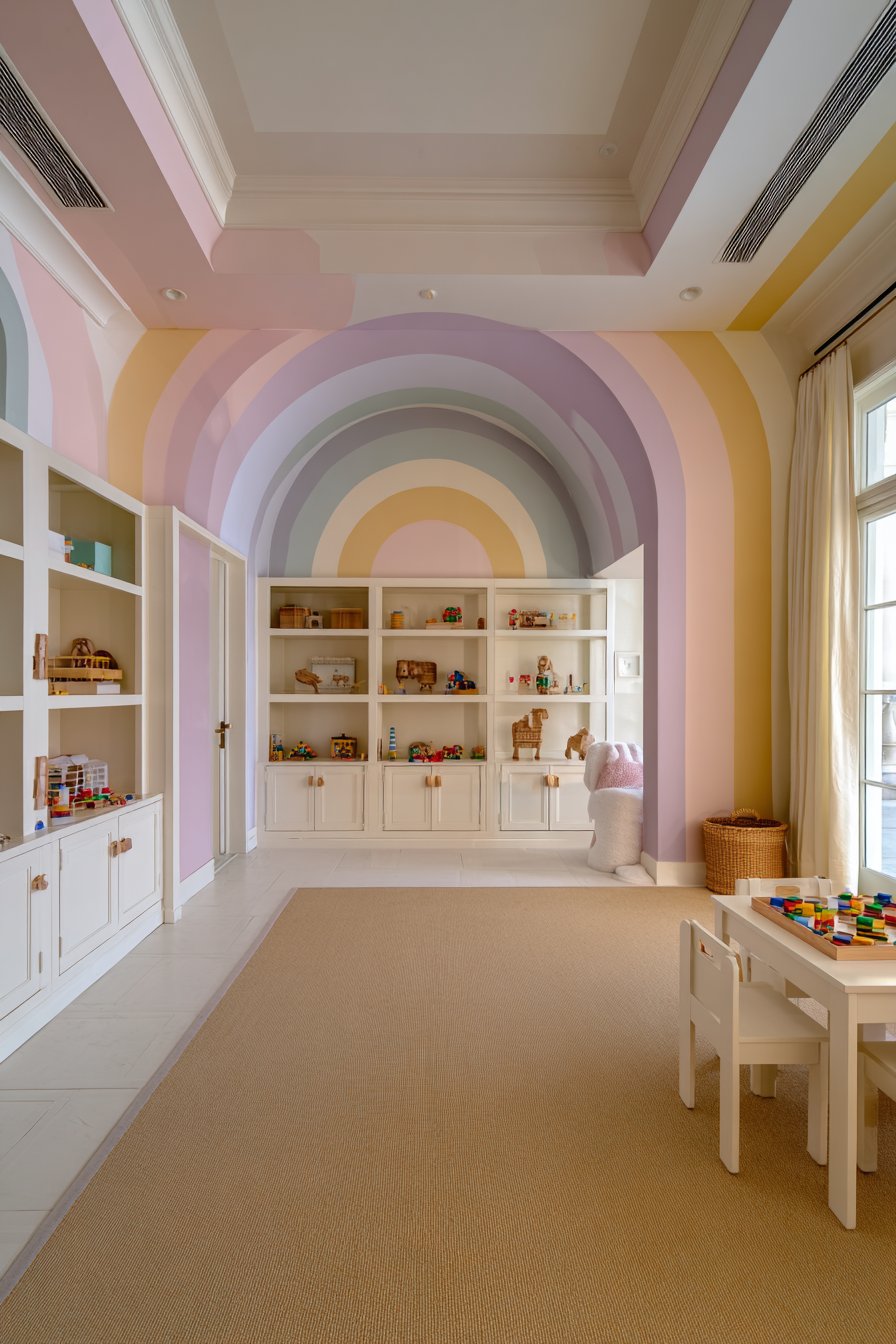
The rainbow arch composition creates a focal point that grounds the room’s design while allowing flexibility in furniture arrangement and toy storage solutions. Unlike all-over patterns or murals that dictate specific furniture placement, the arch functions as a backdrop that works with various room layouts. The white surrounding walls provide essential visual breathing room and make the space feel larger and brighter than it would with more extensive color coverage.
Execution requires careful planning to achieve the characteristic arch shape and smooth color transitions. Creating a large-scale template or using a string compass method ensures symmetrical arching, while patience in blending adjacent colors produces the soft transitions that distinguish this refined approach from harsh, cartoonish rainbows.
Key Design Tips:
- Use low-VOC paints specifically formulated for children’s rooms
- Create arch template using string tied to a pencil, anchored at the arch’s center point
- Paint colors in sequential order, blending transition zones while edges remain wet
- Maintain consistent band widths by measuring and marking before painting
- Consider starting the arch at floor level or wainscot height based on furniture placement
- Balance the rainbow with plenty of white negative space to prevent visual overwhelm
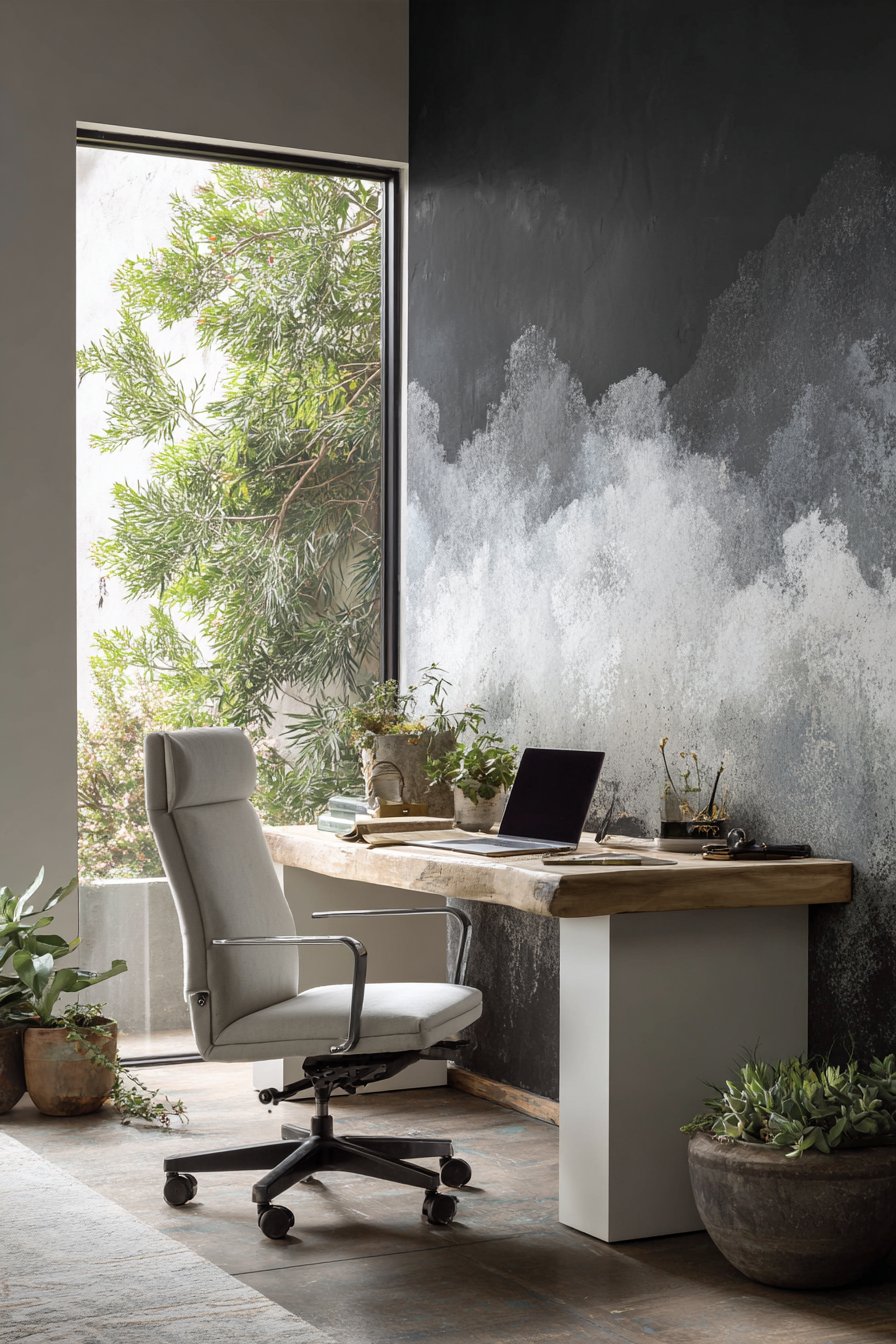
13. Minimalist Charcoal with Horizontal Texture
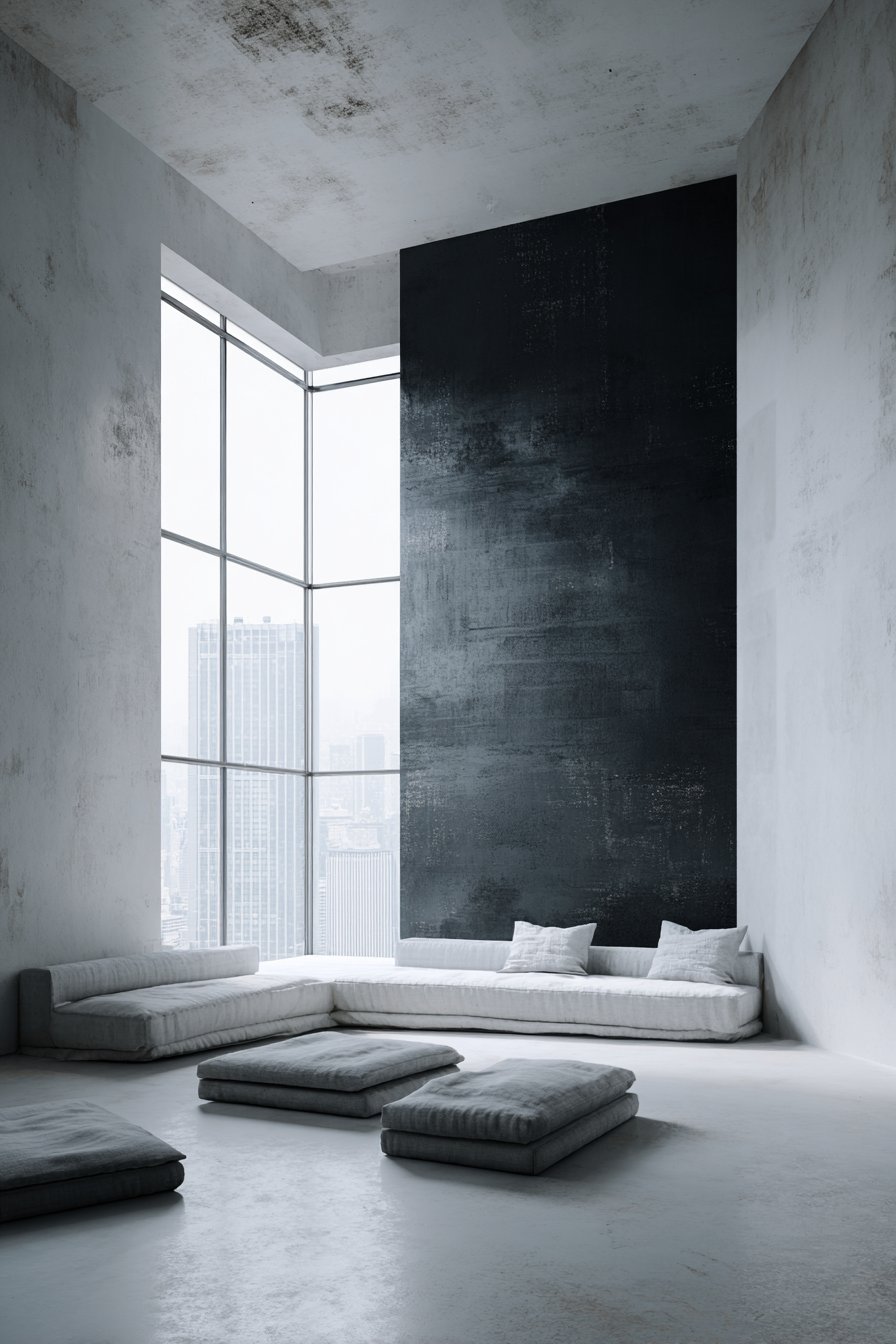
Minimalism doesn’t mean boring, and this charcoal accent wall demonstrates how subtle texture elevates simple color choices into sophisticated design statements. A single accent wall painted in deep charcoal features a barely-there horizontal brushed texture technique that creates subtle striations visible primarily in changing light conditions. This refined approach adds dimensional interest without pattern or color variation, perfect for minimalist aesthetics that prize restraint and attention to subtle detail over obvious decoration.
The textured finish requires specific application techniques that differ from standard rolling or brushing. Long, horizontal strokes applied with consistent pressure create the characteristic striations, with the texture resulting from slight paint buildup along brushstroke edges rather than added materials or products. The subtlety ensures the texture enhances rather than dominates, reading as quality craftsmanship rather than deliberate pattern.
This approach works particularly well in minimalist spaces where every element must justify its presence through both function and carefully considered aesthetics. The charcoal provides necessary contrast against white walls while the texture adds the slight complexity that prevents minimalism from becoming sterile or cold.
Key Design Tips:
- Use high-quality paint with enough body to hold subtle texture without sagging
- Apply paint with a high-quality brush rather than roller for directional stroke control
- Work in consistent horizontal motions from edge to edge without lifting the brush
- Maintain wet edges by working quickly across the wall surface
- Consider whether horizontal or vertical striation better suits your space’s proportions
- View the texture at different angles and lighting conditions before committing to the full wall
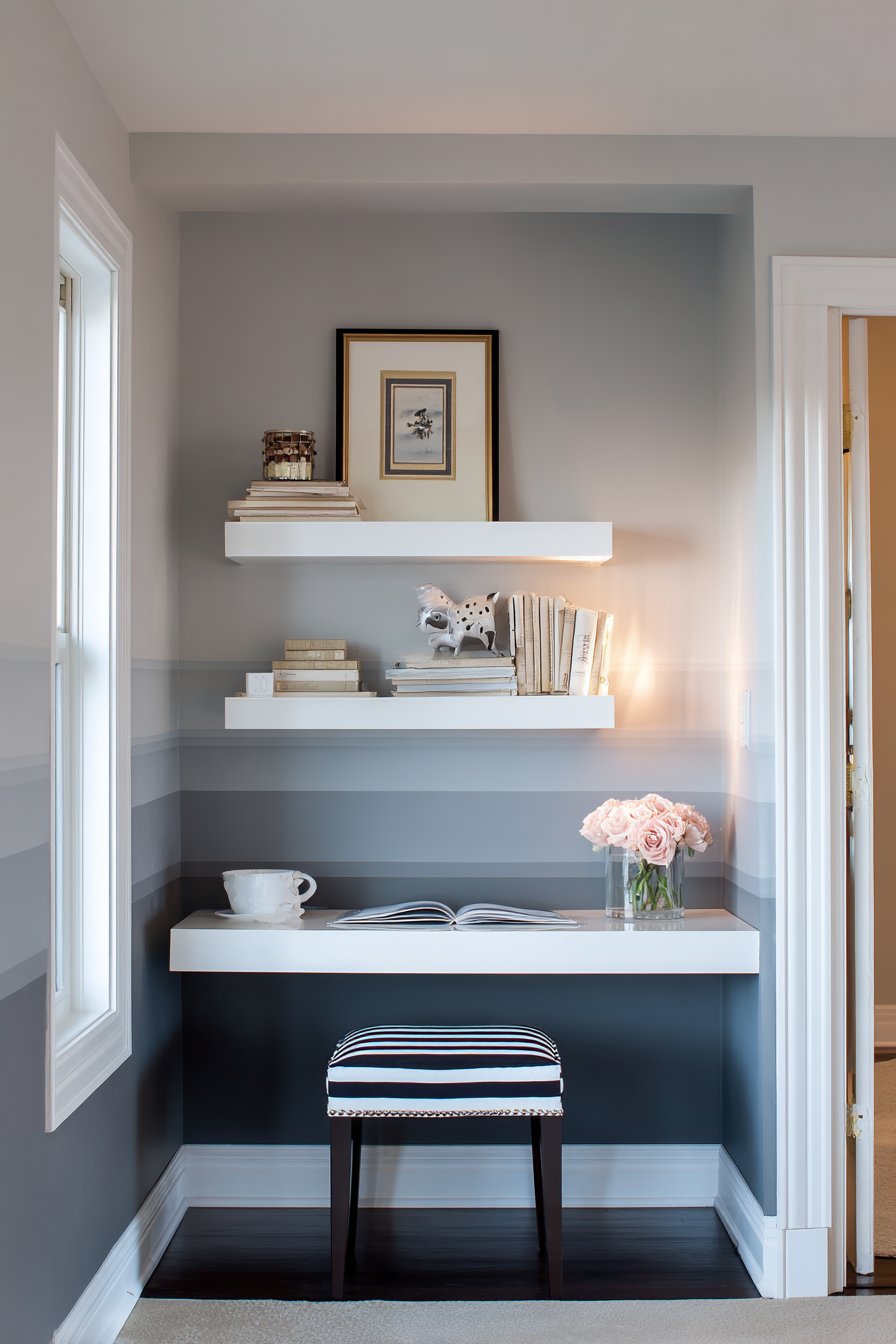
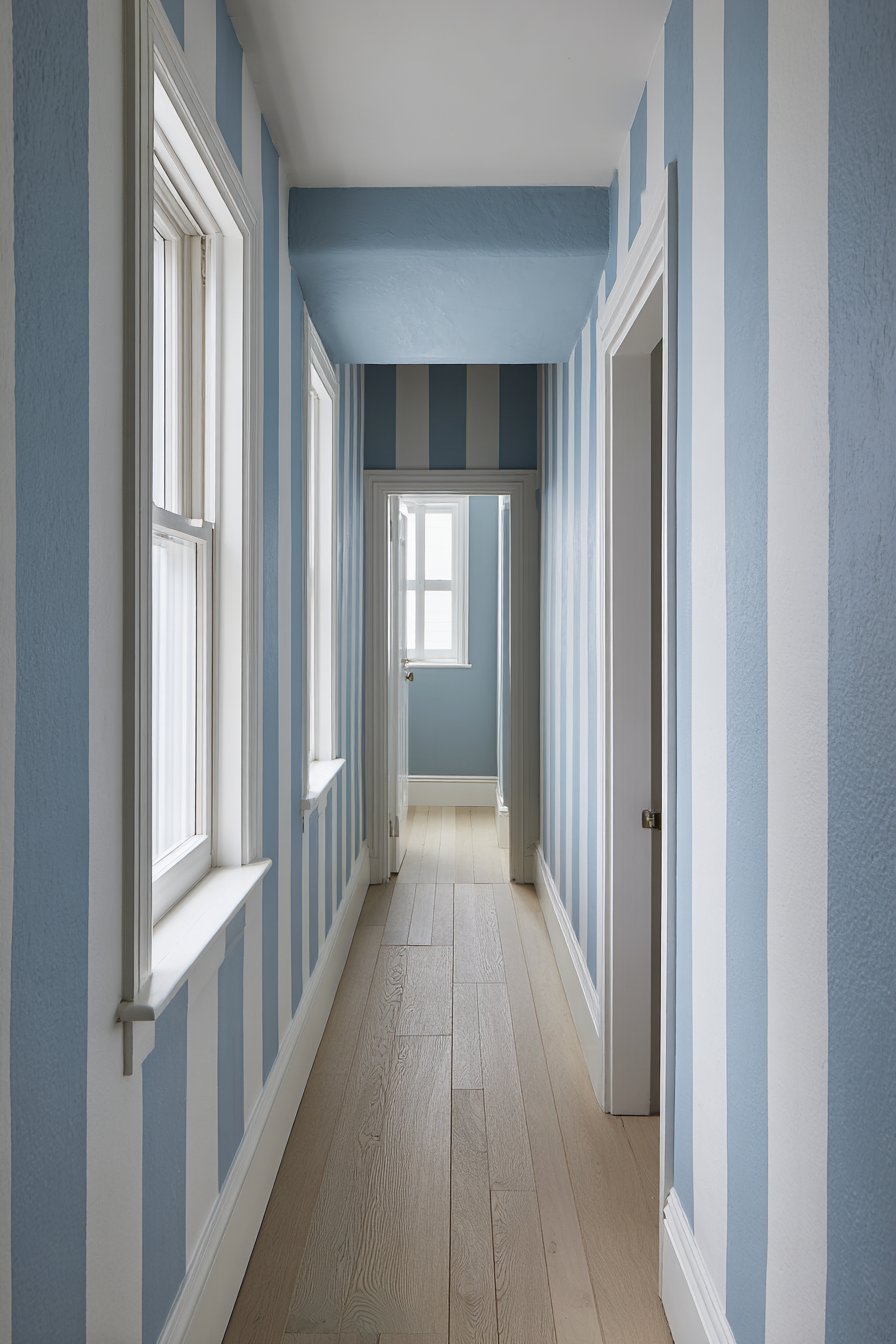
14. Tonal Blue-Gray Stripes in Three Shades
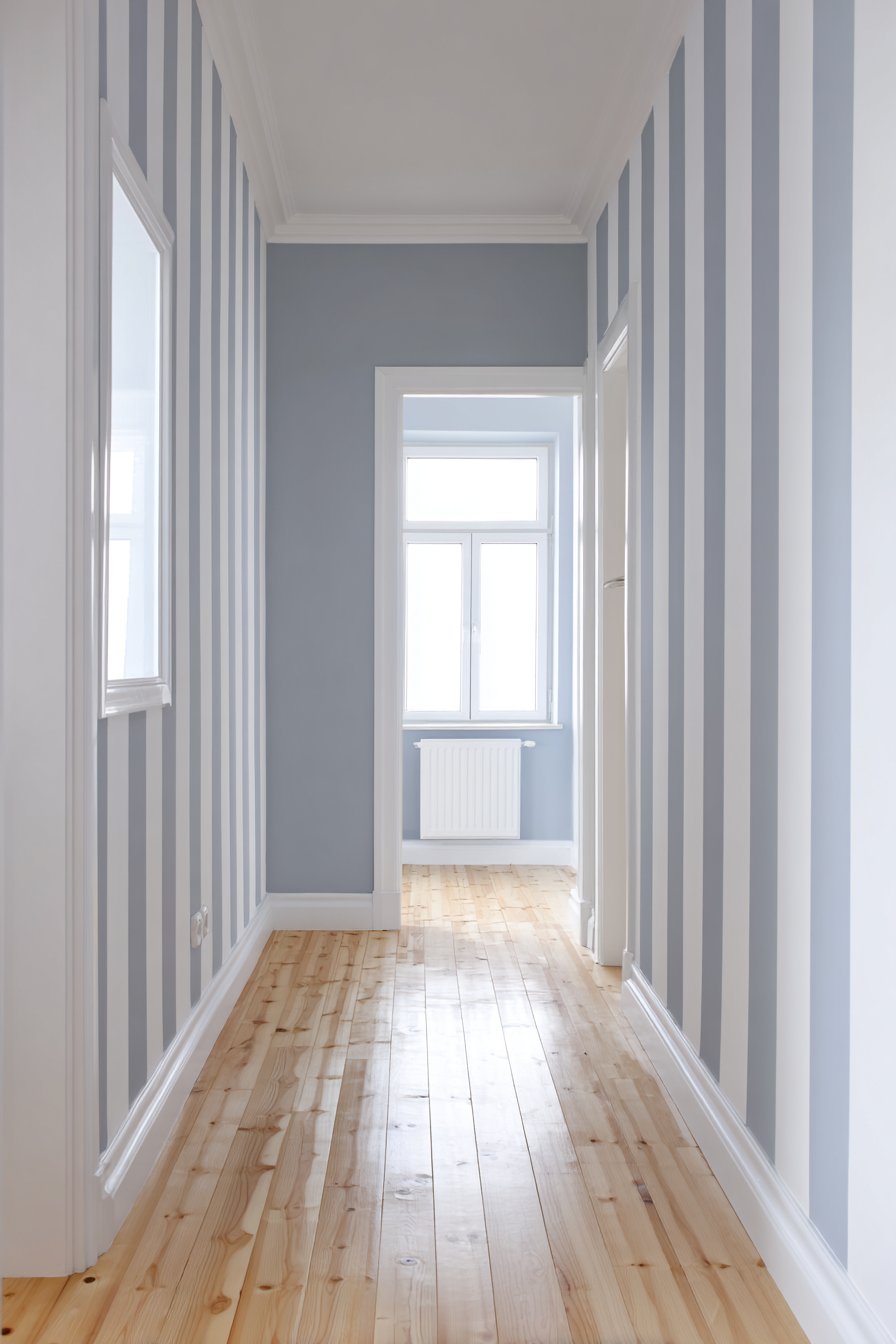
Monochromatic color schemes create sophisticated, cohesive looks that feel intentional and designed without relying on high contrast or bold color combinations. This hallway treatment utilizes three shades of blue-gray in matte finish—light, medium, and dark—arranged in vertical bands of varying widths. The tonal approach adds visual interest while maintaining the calm, flowing quality appropriate for transitional spaces like hallways. The subtle color variations create dimension and prevent the narrow space from feeling flat or boring while avoiding the busy-ness that high-contrast stripes might introduce.
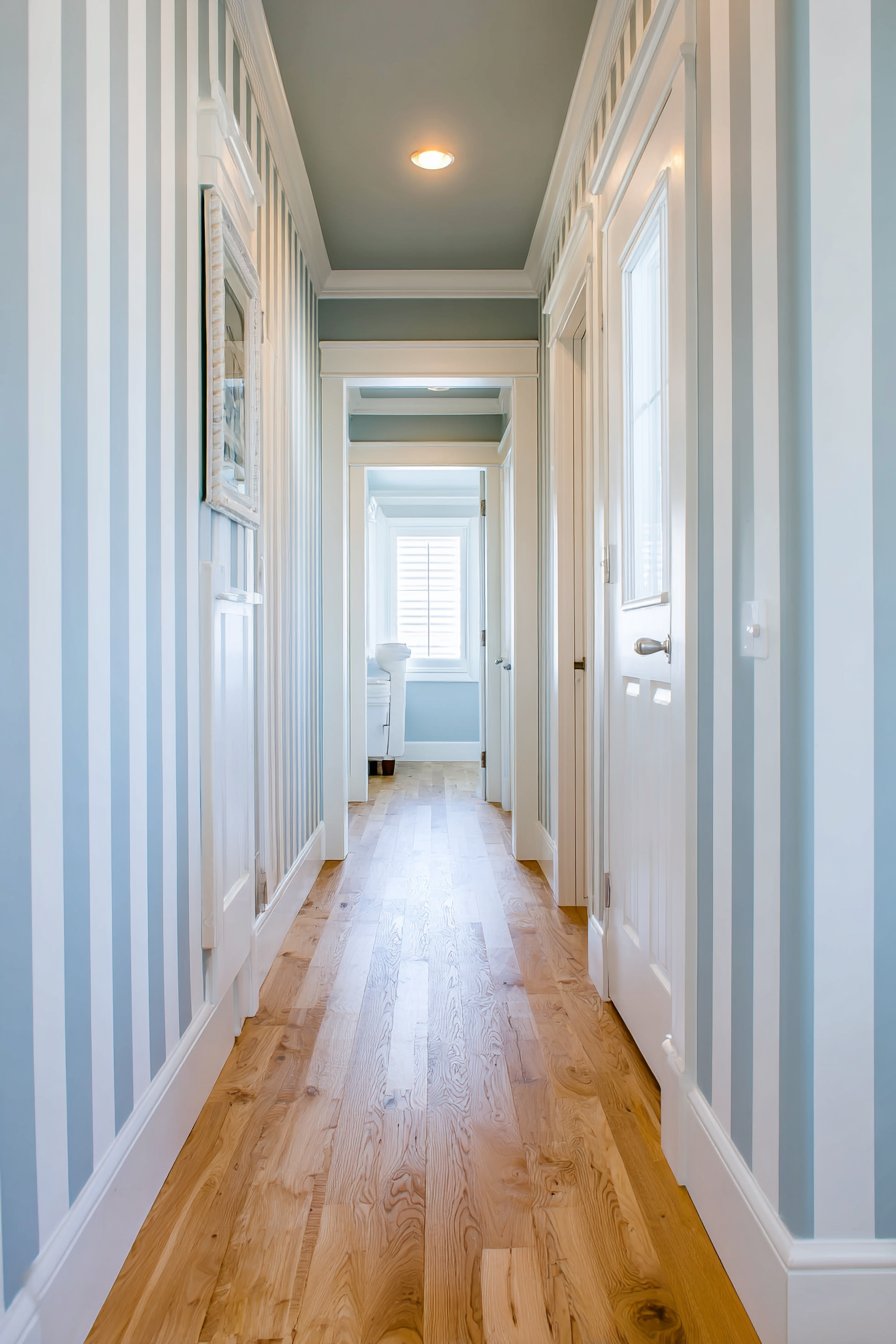
The varying stripe widths prove essential to this design’s success. Uniform stripe widths can feel rigid and predictable, while varied bands create rhythm and visual movement that keeps eyes engaged as one moves through the space. The monochromatic palette ensures this complexity remains soothing rather than chaotic—all variations exist within a single color family, maintaining overall harmony.
Hallways present unique design challenges given their typically narrow, corridor-like proportions. Vertical stripes help counteract the bowling-alley effect by drawing eyes upward and creating the impression of height, making the space feel less compressed. The medium tones prevent the darkness that solid dark colors might create in these often poorly lit spaces while avoiding the institutional feel of unrelieved light colors.
Key Design Tips:
- Select three blue-gray tones that are clearly distinguishable but share the same undertones
- Plan stripe widths ranging from 4 inches to 16 inches for pleasing variation
- Apply the medium tone as base coat, then tape and add light and dark stripes
- Use a level and measuring tape to ensure stripes remain truly vertical
- Consider stripe pattern’s relationship to doorways and architectural features
- Maintain matte finish throughout for cohesive, non-distracting surface quality
15. Energizing Half-Wall Coral and White
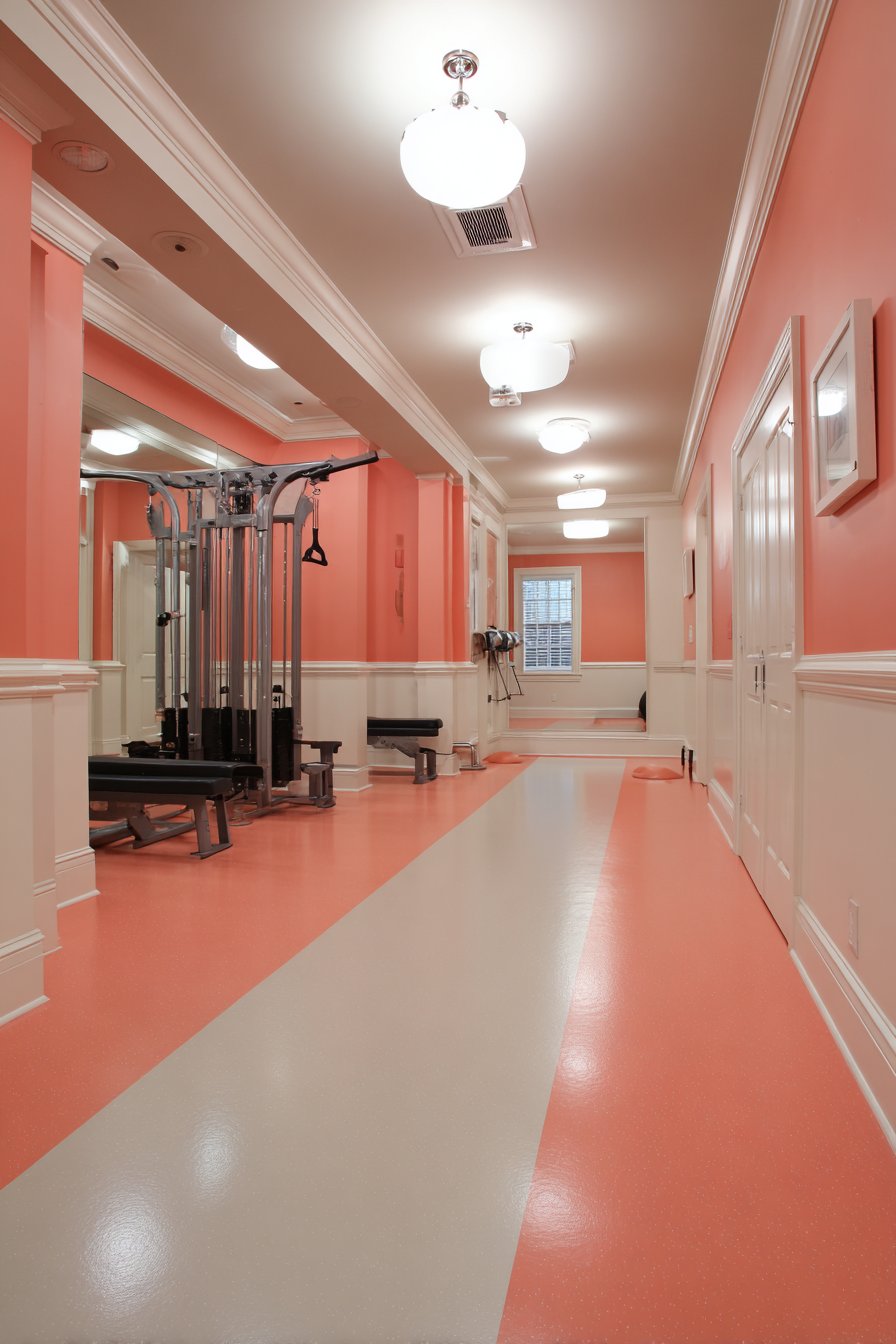
Functional spaces like home gyms benefit from energizing color choices that promote motivation and activity without sacrificing design sensibility. This concept features coral paint covering the lower half of walls with crisp white above, divided by a thin painted horizontal line that creates clean separation. The two-tone treatment injects energy and personality into a utilitarian space while maintaining the clean, uncluttered atmosphere necessary for focused exercise. The coral’s warmth and vibrancy stimulate physical activity, while the white upper walls and ceiling prevent the space from feeling enclosed or overwhelming during intensive workouts.
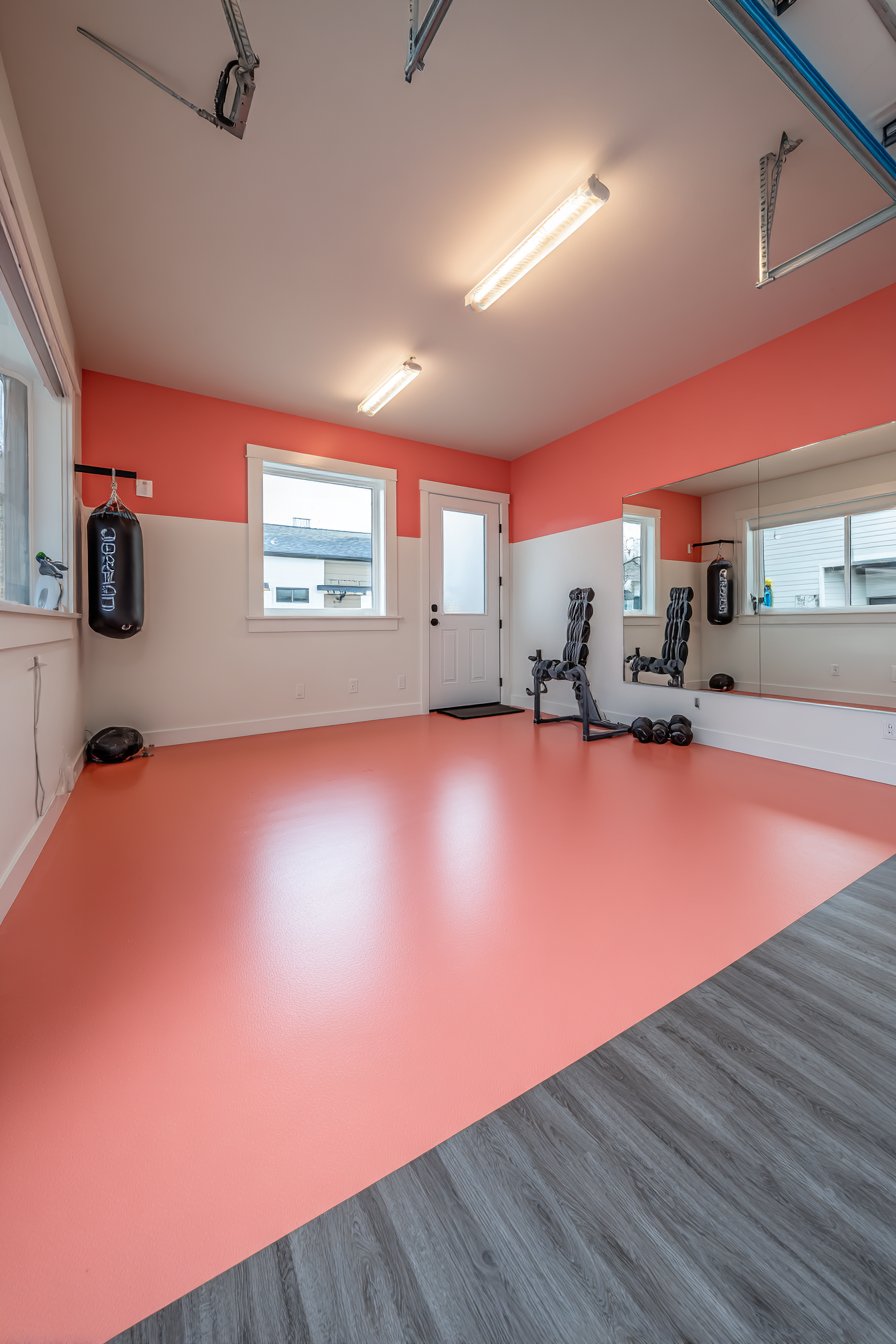
The strategic placement of brighter color in the lower half aligns with typical gym equipment positioning and sightlines during exercise. When using floor-based equipment or performing exercises facing walls, eyes naturally fall at this lower level, making the energizing coral immediately visible. The white upper area maintains openness and reflects light effectively, ensuring adequate brightness for safety and motivation.
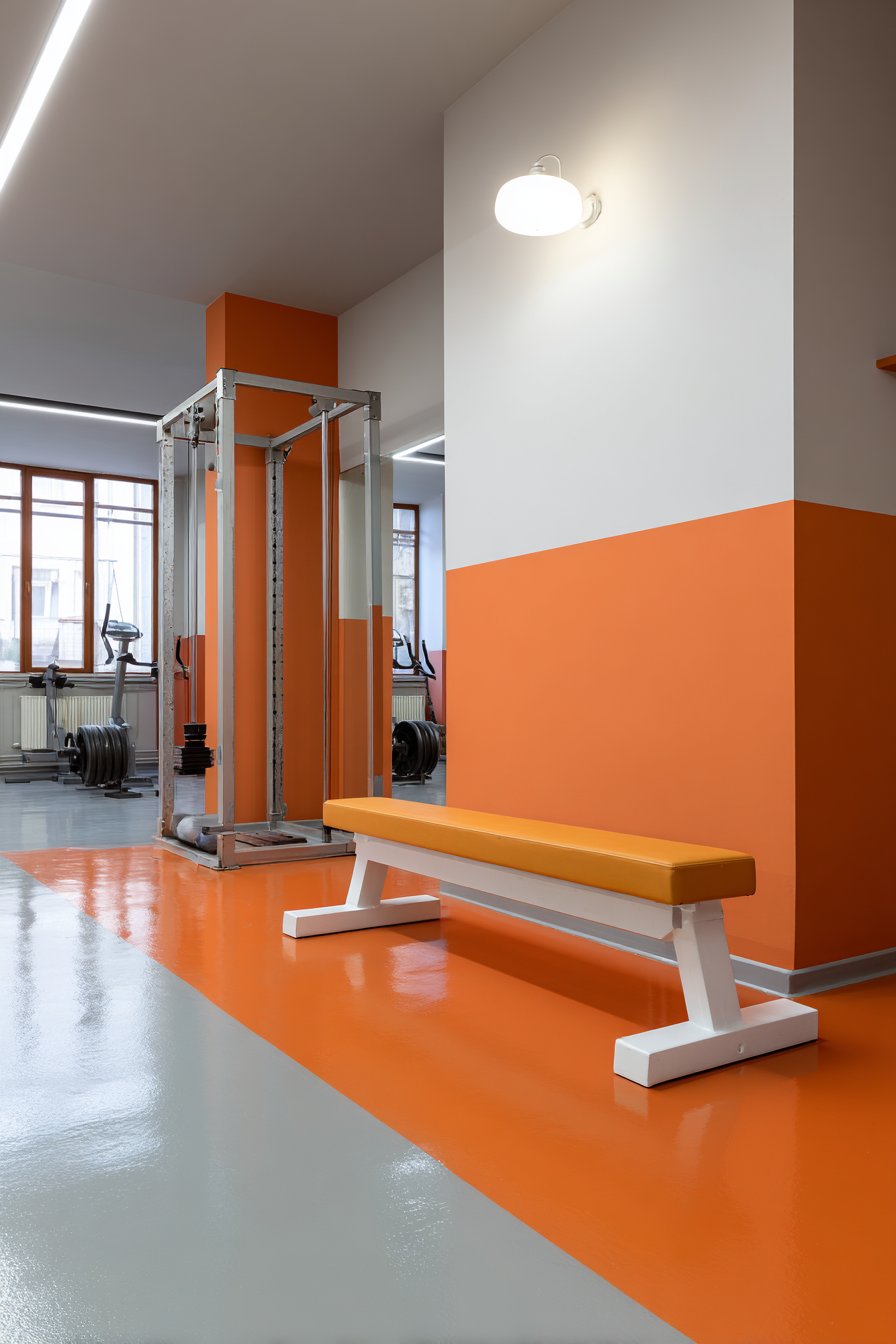
The thin dividing line between colors, while subtle, provides definition and intentionality that prevents the design from reading as unfinished or arbitrary. This crisp separation demonstrates attention to detail and design consideration, elevating what might otherwise seem like a basic two-tone paint job into a thoughtful design choice.

Key Design Tips:
- Position the color division at approximately 36-42 inches from the floor for balanced proportions
- Choose coral tones with enough saturation for energy without overwhelming during long workouts
- Use semi-gloss or satin finish for easier cleaning of inevitable sweat and contact marks
- Ensure adequate ventilation as this space requires good air circulation regardless of wall color
- Consider how the coral interacts with any equipment colors or storage solutions
- Add motivational elements or graphics within the coral section for additional inspiration
16. Painted Headboard Arch in Sage Green

Architectural elements painted directly onto walls offer cost-effective alternatives to physical furniture while providing unique, custom design solutions. This Scandinavian-style bedroom features a painted headboard effect—a large rounded arch shape in soft sage green applied directly to the white wall behind the bed. The organic arch shape creates a focal point and defines the sleeping area without the expense, bulk, or commitment of physical headboard furniture. The gentle sage green maintains the Nordic aesthetic’s characteristic connection to nature while providing just enough color to prevent the space from feeling too stark.
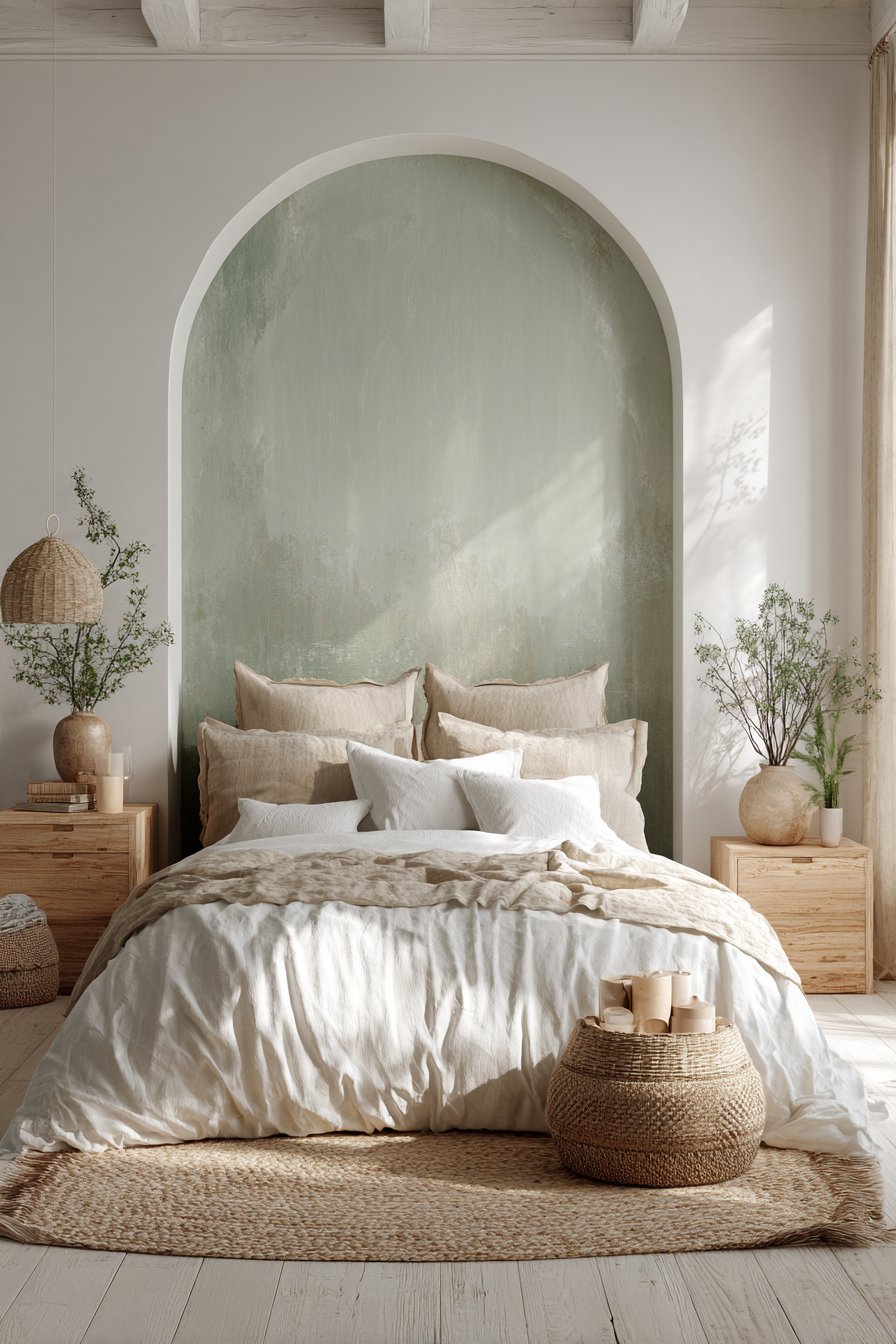
The painted headboard concept demonstrates brilliant design economy—achieving visual impact through paint alone rather than additional furniture or decoration. This approach works particularly well in smaller bedrooms where physical headboards might overwhelm the space or in rental situations where permanent furniture decisions feel premature. The rounded arch shape introduces soft, organic geometry that contrasts pleasingly with the room’s rectangular architecture and linear furniture pieces.
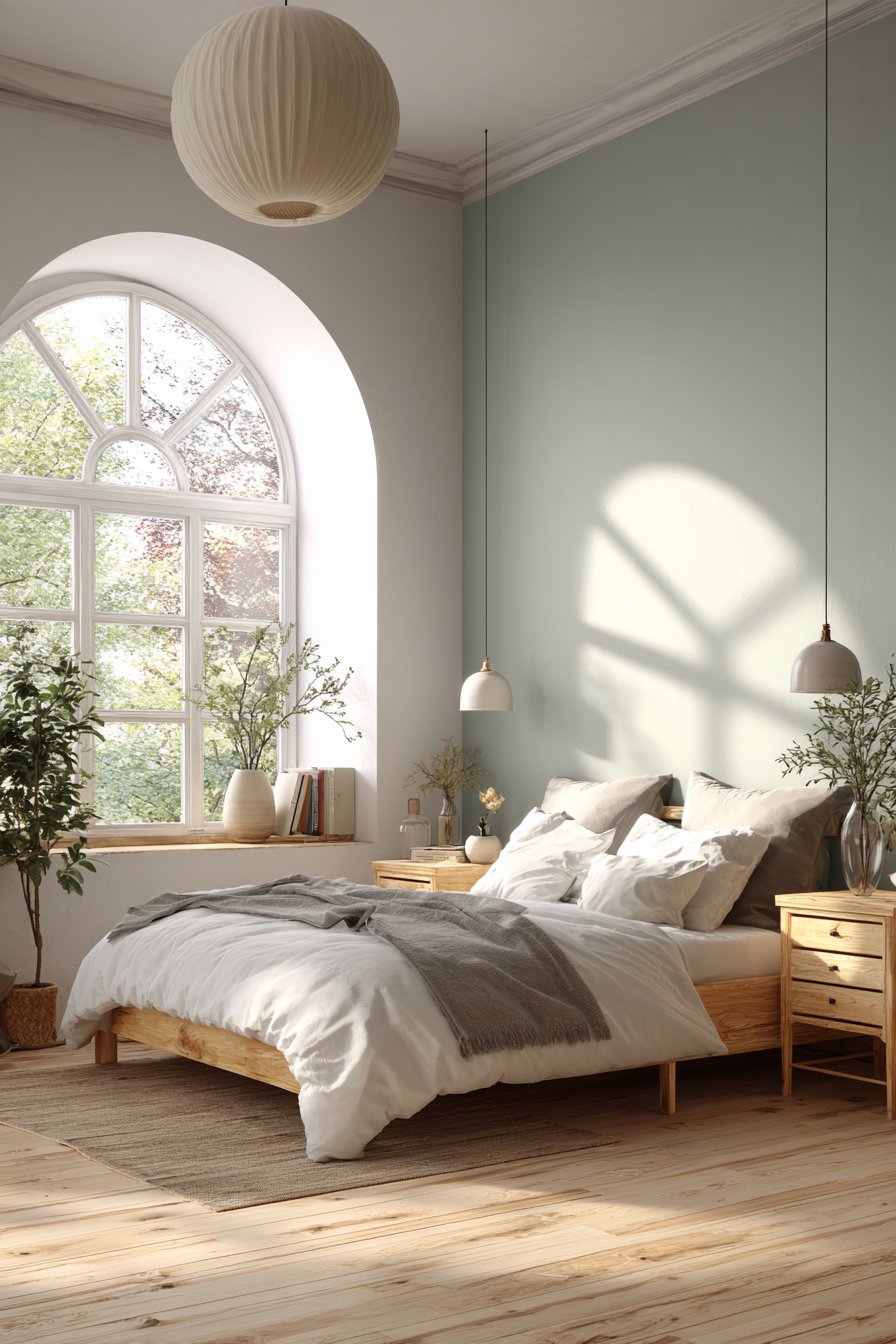
Execution requires planning to achieve the desired scale and proportions. The arch should feel purposeful and generous—too small reads as timid or unfinished, while oversized can overwhelm the bed and surrounding space. The smooth paint finish and clean edges distinguish this from stenciled or freehand work, creating a professional appearance that feels integrated into the architecture.

Key Design Tips:
- Size the arch approximately 6-12 inches wider than the bed on each side
- Extend the arch 24-36 inches above the mattress top for proper proportion
- Create a template using string and pencil for symmetrical arching
- Apply painter’s tape carefully along the arch outline for clean edges
- Use at least two coats of sage green for solid, even coverage
- Consider adding subtle variation within the green for added interest, such as gentle color-washing
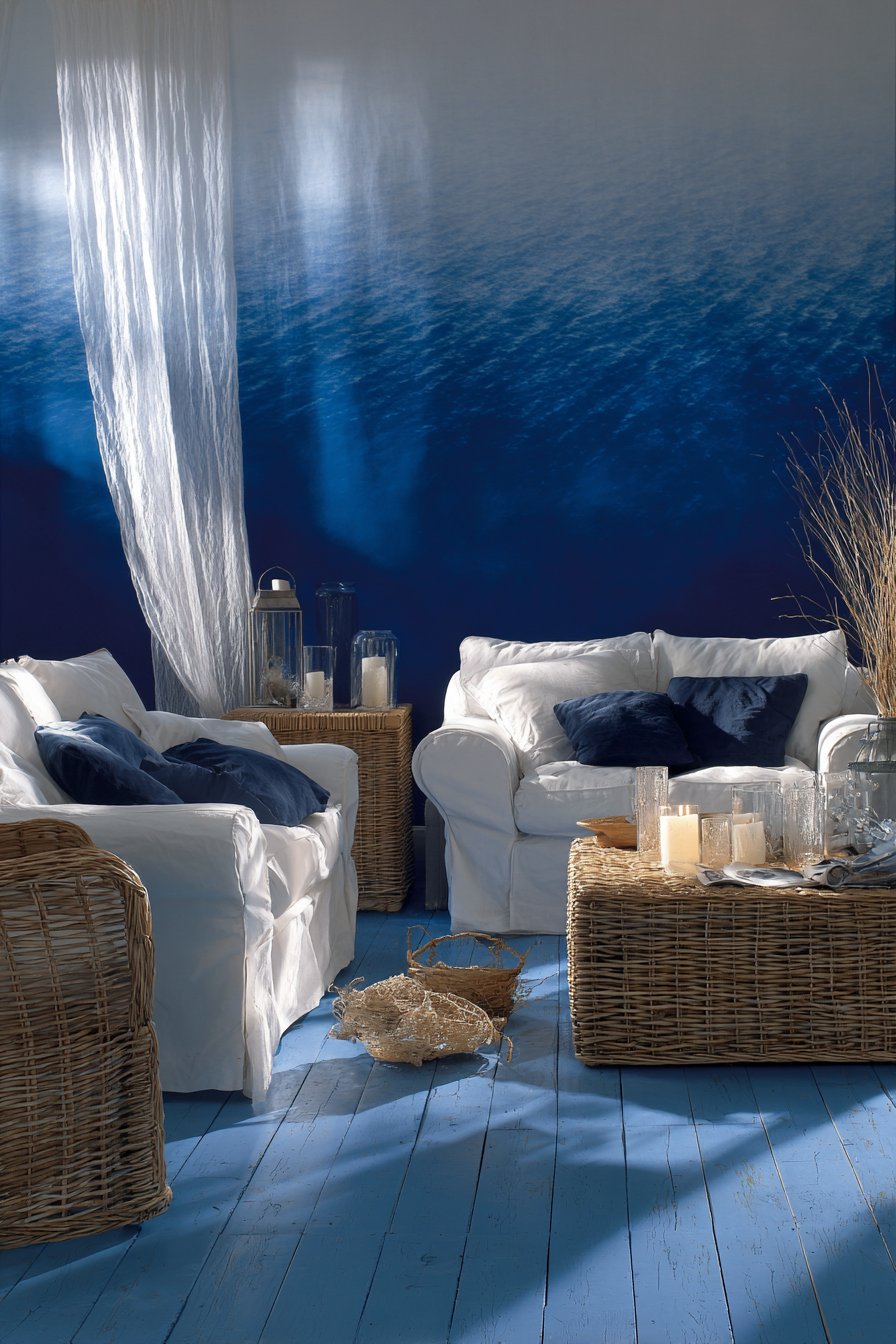
17. Ocean-Inspired Horizontal Gradient
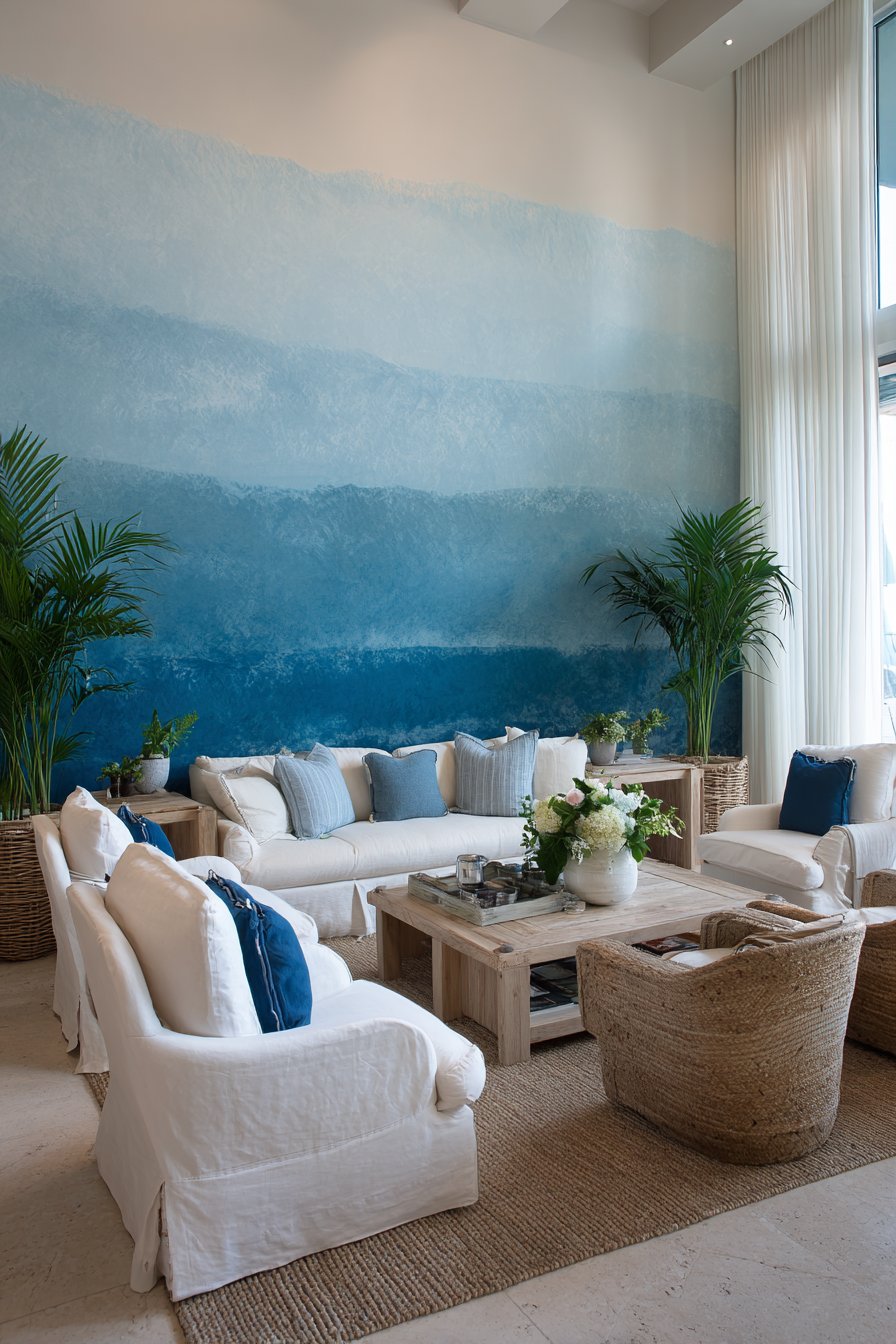
Nature provides endless inspiration for interior color palettes, and this coastal living room captures ocean depths through carefully graduated shades of blue. The horizontal drift pattern progresses from deep navy at the bottom through medium blues to sky blue at the top, mimicking the way ocean water appears darker in the depths and lighter toward the surface. This sophisticated interpretation of ombre technique creates serene atmosphere perfect for relaxation and coastal living while demonstrating more color complexity than simple two-tone treatments.
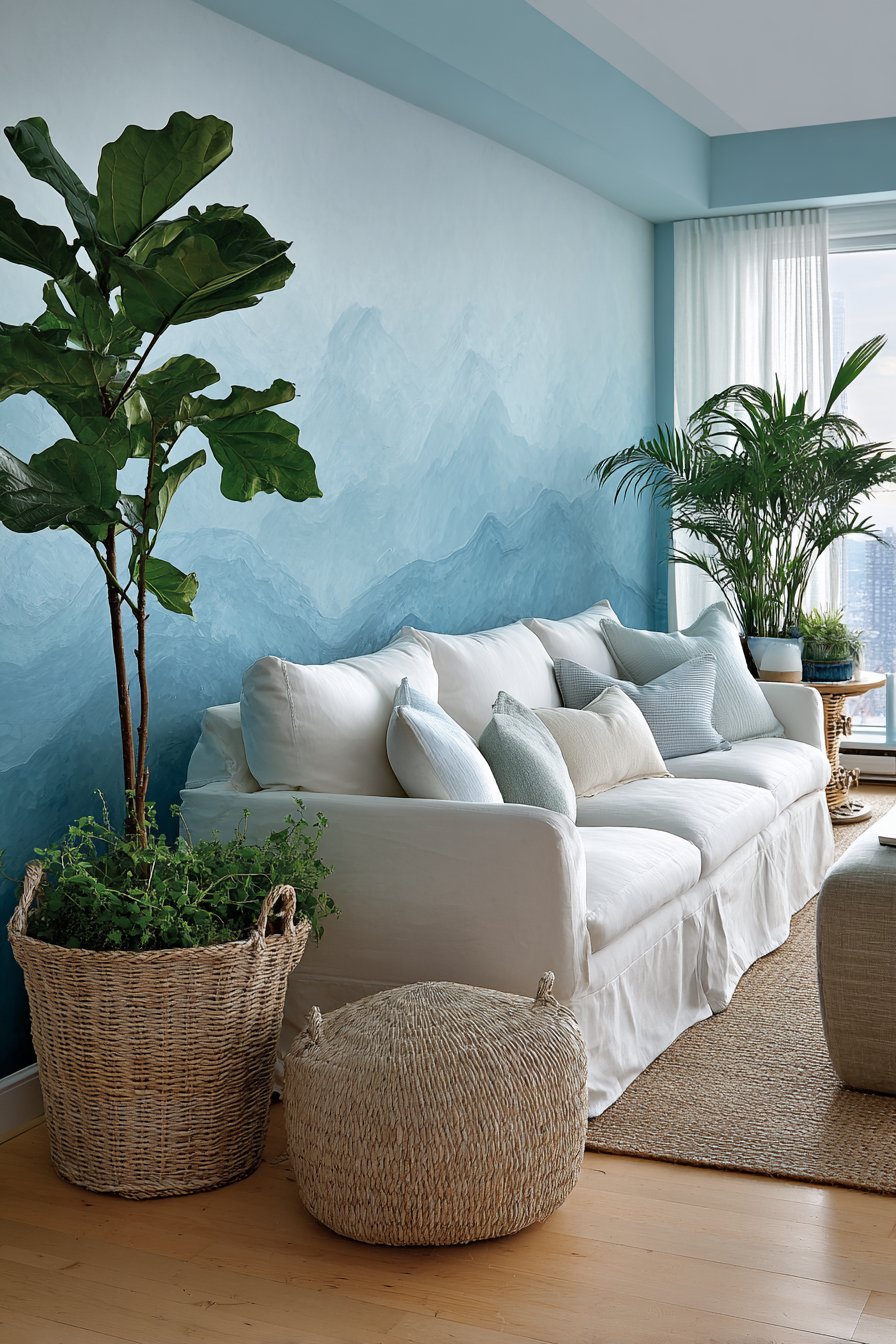
The blended paint technique requires skill and patience but delivers results that read as custom artistic installation rather than standard paint job. Working with multiple blue tones—typically five to seven distinct shades—painters create smooth transitions that appear almost photographic in their naturalistic quality. The horizontal orientation references ocean horizons and reinforces the coastal theme while creating visual width that can make rooms feel more spacious.
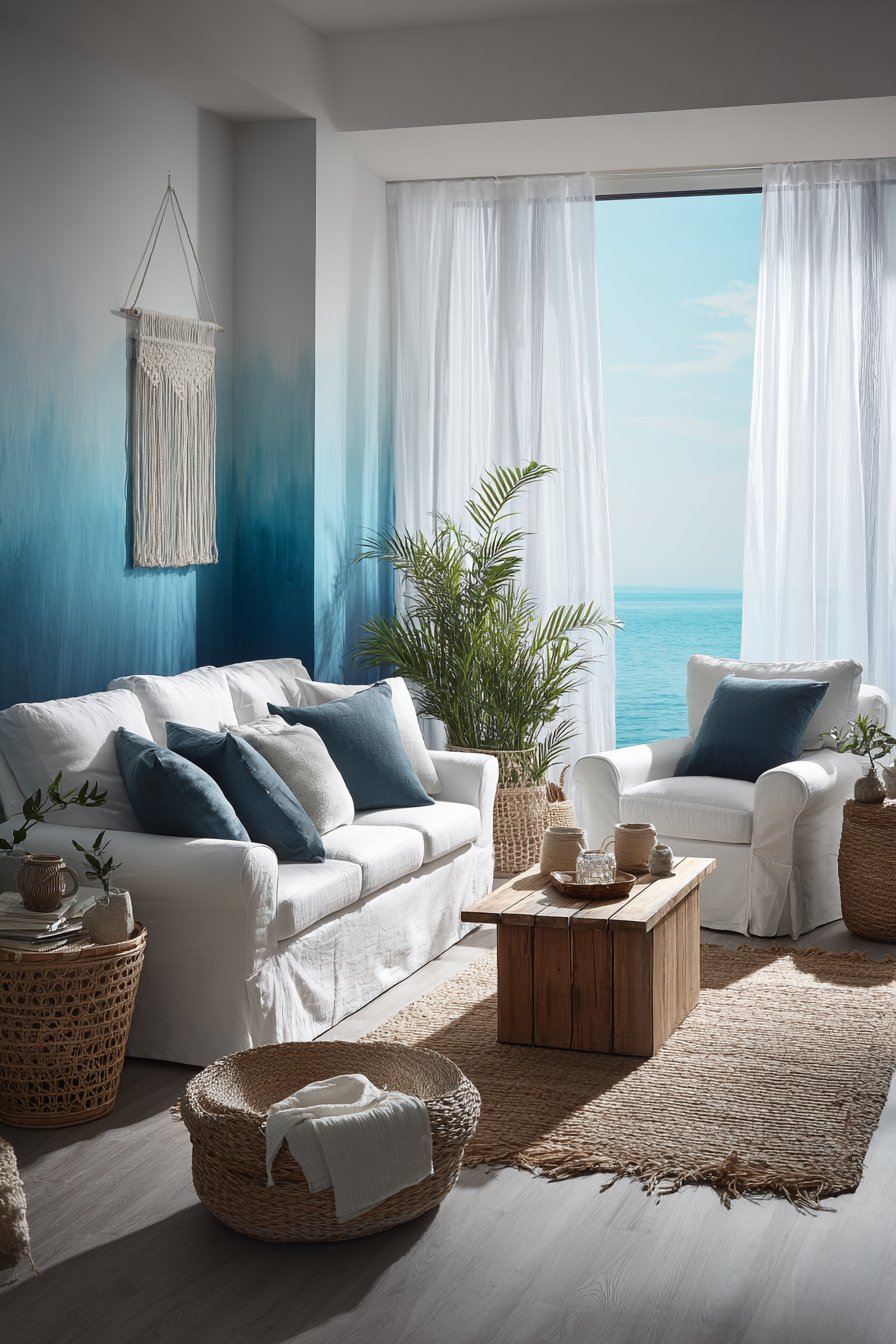
Supporting elements enhance the ocean-inspired wall treatment. White slipcovered furniture mimics sea foam and sandy beaches, while natural textures like jute, linen, and weathered wood reinforce the coastal aesthetic without veering into literal or kitschy nautical decoration. The walls become the hero element that establishes the room’s entire design direction.
Key Design Tips:
- Select blues from the same color family with consistent undertones for harmonious blending
- Create a gradient chart showing each blue and its placement before beginning
- Work in horizontal bands, blending transition zones with a large soft brush or sponge
- Begin with the darkest navy at the bottom and progress upward systematically
- Maintain consistent moisture levels for smooth blending without lap marks
- Consider how the gradient interacts with furniture heights and window placement
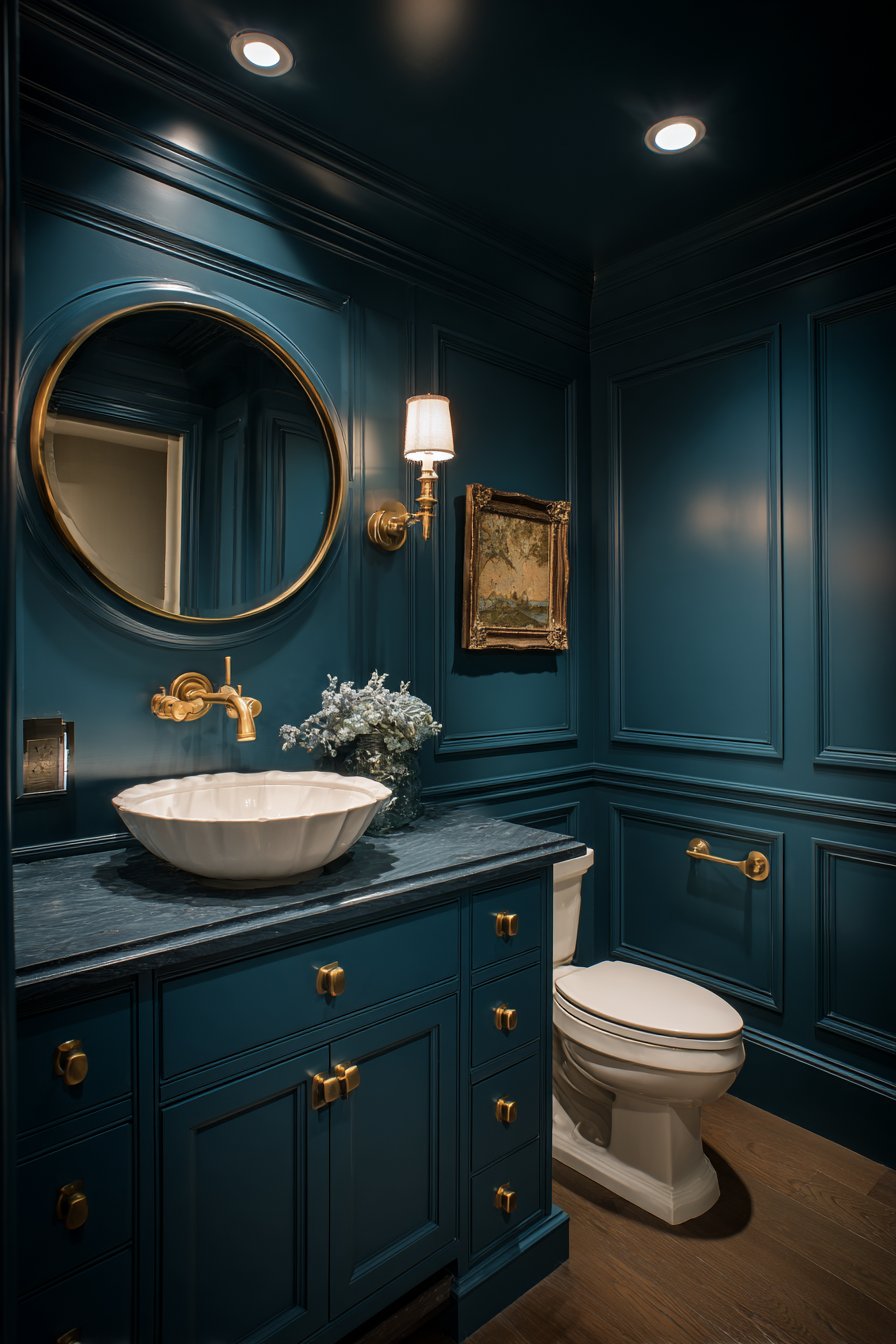
18. Jewel-Box Teal in Small Powder Room
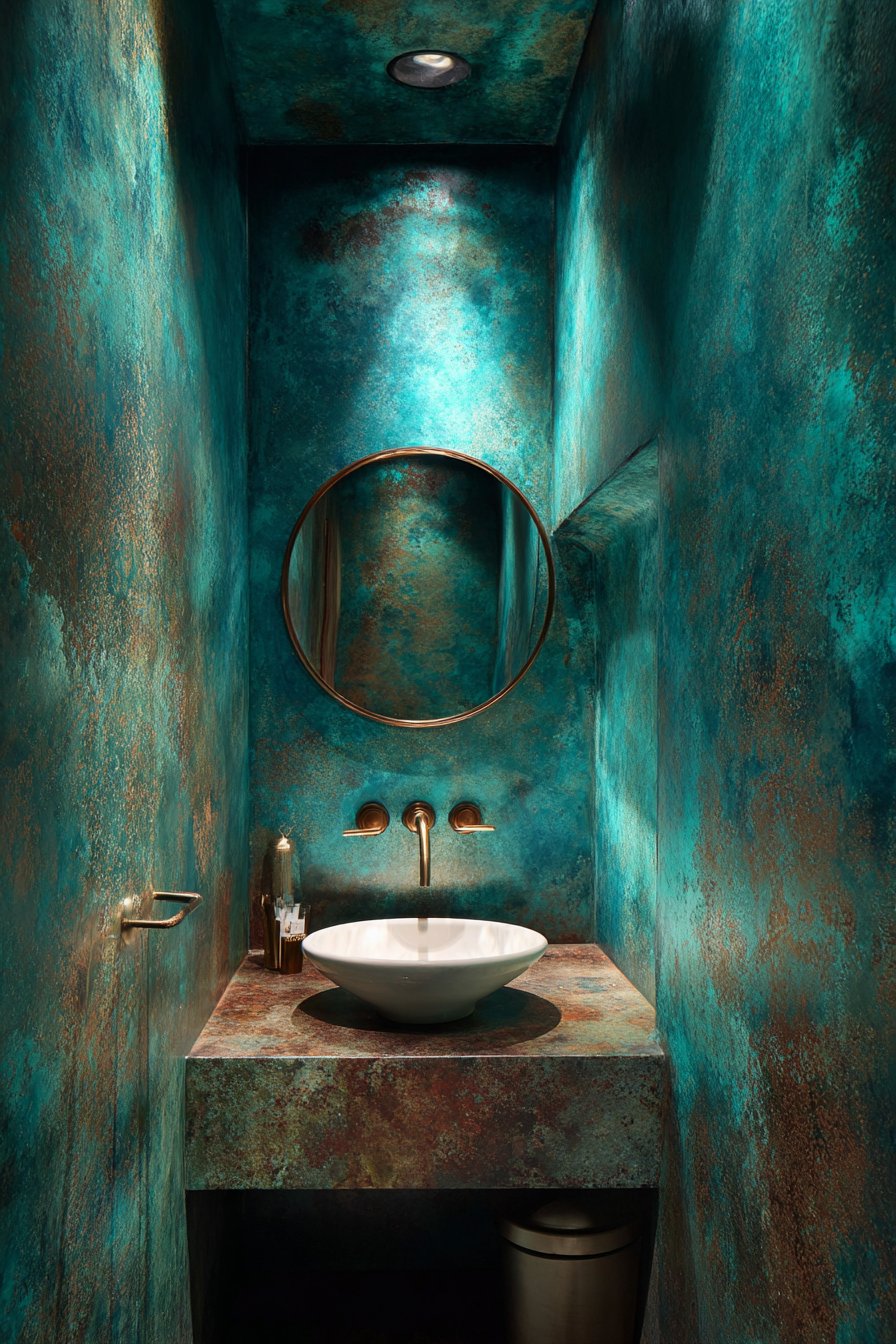
Small spaces present unique opportunities for bold design choices that might overwhelm larger rooms. This powder room embraces dramatic dark teal covering all walls and ceiling, creating an enveloping jewel-box effect that transforms a utilitarian space into a memorable design moment. The rich color contrasts beautifully with white porcelain fixtures and brass hardware, creating sophisticated drama in a space typically relegated to simple, safe design choices. Rather than making the small room feel cramped, the dark walls paradoxically create depth and intimacy that makes the space feel intentional and special.
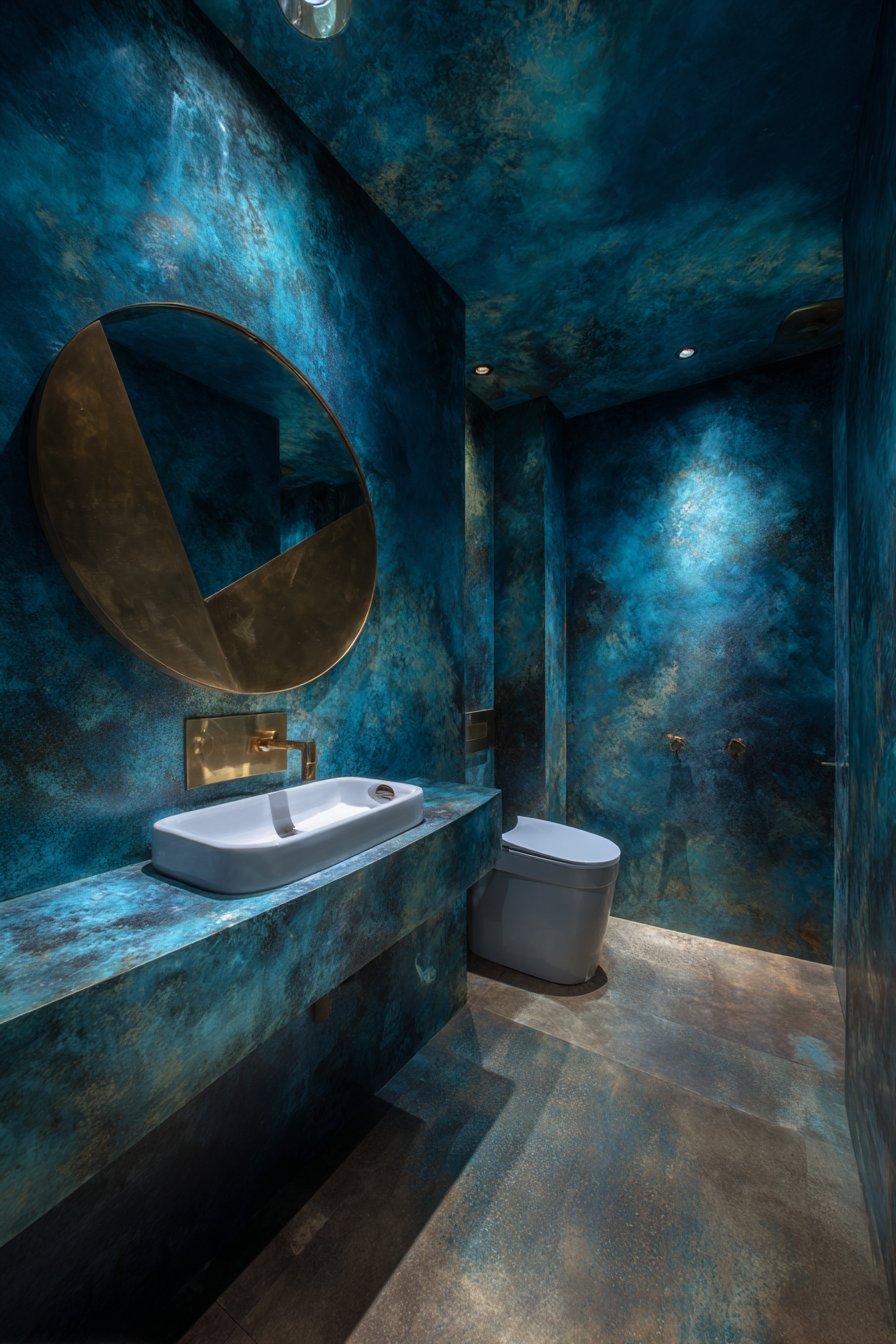
The all-over application, including the ceiling, proves crucial to this approach’s success. Stopping the dark color at the ceiling line would create a truncated, incomplete feeling, whereas continuing the teal overhead creates full immersion in the color. This technique works because powder rooms, as guest bathrooms without showers, function as brief-visit spaces where dramatic color creates impact without the potential fatigue of living with very dark colors in primary rooms.
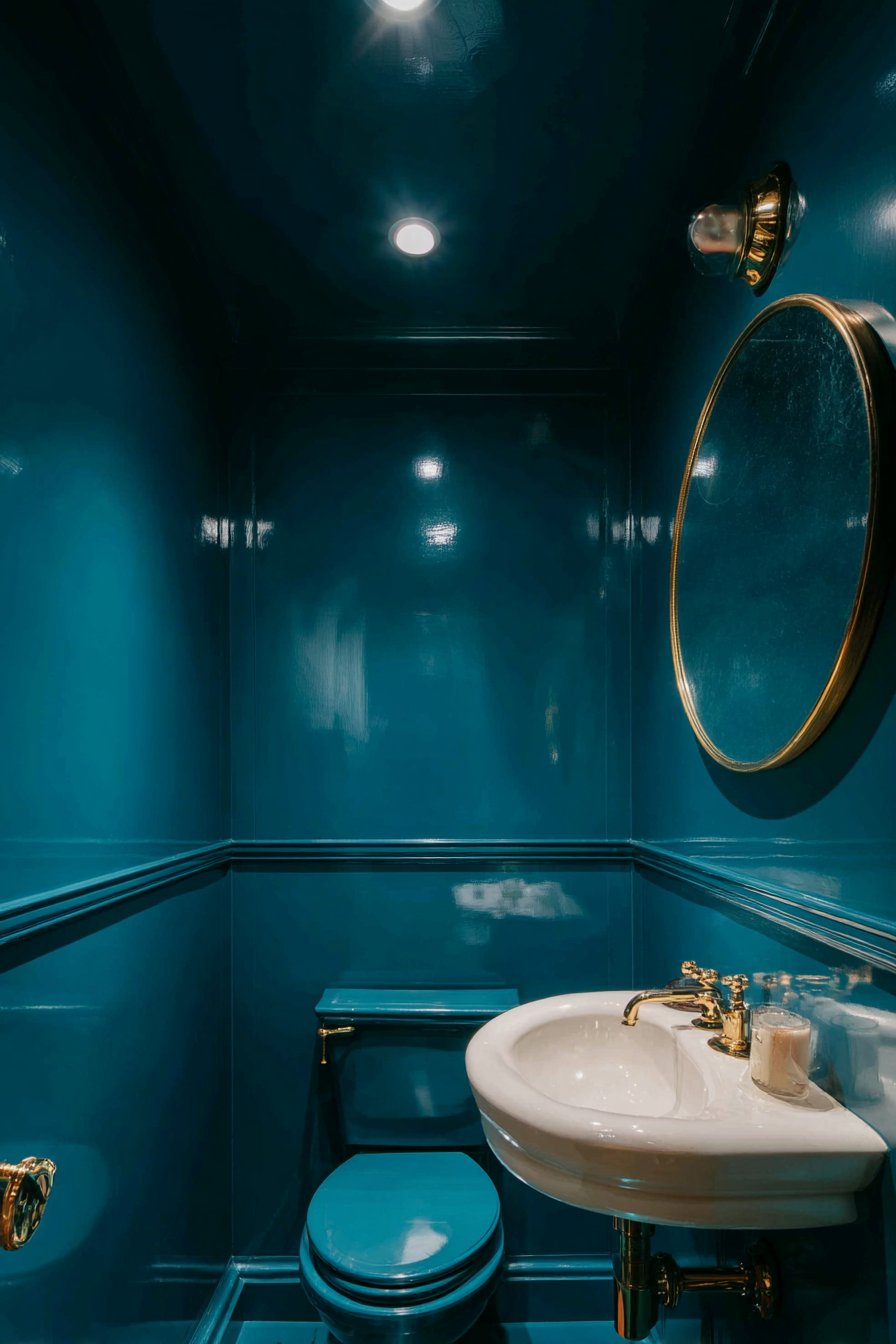
Lighting becomes absolutely critical in dark powder rooms. Recessed lighting, sconces flanking the mirror, or decorative fixtures must provide adequate illumination for grooming tasks while preventing the dark walls from absorbing so much light that the space becomes gloomy. The brass fixtures mentioned serve double duty as decorative elements and light reflectors, adding warm highlights throughout the space.
Key Design Tips:
- Choose teal with enough depth for drama but enough brightness to avoid muddiness
- Apply three coats for full coverage and rich color saturation on walls and ceiling
- Install adequate lighting with multiple sources positioned strategically
- Use semi-gloss or high-gloss finish for light reflection and easy cleaning
- Introduce metallics through fixtures, frames, and accessories for warmth and highlight
- Ensure proper ventilation to prevent humidity issues with ceiling paint
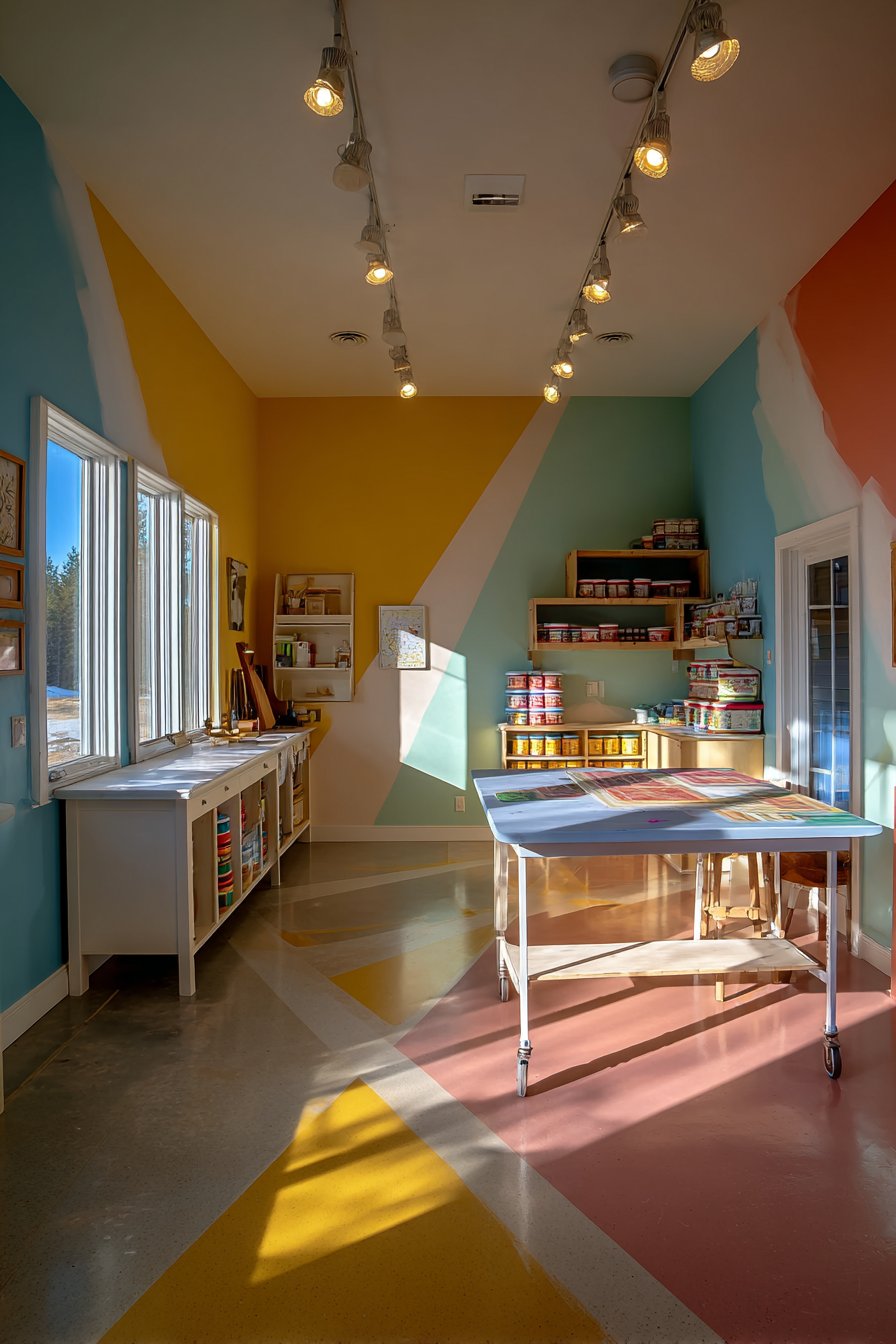
19. Contemporary Four-Color Block Design
Color-blocking reaches its full potential when multiple colors create geometric compositions that feel both bold and balanced. This craft room features four distinct sections in complementary shades—mustard yellow, terracotta, dusty pink, and sage green—meeting at precise angles for a modern geometric effect. The contemporary approach to color-blocking differs from traditional two-tone walls by embracing complexity and creating almost quilt-like patterns that provide visual stimulation appropriate for creative workspaces. Each color occupies roughly equal space, creating balance without symmetry.
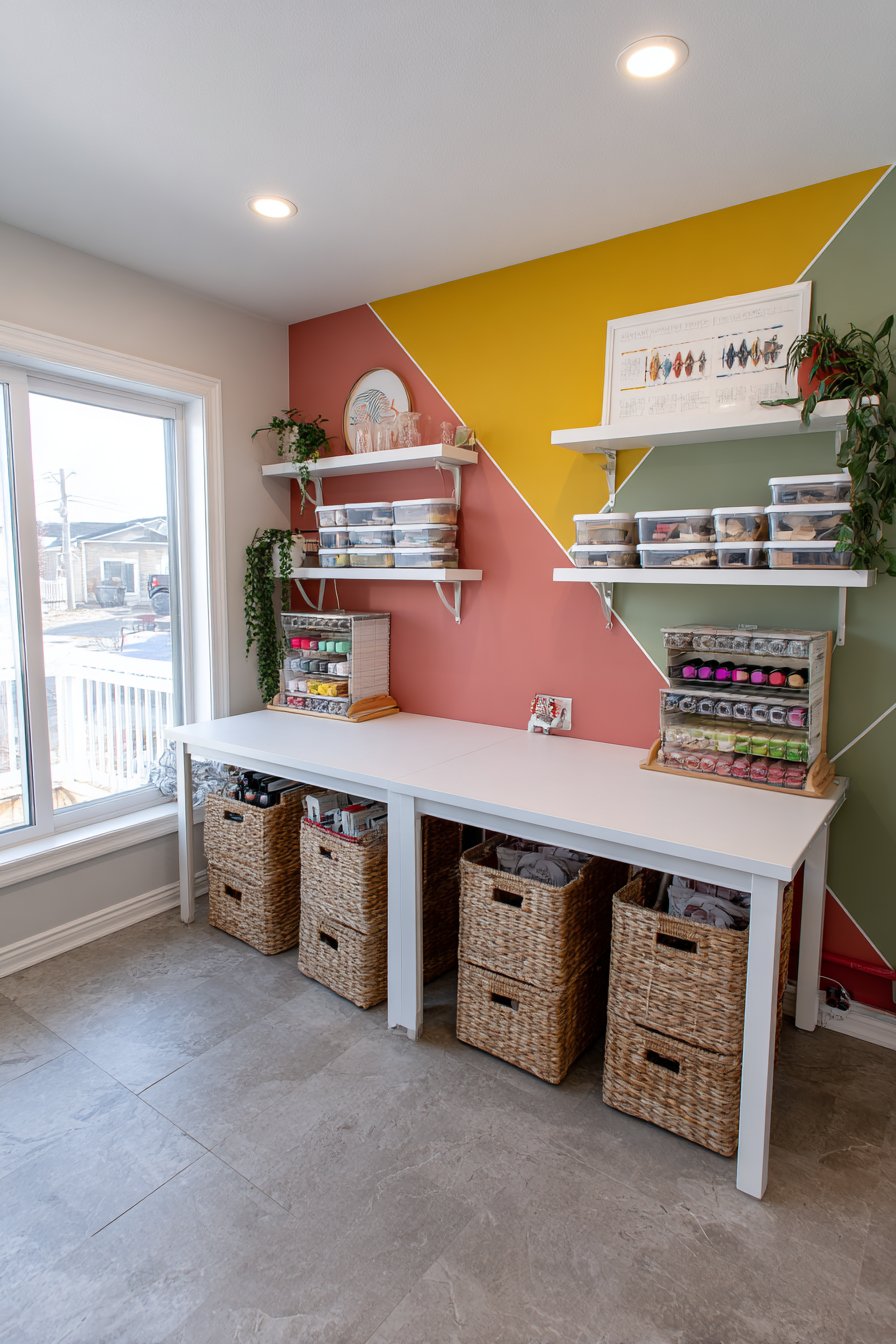
The complementary palette selection demonstrates sophisticated color theory application. While these four colors come from different positions on the color wheel, they share similar saturation levels and warm undertones that enable them to coexist harmoniously despite their diversity. This creates a vibrant, energizing environment that supports creativity and projects enthusiasm—perfect for spaces dedicated to artistic pursuits and crafting activities.
The geometric precision required for successful color-blocking demands careful planning and execution. Measuring angles, creating templates, and applying painter’s tape with meticulous attention to detail ensure clean lines and professional results. The investment in proper preparation pays dividends in the final appearance, where crisp edges and balanced color distribution create sophisticated design rather than chaotic patchwork.

Key Design Tips:
- Plan the color-block layout on graph paper, considering the room’s dimensions and features
- Use painter’s tape and levels to create precise angles and straight lines
- Apply base coat of the lightest color (sage green), then tape and add remaining colors
- Paint one color section at a time, allowing complete drying before taping adjacent areas
- Seal tape edges to prevent color bleeding for the sharpest lines
- Balance bright color with white work surfaces and storage to maintain functionality
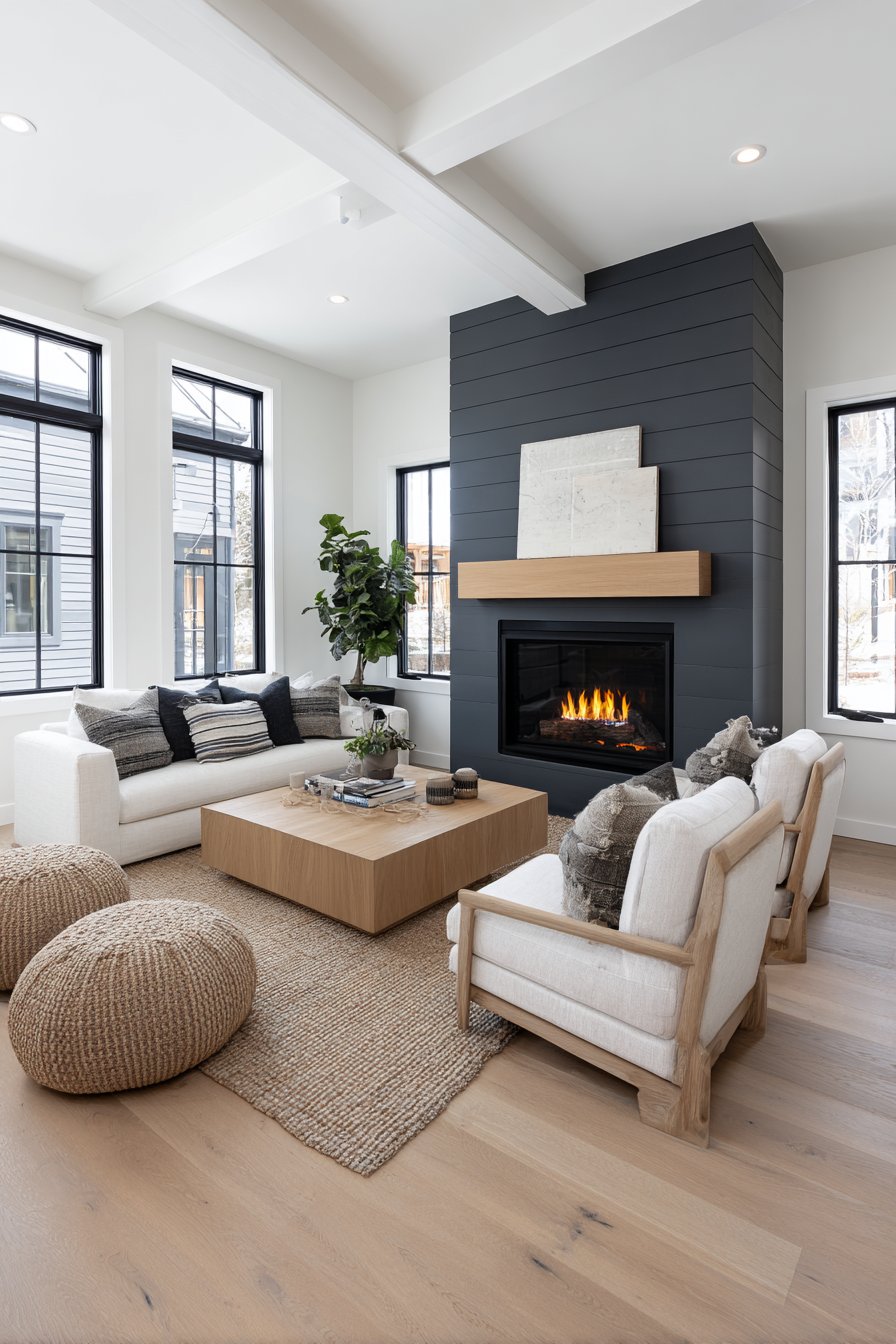
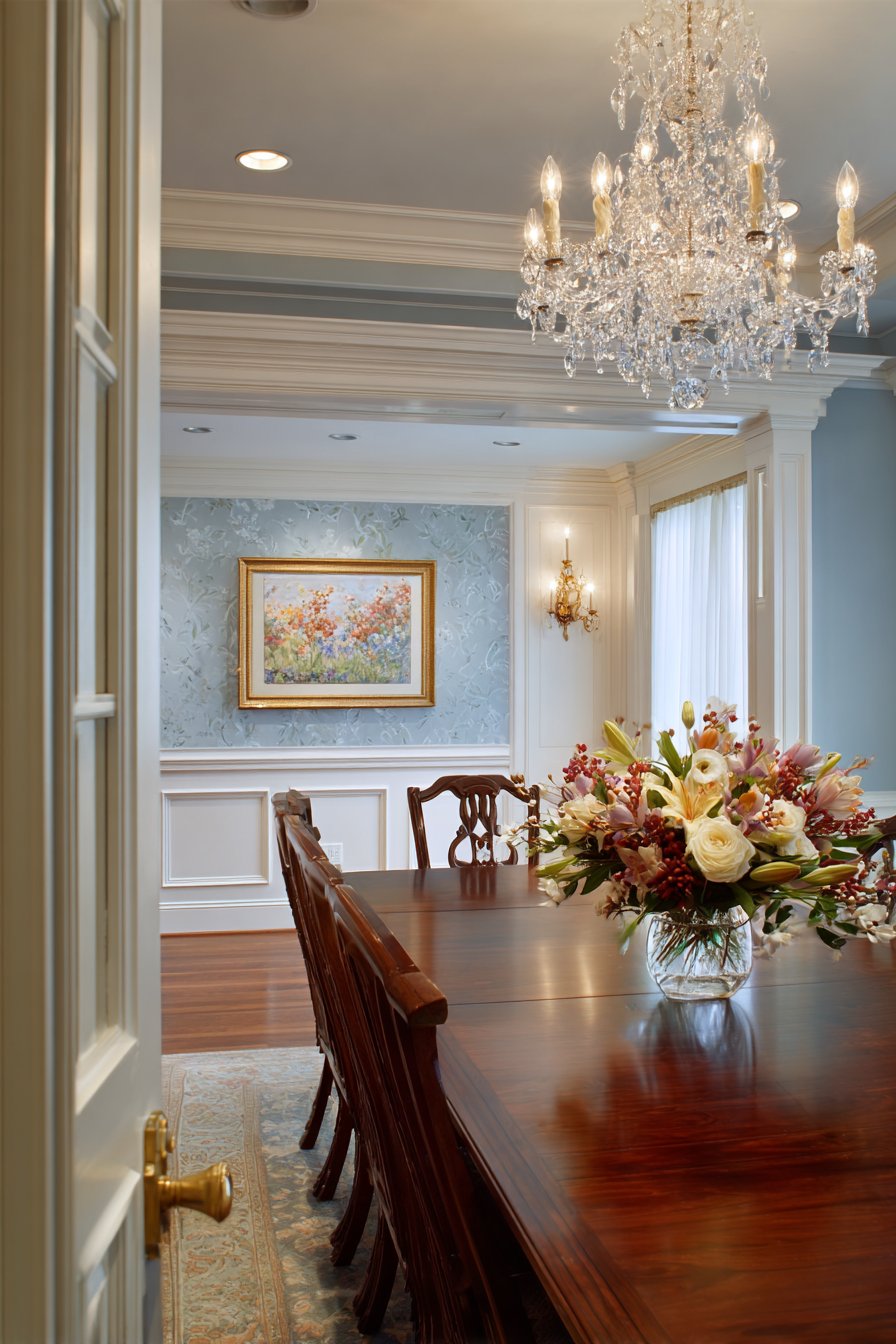
20. Classic Picture Frame Molding in Wedgwood Blue
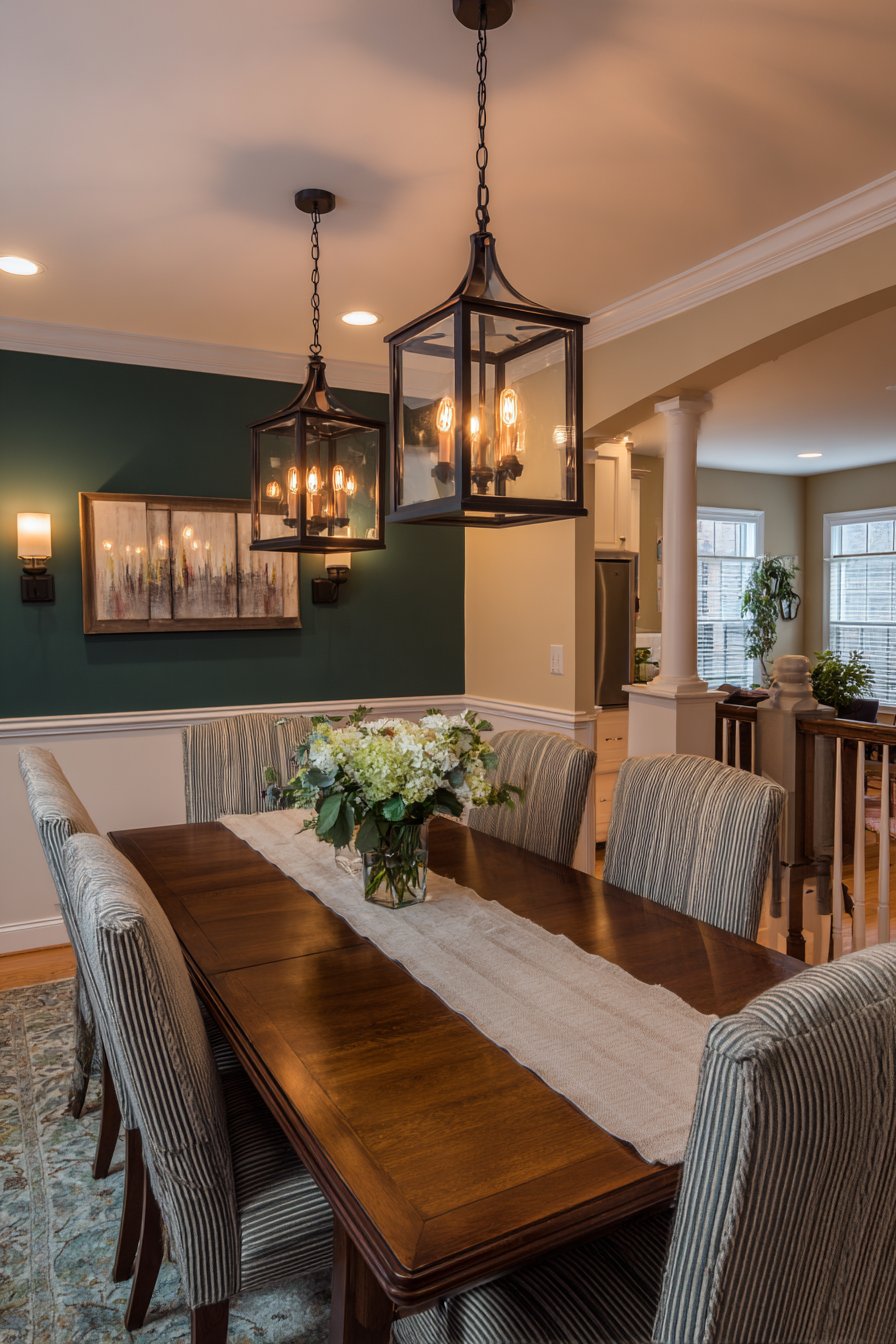
Traditional architectural elements gain fresh relevance when executed with contemporary color choices. This dining room showcases classic picture frame molding painted in a sophisticated two-tone style—frames outlined in crisp white against walls painted in Wedgwood blue. The architectural paint treatment adds elegance and dimension while referencing historical design traditions, making it perfect for transitional spaces that bridge traditional and contemporary aesthetics. The raised molding creates subtle shadows that add depth and interest, while the color contrast ensures the architectural detail reads clearly from across the room.
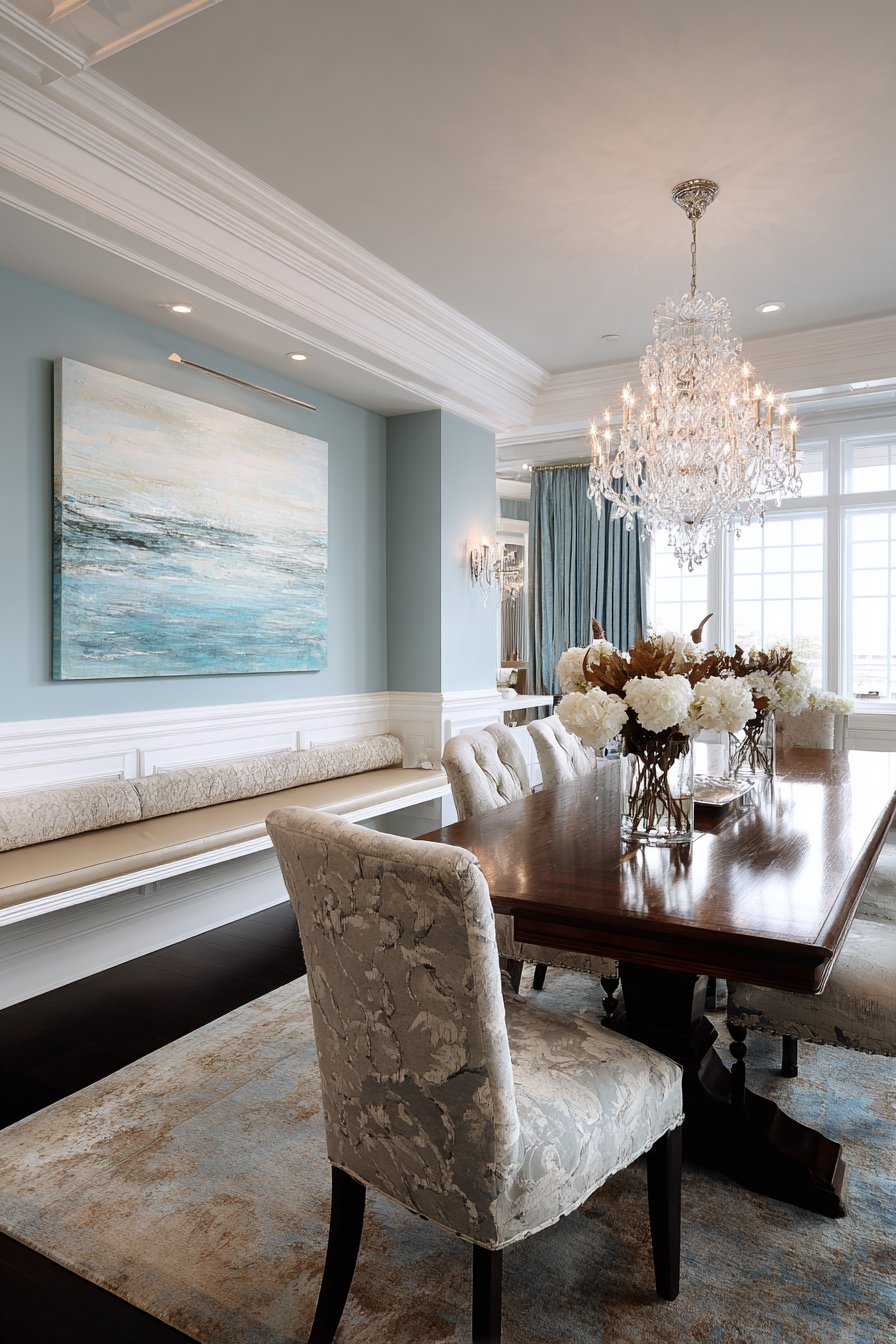
Picture frame molding offers flexibility in application, with rectangles or squares arranged symmetrically across wall surfaces. The placement and proportions require consideration of the room’s architecture, furniture scale, and overall proportions. Properly executed, the molding creates rhythm and visual structure that organizes wall space and provides backdrop for artwork, mirrors, or decorative elements centered within the frames.
The Wedgwood blue choice demonstrates how color updates classic techniques for modern sensibilities. While picture frame molding traditionally appeared in historically accurate colors or neutral palettes, contemporary applications embrace current color trends while maintaining the technique’s inherent formality and structure. The blue’s cool, serene quality works beautifully in dining spaces, creating sophistication without stuffiness.
Key Design Tips:
- Install molding at consistent intervals with approximately 6-10 inches between frames
- Plan frame sizes to accommodate wall space between windows, doors, and architectural features
- Paint the base wall color first, then molding after installation in contrasting white
- Use semi-gloss white for molding to differentiate it texturally from satin-finish walls
- Consider the dining table and furniture scale when planning frame dimensions
- Add subtle accent elements like small artwork or mirrors within select frames
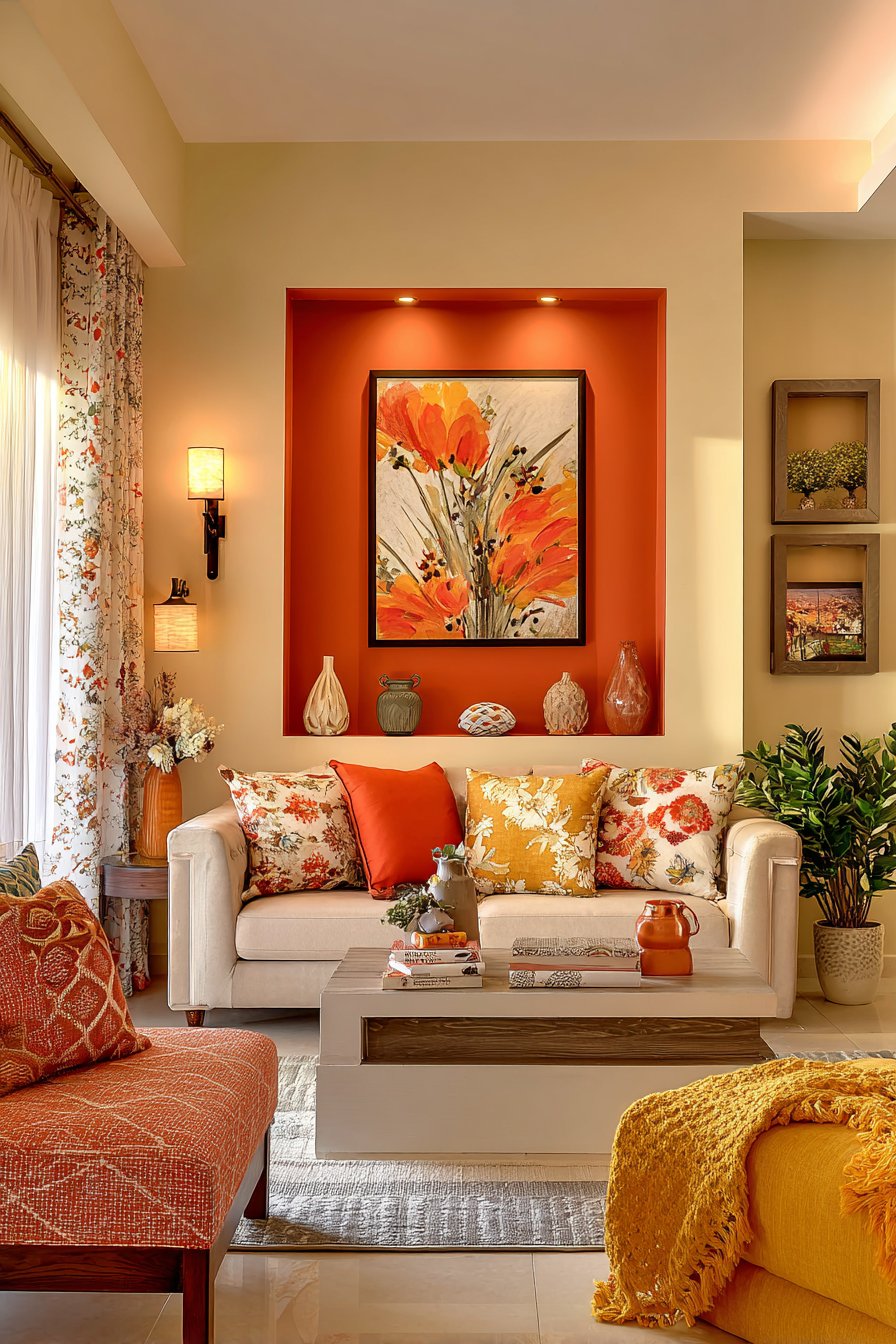
21. Painted Accent Niche in Warm Terracotta
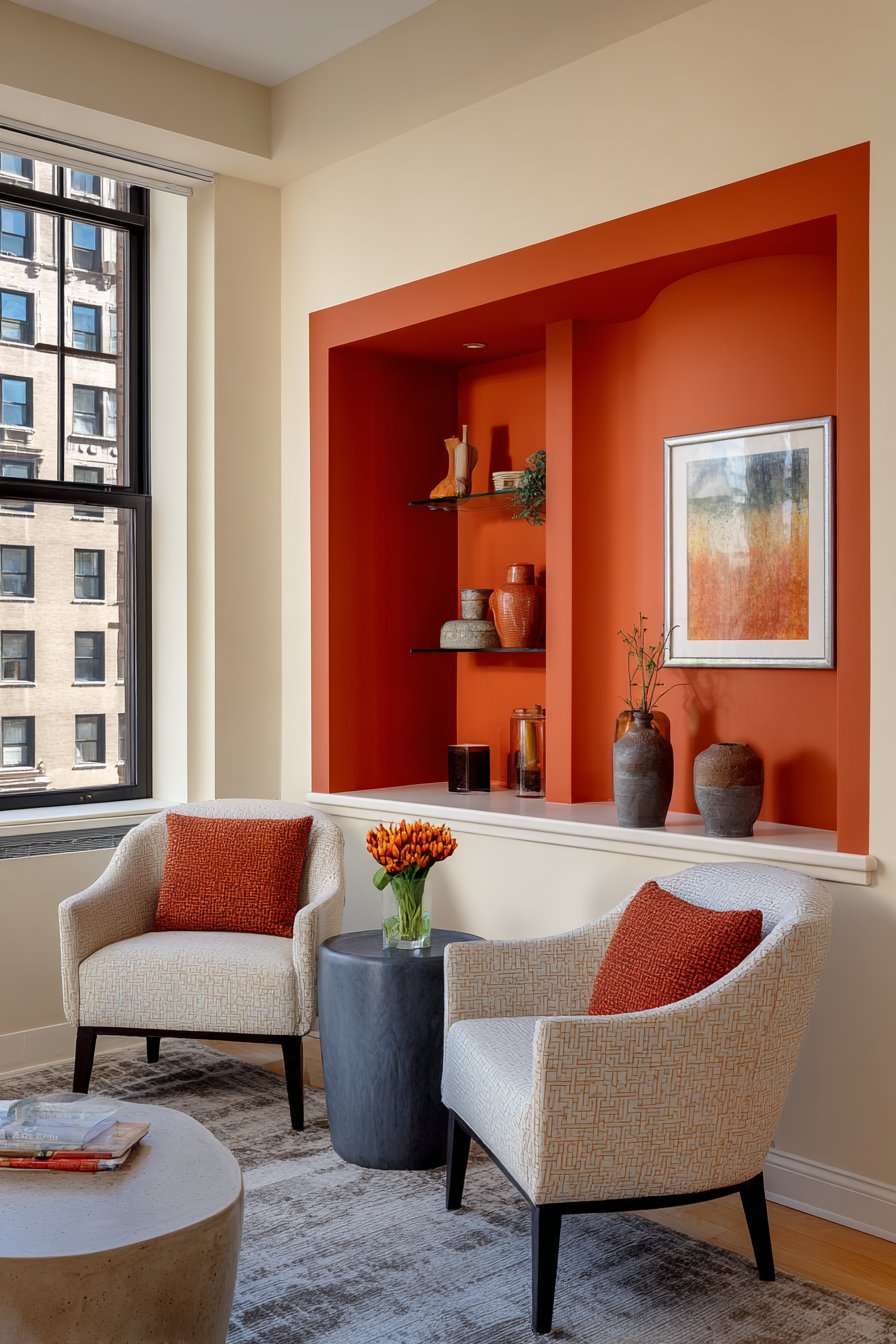
Creative paint techniques can define architectural features that don’t physically exist, adding dimension and interest to flat walls. This small apartment living room demonstrates this concept through a painted accent niche—a recessed wall area painted in warm terracotta to create a display alcove effect against surrounding cream walls. While the wall remains physically flat, the contrasting color convincingly suggests a recessed area, providing focal points for decorative objects and creating the visual complexity typically achieved through actual architecture. This technique proves particularly valuable in apartments and condos where architectural modification isn’t permitted.
The illusion works through strategic color contrast and careful edge treatment. The terracotta’s warmth appears to recede behind the cooler cream, particularly when objects placed “within” the painted niche cast shadows that reinforce the three-dimensional illusion. Clean, precise edges prove essential—any wavering or imprecision immediately breaks the illusion. The success depends entirely on viewers’ willingness to accept the visual suggestion of depth created through color alone.
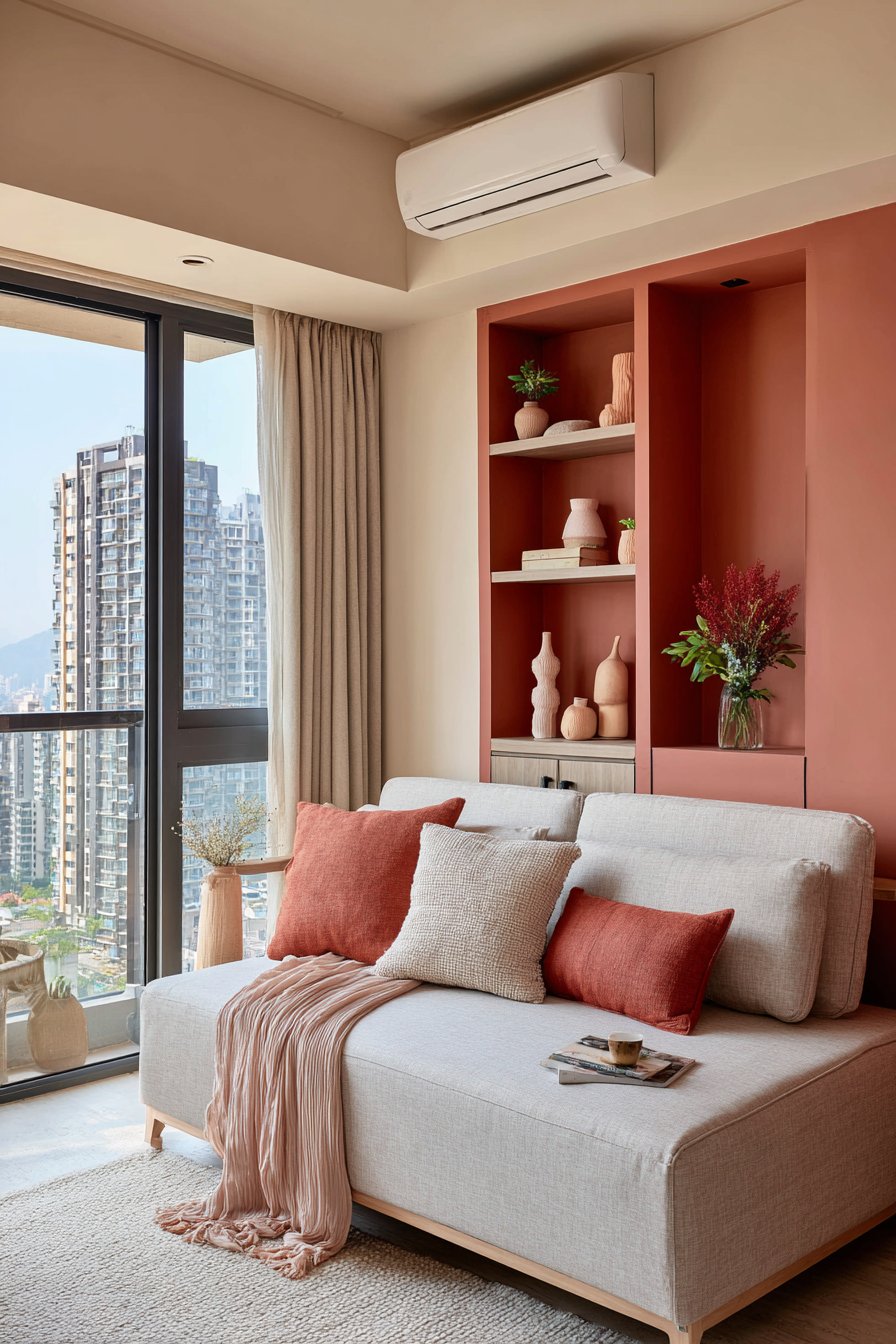
This approach offers practical advantages beyond aesthetics. The painted niche creates natural display zones without installing shelving or consuming floor space with furniture. Objects arranged within the painted area automatically become focal points, allowing even modest decorative items to make significant visual impact within their color-defined frame.
Key Design Tips:
- Plan painted niche dimensions based on objects you intend to display
- Use painter’s tape for precise edges that maintain the architectural illusion
- Select colors with strong value contrast for maximum depth suggestion
- Position painted niches to avoid conflicting with actual architectural features
- Add subtle shading at the painted niche edges for enhanced three-dimensional effect
- Consider lighting to cast shadows that reinforce the recess illusion
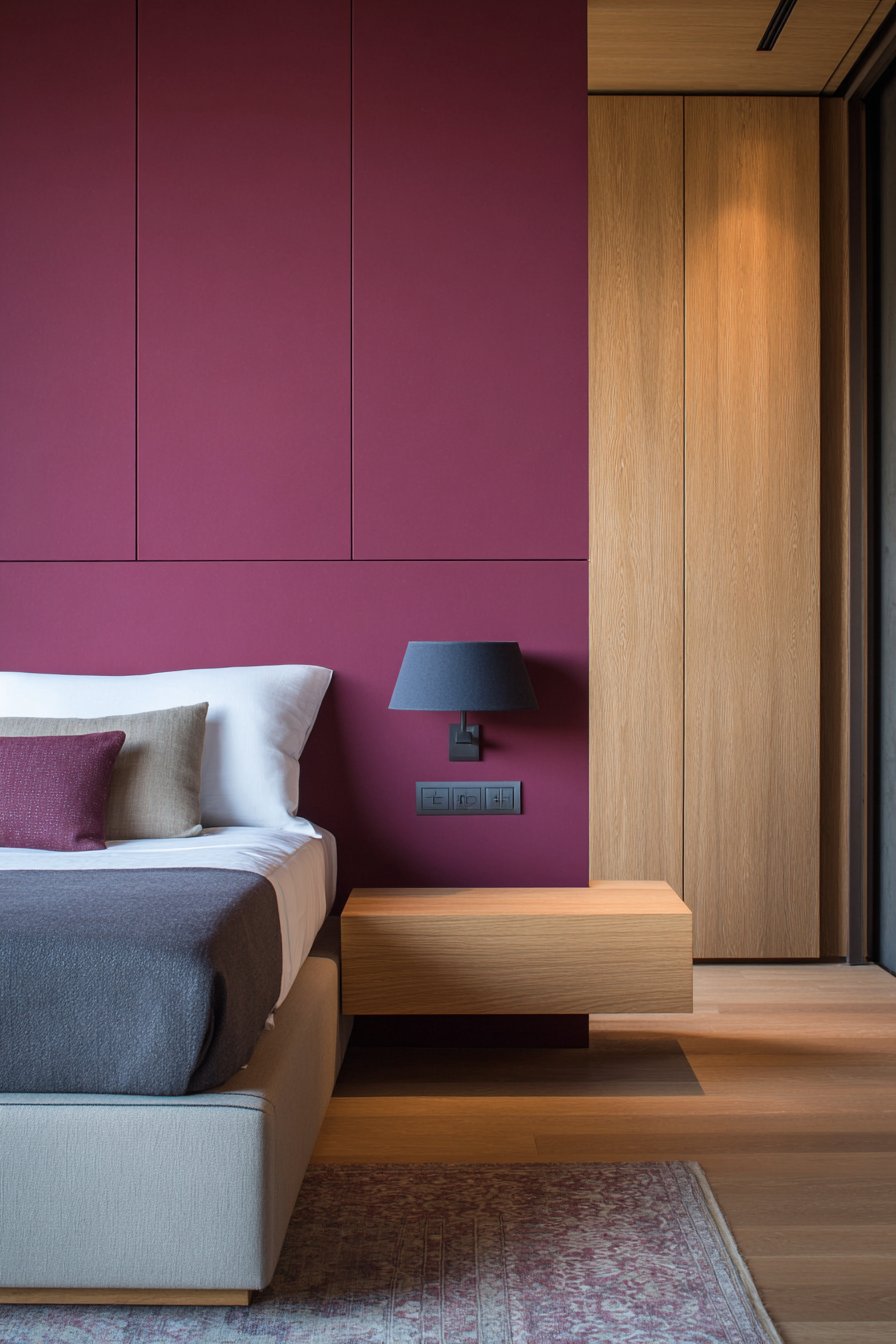
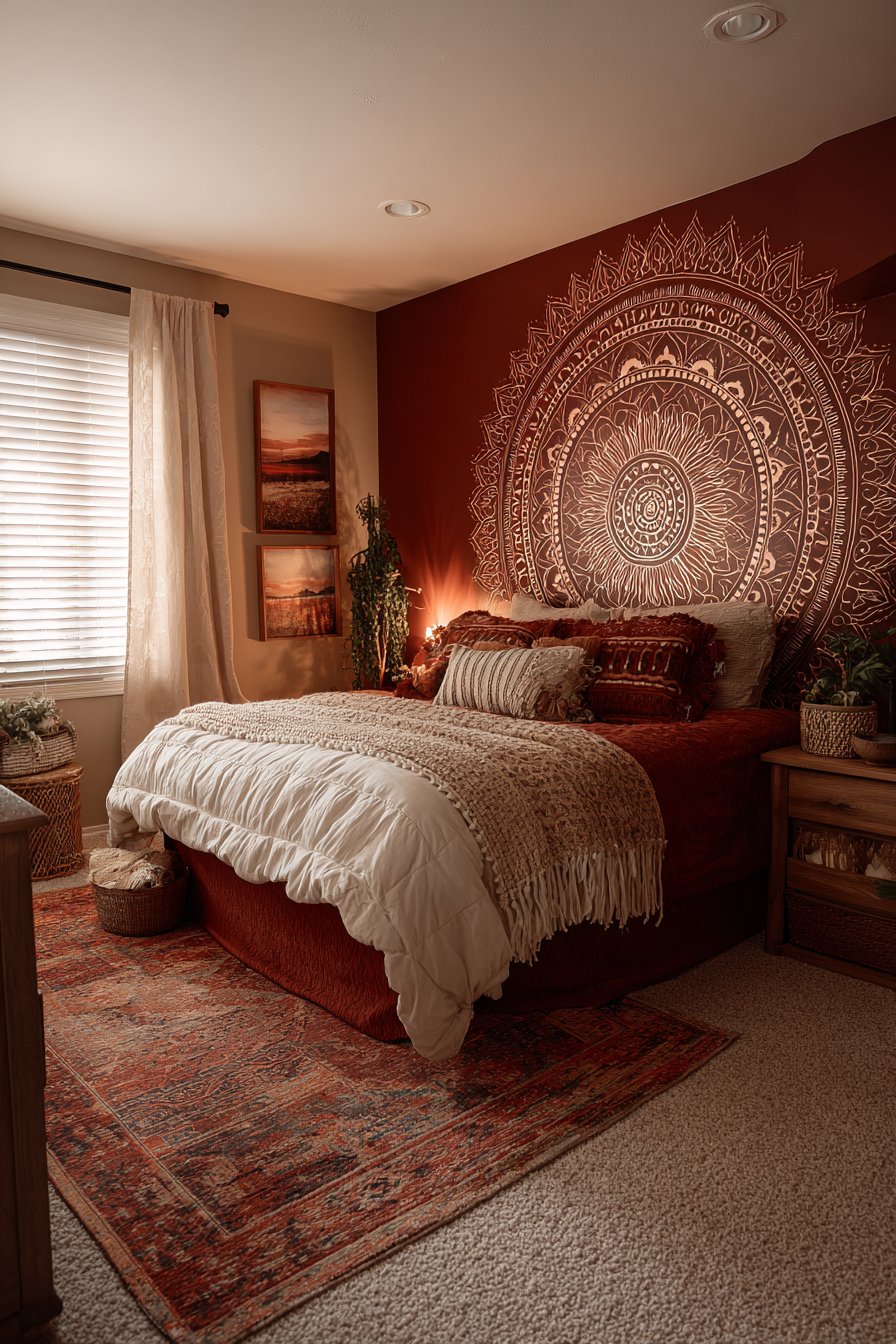
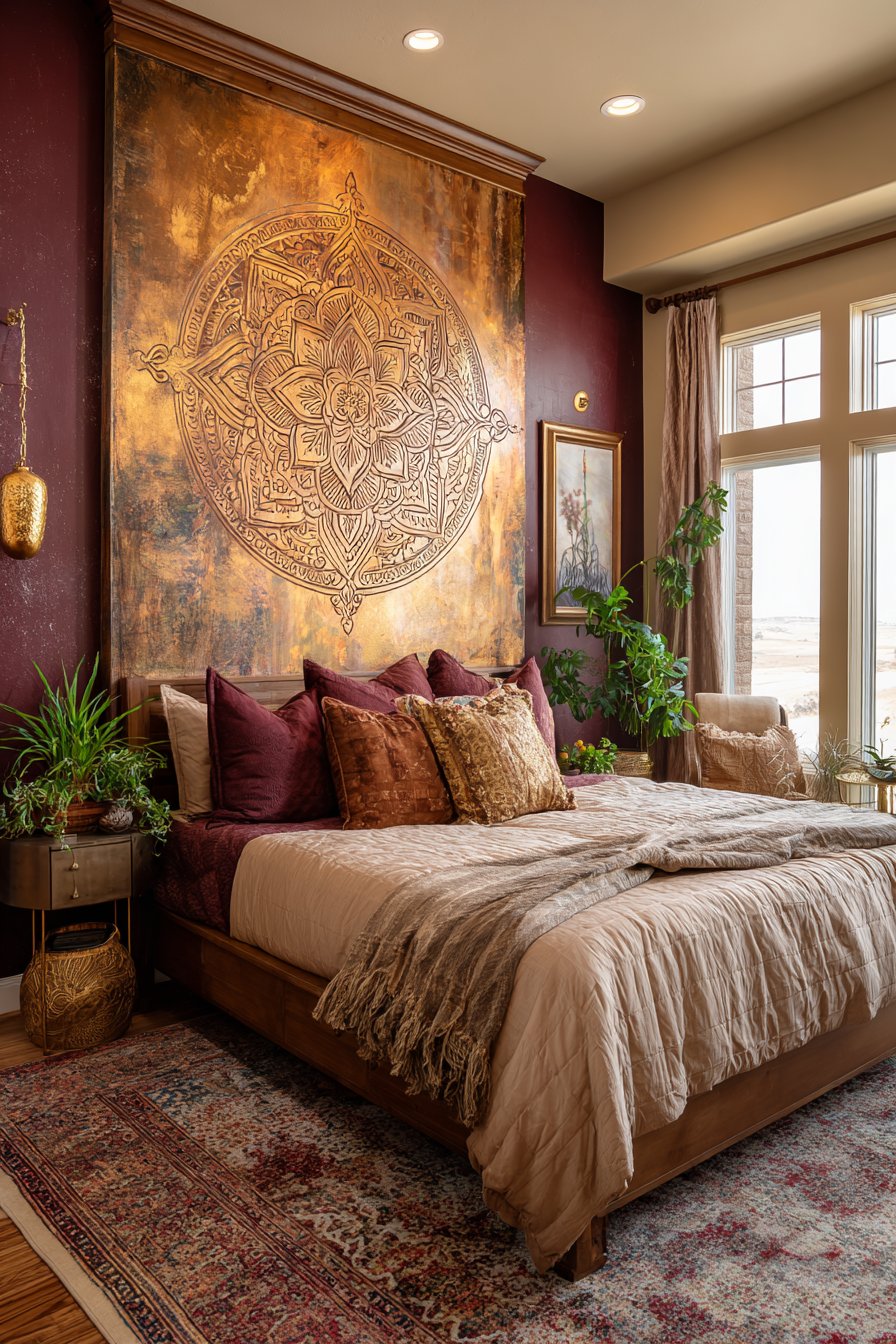
22. Hand-Painted Metallic Mandala on Burgundy
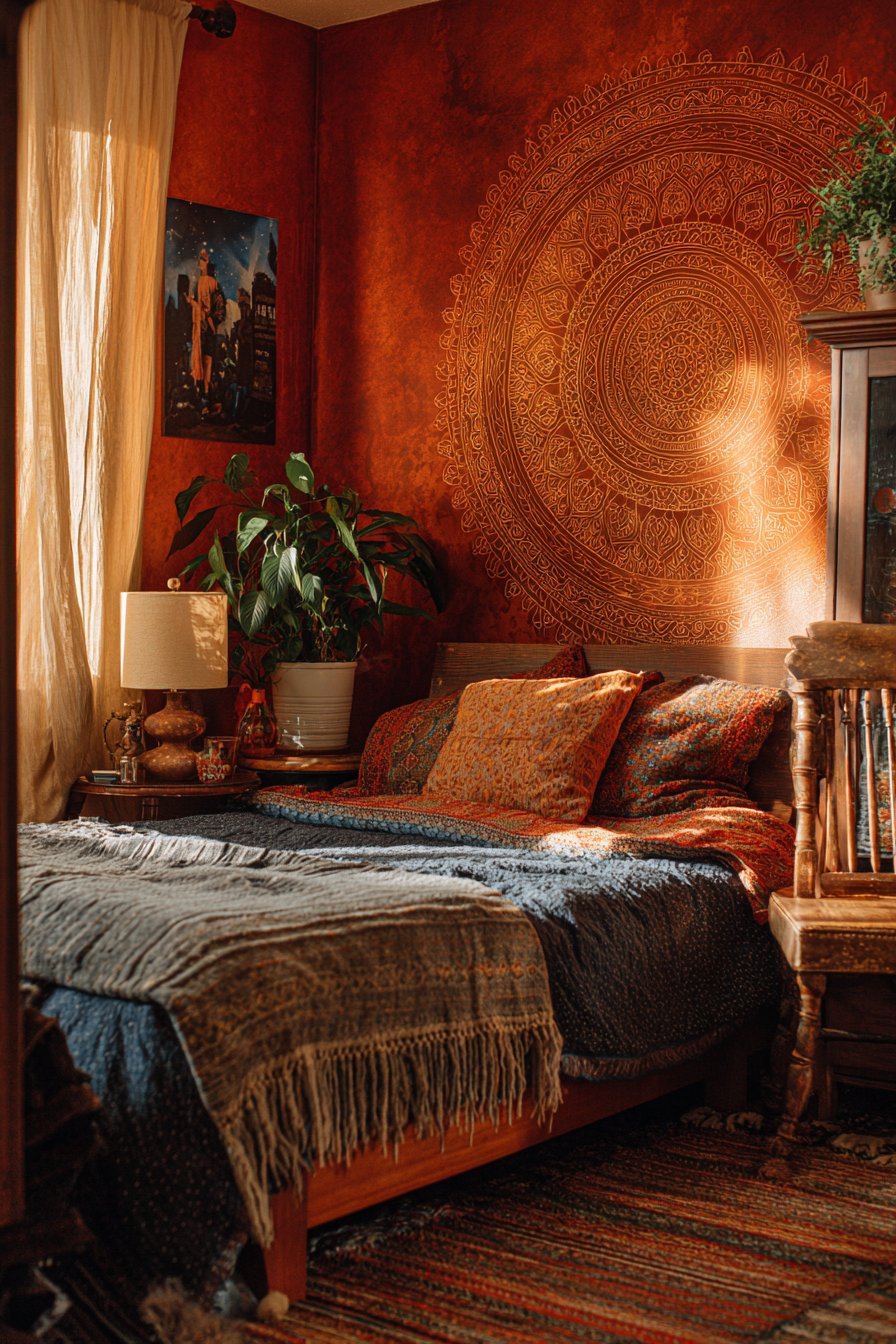
Artistic wall treatments become personal when incorporating hand-painted elements that reflect individual creativity and cultural influences. This bohemian bedroom features a hand-painted mandala design in metallic copper paint on a deep burgundy accent wall behind the bed. The intricate circular pattern functions as an artistic headboard alternative while demonstrating the marriage between artistic expression and interior design. The metallic copper shimmers against the rich burgundy base, creating dynamic visual interest that changes with light throughout the day—catching golden hour sunlight with warm brilliance and maintaining subtle presence under evening lamplight.
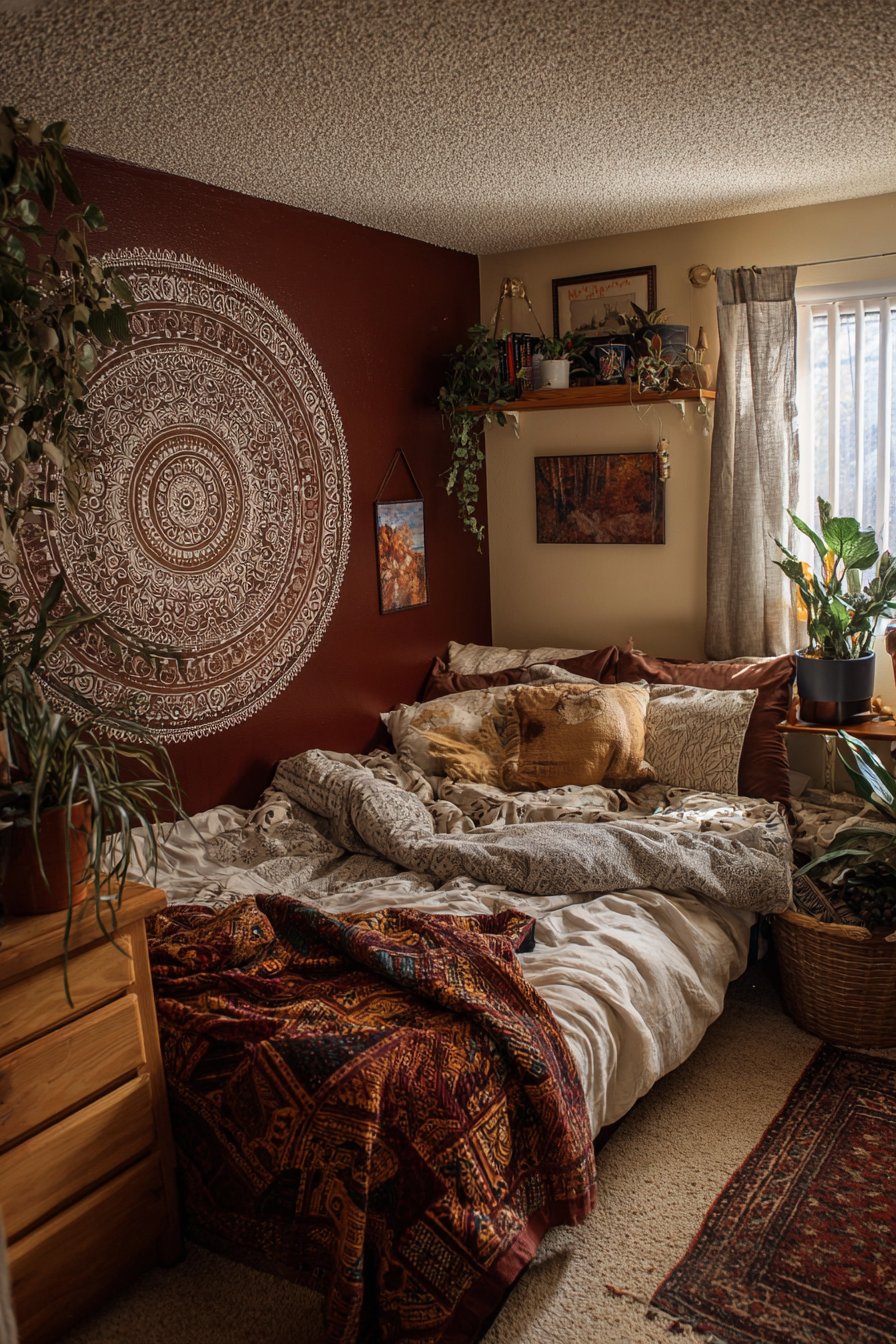
The mandala’s cultural and spiritual significance adds depth beyond pure decoration. Originating in Hindu and Buddhist traditions as spiritual symbols representing the universe, mandalas in contemporary Western design retain their meditative, centered quality even when divorced from religious context. The circular, radiating pattern creates natural focal points that draw eyes toward the center while the symmetrical complexity provides endless visual detail for contemplation—qualities that work beautifully in bedroom spaces dedicated to rest and reflection.
Execution of detailed mandala designs requires patience and planning but doesn’t necessarily demand advanced artistic skill. Creating templates, using stencils, or projecting designs onto walls allows even those without freehand drawing confidence to achieve impressive results. The metallic copper paint adds forgiving shimmer that can mask minor imperfections while adding luxury and visual interest.
Key Design Tips:
- Sketch or project the mandala design onto the wall before painting
- Use metallic copper paint specifically formulated for walls rather than craft paint
- Work from the center outward, completing each concentric ring before moving forward
- Apply at least two coats of burgundy base for rich color that makes copper pop
- Consider using stencils or stamps for repeated elements to ensure symmetry
- Protect the metallic design with clear sealant if the wall may experience physical contact
23. Faux-Textured Shiplap in Dove Gray
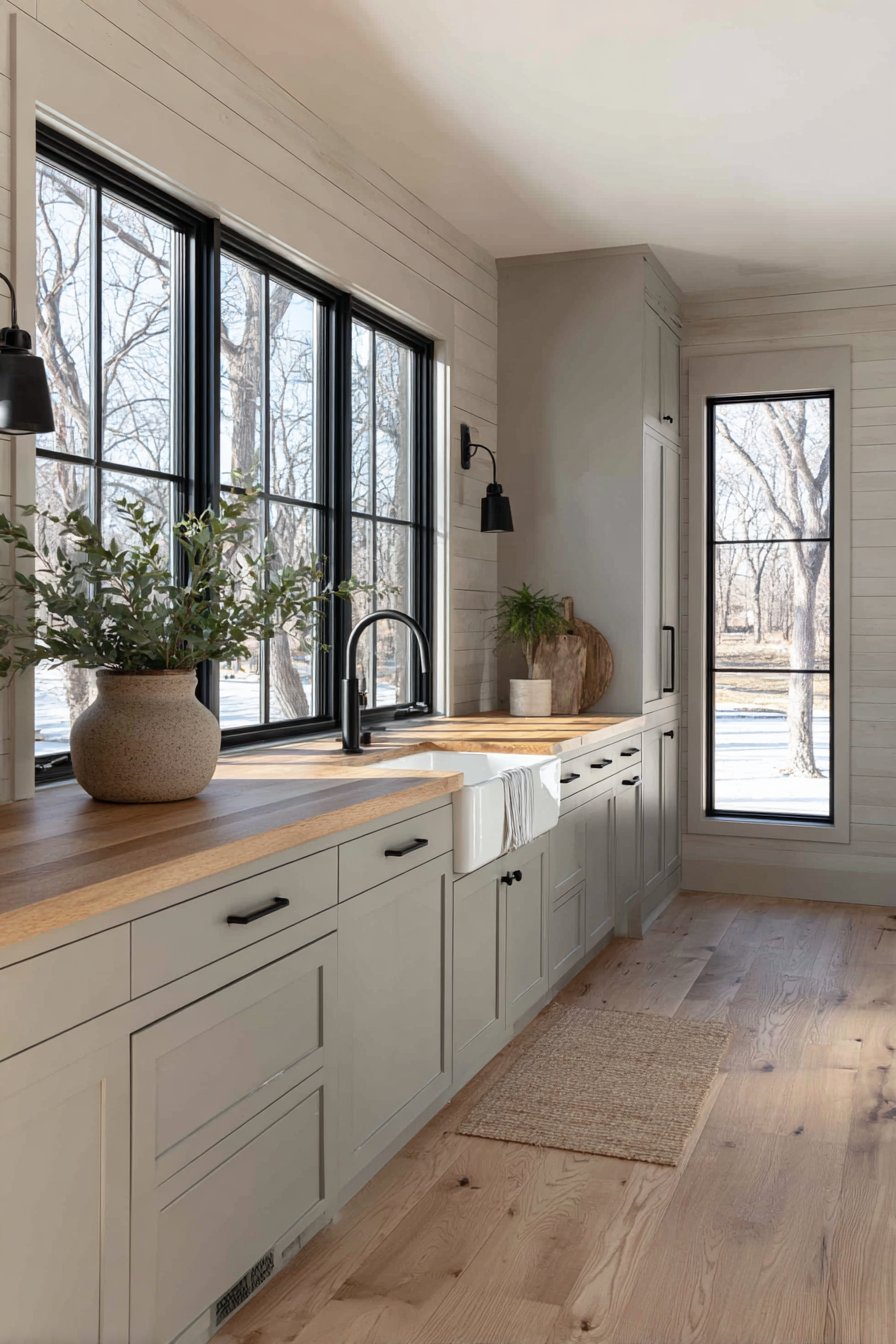
Achieving the look of architectural elements through paint alone represents both economical practicality and creative problem-solving. This farmhouse kitchen demonstrates faux-textured shiplap walls painted in soft dove gray, where paint application emphasizes horizontal lines to create texture effects without actual wood planks. The technique delivers shiplap’s characteristic horizontal rhythm and farmhouse appeal without the expense, installation complexity, or moisture concerns of actual wood. The subtle texture adds visual interest while maintaining the clean, uncluttered aesthetic that defines modern farmhouse style.
The faux-textured technique involves creating the suggestion of horizontal boards through strategic paint application and possible use of texture additives or specialty finishes. Some approaches utilize actual slight texture in horizontal bands, while others employ shading and highlighting techniques that suggest dimensional boards through trompe-l’oeil effect. Either way, the goal remains creating believable suggestion of horizontal wood elements through paint alone.
This approach proves particularly valuable in kitchens where actual wood shiplap might suffer from moisture and temperature fluctuations. Painted walls withstand kitchen conditions far better than wood while delivering similar aesthetic impact. The dove gray colorway updates traditional white shiplap with contemporary sophistication while maintaining the light, airy quality essential to farmhouse aesthetics.
Key Design Tips:
- Apply base coat in dove gray, allowing complete drying before creating texture
- Use painter’s tape to mark horizontal “board” lines approximately 6-8 inches apart
- Create subtle texture within bands using specialty brushes or texturing tools
- Add slight darker gray shading at board edges to suggest shadow and dimension
- Maintain consistency in board width and spacing for believable architectural effect
- Protect the finish with kitchen-appropriate topcoat for durability and easy cleaning
Conclusion
The twenty-three cool wall painting ideas explored throughout this article demonstrate the remarkable transformative power of strategic paint application. From dramatic accent walls and sophisticated color-blocking to textured finishes and hand-painted artistry, these techniques prove that walls need not remain neutral backdrops but can become defining design elements that establish room character and express personal style. Whether you gravitate toward the enveloping drama of jewel-box powder rooms, the serene sophistication of ombre gradients, the playful charm of rainbow arches, or the artistic impact of metallic murals, creative wall painting offers accessible opportunities to customize your living spaces.
The beauty of these painting techniques lies in their adaptability across different skill levels and budgets. Simple approaches like two-tone divisions or color-dipped effects provide impressive results with basic DIY capabilities, while more complex techniques like ombre gradients or hand-painted murals challenge experienced decorators to expand their skills. Quality paint and proper preparation remain non-negotiable foundations regardless of technique complexity—investing in premium materials and taking time for thorough surface preparation ensures results that endure and continue bringing joy for years.
As you consider implementing these cool wall painting ideas in your own home, remember that successful interior design balances aesthetic ambition with practical livability. Consider each room’s function, lighting conditions, existing architecture, and your personal color preferences when selecting techniques. Don’t hesitate to test ideas on sample boards or small, less prominent walls before committing to entire rooms. Most importantly, embrace the creative process and trust your instincts—your home should reflect your personality and support your lifestyle. With thoughtful planning, quality materials, and willingness to experiment, these wall painting ideas can help you transform your spaces into personalized havens that inspire, comfort, and delight daily.